Tips and Techniques/Point to Locator3D
From VFXPedia
Point to Locator3D
Summary
This tip shows how to derive the location of a 2D feature in 3D space by "triangulating" from two different frames of a camera path. It basically uses the Locator3D backwards.
Based on this thread at PigsFly and also made into this video tutorial.
Description
If you don't want to go back to your matchmoving software or department just to get the 3D coordinates of a certain feature, you might find this trick handy.
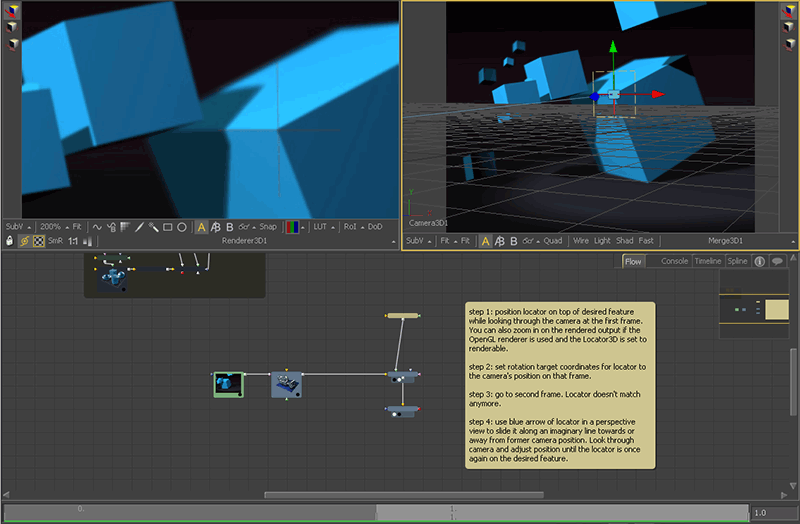
- Start by importing the camera path to a Camera3D node and connect your footage.
- Look through the camera in one of the viewports and find a frame where the desired feature is visible.
- Add a Locator3D and move it around until it's on top of the desired feature. Since you can't zoom into the 3D viewport, you might want to add a renderer to show a closeup in 2D. The locator's crosshair will be visible if "make renderable" is checked on the locator and the Renderer3D uses OpenGL.
- Make the locator look at the current camera position by ticking the locator's "Use Target" checkbox. Copy the XYZ coordinates of the camera.
- Go to another frame where the camera has moved a bit but the feature is still visible. Unless you were incredibly lucky, the locator's position is off now but you have an imaginary line towards the former camera position.
- Use the blue Z arrow of the locator to slide it along that line until its crosshair is once again on top of the desired feature. You can do this in the camera viewport or in another perspective view.
Congratulations, you have triangulated the correct 3D position.
Download the comp and images. This is a simple example that just uses two keyframes instead a real-life camera path. However, the geometry used to render the example images is included so you can check your results.

