Eyeon:Manual/Fusion 6/Display Views/Display View Position and Layout
From VFXPedia
[ Main Manual Page ]
- Introduction
- Types of Display Views
- Context Menu
- Displaying an Image
- Position and Layout
- Panning and Scaling the Image
- Previews
- Onscreen Controls
- Toolbars
- A and B Buffers
- Subviews
- View Types
- Choosing Color Channels
- The 3D View
- Quad Display Mode
- Effects Masks
- Guides
- Look Up Tables (LUTS)
- View Options and Preferences
- Status Bar Information
- General Display Options
- Display View Label
Contents |
Display View Position and Layout
It is possible to customize the layout and configuration of fixed views to suit the size of the desktop and monitor, or to match personal preferences.
Once the desired layout has been achieved, use the Grab Document Layout button in the Layout preferences to remember the layout for newly-created documents. The Grab Program Layout button will remember the size and position of any floating views, and enabling Create Floating Views checkbox will automatically create them again when Fusion starts up.
The current view layout is always saved with the comp. Turn off the Recall Layout switch in the Layout preferences to ignore the saved layout when opening a comp.
Layout Toolbar
The Layout Toolbar at the top of the interface (shown below) can be used to configure the display views to several preset layouts.
- First Button
- This option maximizes the left display view, aligning the tool controls with the top of the screen.
- Second Button
- This splits the available display region equally between the left and right display views, aligning the tool controls with the top of the screen.
- Third Button
- This fully maximizes the left display view, aligning the tool controls with the bottom of the display area.
- Fourth Button
- This fully maximizes the display region, splitting the left and right views equally. The tool controls stay aligned to the bottom of the display region.
Splitter Bars
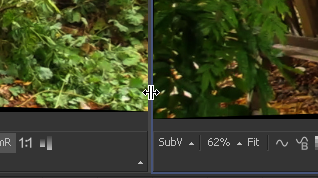
The relative sizes of the left and right display views can be adjusted using the horizontal splitter bar between them.
Click-drag the splitter to increase or decrease the amount of space used by one display view. The adjacent display view will adjust to suit the new layout.
The amount of vertical space available for both display views can be adjusted by click-dragging on the horizontal scroll bar between the display region and the work region.
Fullscreen Floating Views
Floating views are not affected by the buttons in the layout toolbar. Adjust the size of a floating view using the usual method of click-dragging on the outside of the window border, or by double-clicking on the window's titlebar. Additionally, right-click in the display and set the floating view to Fullscreen from the context menu. The fullscreen option only appears once an image is present in the view.
Fullscreen Fixed Views
To maximize any fixed display view so it fills the screen, place the mouse pointer over the view and press the F4 keyboard shortcut. To restore a maximized view to its original settings press F4 again. This shortcut can also be used to maximize the workspace below the fixed views.
| The contents of this page are copyright by eyeon Software. |

