Eyeon:Manual/Fusion Basics
From VFXPedia
Fusion Basics
This chapter is designed to introduce some of the most basic concepts and terms while working with Fusion. Most of the items described here are also discussed in far greater detail later in this manual.
Contents |
Flow
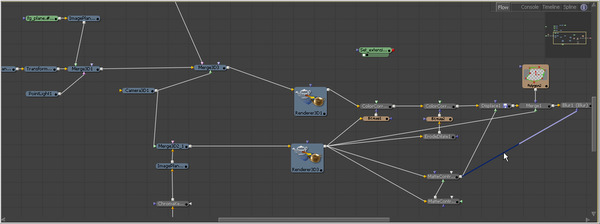
The dominant interface in Fusion is the Flow, a schematic-like display of the project. Images are loaded into the flow, passed down through tools and filters, ending in a saver that writes the results back to disk. Each tool is represented by a tile in the flow. As several tools are connected together, the flow begins to resemble a circuit board or plumbing chart.
Flow Editor
The Flow Editor provides a top view of the entire project. This makes the understanding of the way the images are processed intuitive. This schematic interface is so important to the way the artist operates that Fusion refers to compositing projects in general as flows or compositions (saved out as .comp).
Current Time
Current Time is the active frame of the current project. The images viewed and produced will reflect the output of the tools at that frame. Current time is set using the time ruler at the bottom of the screen and by entering a new value in the edit box. Alternately, use the keyboard shortcuts [ and ] to advance the current frame forward or backward in time.
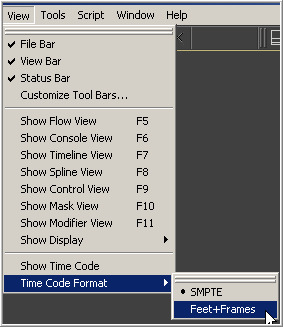
Display Current Time can be displayed using different formats by changing the relevant options in the View menu at the top of the interface. Available formats are :
- Frame Numbers
- Timecode
- Film Feet+Frames notation
Global Range
The Global Range determines the maximum length of a project. Video editors should think of global range in Fusion as the equivalent to the length of the timeline in an editing program. The current time cannot be changed to a frame outside of the global range.
Render Range
The Render Range is the section of the global range that will be used for interactive playback, disk caches and previews or final renders. The range is normally visible in the time slider as a grey highlight over the global time.
Frames outside of the render range will not be rendered or played in the flow, although the current time can be changed to these frames to see what the image looks like.
High Quality
When working with Fusion interactively to create a flow, the quality of the images in the displays is often less important than the speed with which they are shown. As a result, Fusion does not normally render images interactively at the same quality that is required for final renders. More complex and time consuming operations like area sampling, anti-aliasing and interpolation are skipped to produce results more rapidly. Enabling HiQ mode will force Fusion to produce a full quality render instead.
To enable the HiQ mode, click on the HiQ button at the bottom of the screen. Interactive processing will take longer but the image seen onscreen will be identical to that produced during a final render.
Proxy And Auto Proxy
Proxy
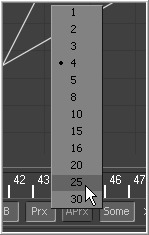
For increased performance, the Proxy (Prx) button in the time ruler reduces the resolution of the images that are processed interactively. Enable proxy mode to force Fusion to process one out of every x pixels interactively, instead of rendering every pixel. The value of x is decided by right-clicking on the Proxy button and selecting a proxy ratio from the button's context menu.
Auto Proxy
The Auto Proxy button enables Fusion to interactively degrade the image while adjustments are made to controls, snapping back to normal resolution when the control is released.
For example, while dragging a center control, Fusion may only process the image at a third the resolution so that updates to the screen can keep up with adjustments. Once the center control is released, the image returns to full quality to confirm the change.
Set the auto proxy ratio by right-clicking on the Auto Proxy button and selecting it from the context menu.
Selective Updates (Some, None And All)
Interactively, Fusion normally renders only the tools that are needed to display the images in the views. The Selective Update button in the time ruler opens the render settings dialog to select the mode used during final and network renders.
There are three modes of Selective Update.
- Some
- During final renders, Fusion only renders the tools that directly contribute to the output saved to disk. This is known as the Some mode of selective update because only some of the tools in the flow are rendered. Some is the default mode.
- None
- None will prevent rendering of all tools in the flow, which can be handy for making a large number of changes to a slow composition.
- All
- All forces all of the tools in the flow to render. This can be useful when interactively adjusting small, fast compositions.
Caching
Tools will render their results while the composite is assembled in Fusion to see the effect in the display views. As each tool renders, the result of that tool is stored in memory. This is known as Caching. When returning to that frame, the tool will avoid re-rendering and use the cached result instead. If the settings of the tool (or one before it) are changed, the cache is invalidated for frames that are affected by the change. That tool will re-render as needed.
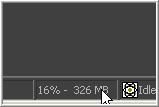
The amount of memory used by the cache is displayed in the bottom right corner of the Fusion interface. Fusion will use as much as 60% of the memory that is physically installed on the computer before elements of the cache will be dropped to make space for new frames (this threshold can be adjusted in the preferences).
Fusion chooses which frames to drop from the cache by evaluating the amount of time a tool takes to render, how many other tools rely on that tool's output and whether the tool is currently displayed in the views. The more valuable the cache on a tool, the less likely that it will be dropped when RAM becomes scarce.
If a frame is placed in the cache while Fusion is processing full resolution images and the HiQ mode is enabled, the cached frame will be used in final renders as well.
Interactive Playback
A series of VCR-style buttons at the bottom of the interface (called transport controls) can be used to play the current composition. Fusion will playback the composition's render range as quickly as images can be rendered. Only tools that are required to display the images in the views will render.
Simple flows will play quite quickly, whereas larger, more complex flows will take some time to render each frame. The frame rate achieved is displayed at the bottom of the screen in the status bar. Playback speed is capped to never exceed the frame rate defined in the frame format preferences.
Continue to make adjustments to controls during playback. The flow is not locked in any way during playback. Changes made to animated controls will add key frames to the current frame of playback.
As playback progresses, the rendered results are added to the cache. The first pass through the render range will require rendering. The second pass should play back from cache at the full frame rate, provided there is enough memory to fit all the frames in the cache.
Background Rendering
Background rendering is a feature in Fusion intended to help the artist take advantage of idle cpu time. For example, an artist may be viewing a specific frame of the composition, and will often sit back to evaluate the image. While this is taking place, the systems CPU sits idle.
Fusion can detect times like this when the CPU is not active, and background render other frames in the current render range. These pre-rendered frames will silently appear in the cache, ready to display when they are needed.
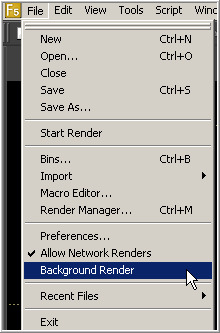
To enable Background Rendering, open the file menu at the top of the interface and select the Background Rendering option.
Cluster
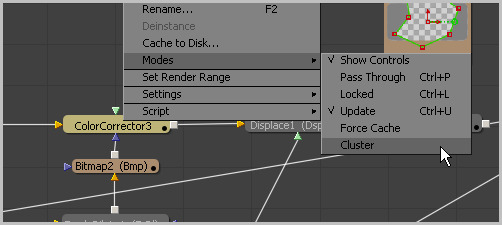
Clustering is like background rendering, except that the cache will automatically be filled by remote workstations or slaves over the network instead of by the local machine. Unlike background rendering, clustering must be explicitly enabled on a tool. When clustering is enabled on a tool, each of the slaves will load a copy of the composition. Subsequent changes to the composition are transmitted to each slave over TCP/IP to reduce bandwidth.
As each remote slave completes a frame, it sends the completed image over the network directly into RAM on the main workstation. Any changes that invalidate the cache will automatically retrigger the cluster, which will regenerate the cache for that tool over time.
For details on clustering, see the Network Rendering chapter of this manual.
Alpha
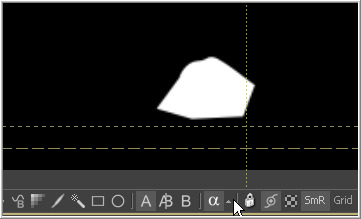
Alpha is the matte or transparency channel of an image. Generally, this is visualized as a greyscale image where black pixels (with a value of 0) are considered to be fully transparent and white pixels (with a value of 1.0) are considered to be completely opaque. Pixels with values between 0 and 1 are shown as grey. They are only partially transparent.
The alpha channel is used when merging the image over another to determine which pixels in the red, green and blue channels are transparent and which are not. This channel is sometimes referred to as a matte channel.
If an image does not have an alpha channel (for example, JPG, YUV and PVD images), Fusion will add a fully opaque alpha channel to the image when it is loaded.
Use the tools in the matte category to create new alpha channels for images by removing specific colors. Alternately, use the matte control tool to directly affect an existing alpha channel. Fusion's tools like the chroma key and matte control tools can be used to manipulate and adjust the alpha further.
