Eyeon:Manual/Fusion 6/Gradient 3D
From VFXPedia
[ Main Manual Page ]
With the Gradient 3D tool it is possible to texture objects with a variety of gradient types. It offers many of the controls of the Background tool. While it is not possible to transform the gradient directly in 3d space, it is orientable using the following tools:
- Texture Transform tool
- The Texture Transform tool can be used to adjust the mapping per pixel.
- UVMap tool
- The UV Map tool can be used to adjust the mapping per vertex (use the XYZtoUVW mode) - this has onscreen controls so you can see what the gradient is doing. Using this tool is recommended because it is faster to evaluate.
Working with the Gradient tool may be a bit confusing at first. By default the gradient defaults to a linear gradient that goes from -1 to +1 along the Z-axis. All primitives in Fusion (Shape 3D) can output a 3rd texture coordinate for UVW mapping.
External Inputs
This material tool does not have any external inputs.
Controls
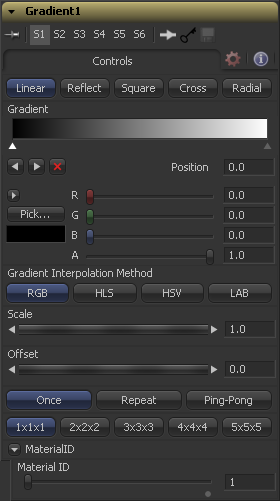
Determines the type of or pattern used for the gradient.
- Linear
- A simple linear gradient.
- Reflect
- Based on the linear mode, this gradient will be mirrored at the middle of the textured range.
- Square
- The gradient is applied using a square pattern.
- Cross
- Similar to the reflect mode, but it will use two axis to apply the gradient.
- Radial
- The radial mode uses a circular pattern to apply the gradient.
The Gradient control consists of a bar where it is possible to add, modify and remove points of the gradient. Each point has its own color. It is possible to animate the color as well as the postion of the point. Futhermore a From Image modifer can be applied to the gradient to evaluate it from an image.
The gradient is linear interpolated from point to point in RGB color space by default. This can result in unwanted colors sometimes. Choosing another color space may provide a better result.
Allows you to pan through the gradient.
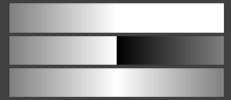
Defines how the left and right border of the gradient is treated.

- Once
- When using the Gradient Offset control to shift the gradient the border colors will keep their values.
- Shifting the default gradient to the left will result in a white border on the left,
- shifting it to the right will result in a black border on the right.
- Repeat
- When using the Gradient Offset control to shift the gradient the border colors will be wrapped around.
- Shifting the default gradient to the left will result in a sharp jump from white to black,
- shifting it to the right will result in a sharp jump from black to white.
- Ping Pong
- When using the Gradient Offset control to shift the gradient the border colors ping pong back and forth.
- Shifting the default gradient to the left will result in the edge fading from white back to black,
- shifting it to the right will result in the edge fading from black back to white.
Determines the sub-pixel accuracy the gradient is created with to avoid banding.
This slider sets the numeric identifier assigned to this material. This value will be rendered into the MatID auxiliary channel if the according option is enabled in the renderer.
Tips for Gradient 3D (edit)
| The contents of this page are copyright by eyeon Software. |


