Eyeon:Manual/Spline Editor/Creating Animation Splines
From VFXPedia
Creating Animation Splines
From The Context Menu
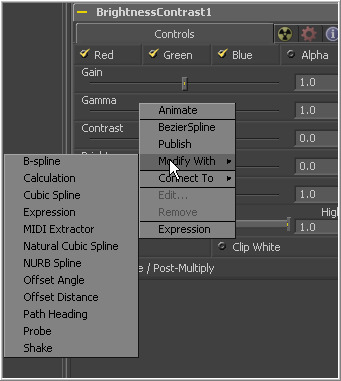
To create a spline, in the tool controls right-click on the control to be animated and select one of the following options.
- Animate
- Selecting Animate from the context menu will connect the control to a the default spline type. This is usually a Bezier Spline, unless the default spline has been adjusted in the defaults panel of the preferences.
- Other spline types can be used via the Modify With context menu's submenu.
- Modify With Bezier Spline
- Bezier Splines are the default curve type. The smoothness of the curve is determined by three points for each keyframe on the spline. The first point is the actual keyframe, representing the value at a given time. The other two points represent handles that determine how smoothly the curve for the segments leading in and out of the keyframe are drawn.
- Modify With>B-Spline
- B-Splines use a single point to determine smoothness of the curve. Instead of using a keyframe and three handles, a single keypoint determines the value as well as the smoothness of the curve.
- Modify With>Natural Cubic Spline
- Natural Cubic Splines are similar to Bezier splines, except that the Bezier handles for this spline type are locked and invisible, and always set to make the smoothest possible curve. This spline type is almost never used.
- Modify With>NURB Spline
- A NURB spline uses NURB-type spline interpoloation between points on the spline.

