Eyeon:Manual/Fusion 6/Color Gain
From VFXPedia
[ Main Manual Page ]
Color Gain [Clr] | |
|
The Color Gain tool contains options for adjusting the gain, gamma, saturation and hue of the image. Many of the controls provided by the color gain tool are also found in the Color Corrector tool, but this simpler tool may render more quickly. One feature that distinguishes the color gain tool from the color corrector is its balance controls. These can be used to adjust the tinting of the colors in the high, mids and lows. | |
Contents |
Gain Tab
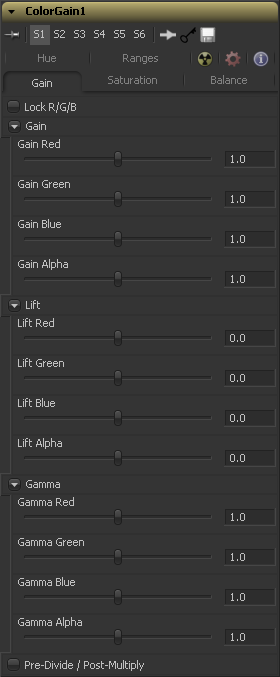
When selected, the Red, Green and Blue channel controls for each effect are combined into one slider. Alpha channel effects remain separate.
The Gain RGBA controls multiply the values of the image channel in a linear fashion. All pixels are multiplied by the same factor, but the effect will be larger on bright pixels and smaller on dark. Black pixels will not be changed (x * 0=0).
While Gain basically scales the color values around Black, Lift scales the color values around White. The pixel values are multiplied by the value of this control. A Lift of 0.5 will make a pixel that is R0.0 G0.0 B0.0 into R0.5 G0.5, B0.5, while leaving white pixels totally unaffected. Lift affects lower values more than it affects higher values so the effect will be strongest in the midrange and lowrange of the image.
The Gamma RGBA controls affect the brightness of the mid-range in the image. The affect of this tool is non-linear. White and black pixels in the image are not affected when gamma is modified, whereas pure grays are affected most by changes to this parameter. Large value changes to this control will tend to push mid-range pixels into black or white, depending on the value used.
Selecting this checkbox will cause the image pixel values to be divided by the alpha values prior to the color correction, and then re-multiplied by the alpha value after the correction. This helps to avoid the creation of illegally additive images, particularly around the edges of a blue/green key or when working with 3D rendered objects.
Saturation Tab
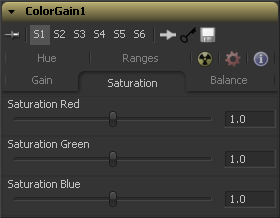
This setting controls the intensity of the colors in the image channels. A value of 0.0 will strip all of the color out of an image channel. Values greater than one will intensify the colors in the scene, pushing them toward primary colors.
Balance Tab
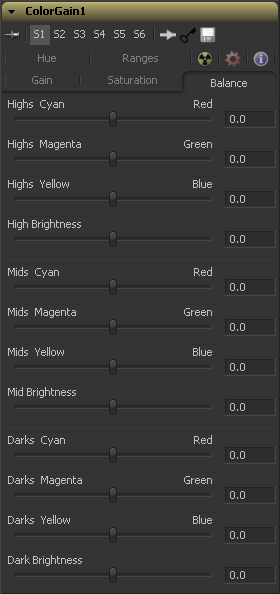
This section of the color gain tool offers controls for adjusting the overall balance of a color channel. Independent color and brightness controls are offered for the High, Mid and Dark ranges of the image.
Colors are grouped into opposing pairs from the two dominant color spaces. Red values can be pushed toward Cyan, Green Values to Magenta and Blue to Yellow. Brightness can be raised or lowered for each of the channels.
By default, the balance sliders can be adjusted by -1 to +1, but values outside of this range can be entered manually to increase the effect. A value of 0.0 for any slider indicates no change to the image channel. Positive and negative values indicate that the balance of the image channel has been pushed toward one color or the other in the pair.
Hue Tab
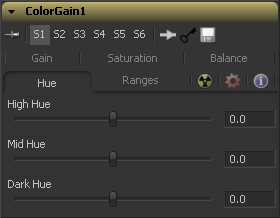
Use the Hue section of the color gain tool to shift the overall hue of the image, without affecting the brightness or saturation. Independent control of the High, Mid and Dark ranges is offered by three sliders.
The following is the order of the hues in the RGB color space Red, Yellow, Green, Cyan, Blue, Magenta and Red
Values above 0 push the hue of the image toward the right (red turns to yellow). Values below 0 push the hue toward the left (red turns to magenta). At -1.0 or 1.0, the hue completes the cycle and returns to its original value.
The default range of the hue sliders is -1.0 to +1.0. Values outside of this range can be entered manually.
Ranges Tab
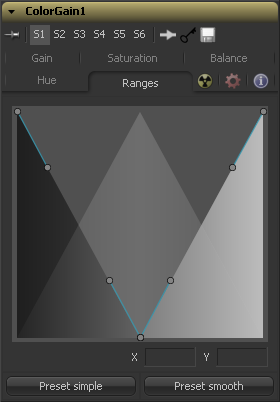
The Ranges Tab contains the controls used to specify which pixels in an image are considered to be shadows and which are considered to be highlights. The midrange is always calculated as any pixels not already included in either the shadows or the highlights.
- Spline Display
- The extent of the ranges is selected by manipulating the spline handles. There are four spline points, each with one Bezier handle. The two handles at the top represent the start of the shadow and highlight ranges, whereas the two at the bottom represent the end of the range. The Bezier handles are used to control the falloff.
- The midtones range has no specific controls since its range is understood to be the space between the shadow and the highlight ranges.
- The X and Y text controls below the Spline Display can be used to enter precise positions for the selected Bezier point or handle.
- Preset Simple/Smooth Ranges
- These two buttons can be used to return the spline ranges to either Smooth (default) or Simple (linear) settings.
Tips for Color Gain (edit)
EyeonTips:Manual/Fusion 6/Color Gain
| The contents of this page are copyright by eyeon Software. |
