Eyeon:Manual/Fusion 6/Light Trim
From VFXPedia
[ Main Manual Page ]
- [Cineon Log]
- [File LUT]
- [Film Grain]
- [Grain]
- [Light Trim]
- [Remove Noise]
Contents |
Controls
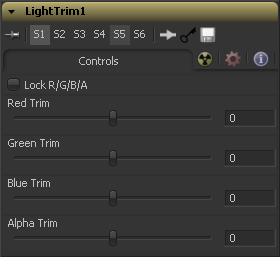
When selected, the Lock RGBA control collapses control of all image channels into one slider. This selection is on by default. To manipulate the various color channels independently, de-select this check box.
This slider shifts the color in film, optical printing and lab printing points. 8 points equal one stop of exposure.
Tips for Light Trim (edit)
I would need a developer to verify this, but I am pretty sure that a Trim value of 8 represents 1 stop of exposure in old film light terms, and 1 stop of exposure is a lift or increase in brightness of the log (0-1024) data by 96. 96 divided by 8 equals 12, so a trim of 1 lifts the color by 12. So to mimic this tool using just a brightness contrast we would apply the brightness contrast to the log image, and increase the value by 12/1024 or 0.01171875 per each integer trim value.
--Izyk 04:16, 5 September 2011 (EDT)
- - A trim value of 1 = 12.5 cineon code values, ie. a trim of 1 = 12.5/1024 = 0.01220703125. Stuart 16:11, 5 September 2011 (EDT)
| The contents of this page are copyright by eyeon Software. |

