Eyeon:Manual/Fusion 6/Interface Overview/Flow Editor/Groups
From VFXPedia
[ Main Manual Page ]
- Flow Overview
- Viewing, Scaling and Panning the Flow
- Context Menus
- Adding Tools
- Connecting and Disconnecting Tools
- Inserting Tools
- Replacing Tools
- Deleting Tools
- Connection Types
- Moving Tools and Organizing the Flow
- Groups
- Displaying Tile Pictures
- Viewing Tools
- Tooltips and the Status Bar
- Copying and Pasting Tools
- Instancing Tools
- Finding Tools
- Macro Tools
- Flow Options
- Tool Context Menu
- Tool Tile Color Coding and Icons
Contents |
Groups
Groups are containers on the flow that can hold multiple tools in a small container. They are excellent for keeping the visual complexity of a flow to a minimum.
Groups can contain other groups as well as tools. There is no limit to the number of tools that can be contained within a group.
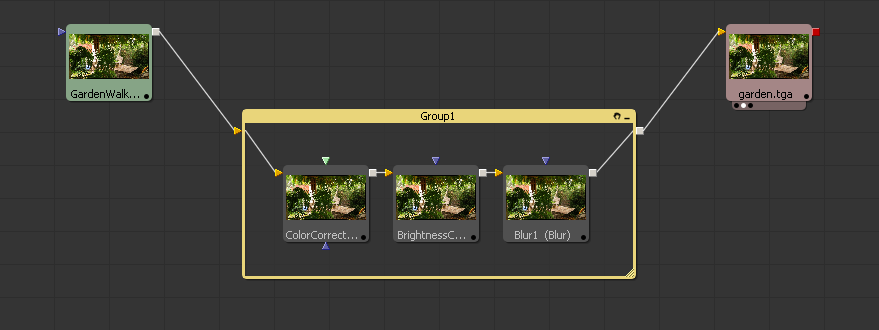
A group can be collapsed or expanded. A collapsed group is represented by a single tile on the flow, where a group that has been expanded is represented by a subflow showing the tools contained within the group.
Creating Groups
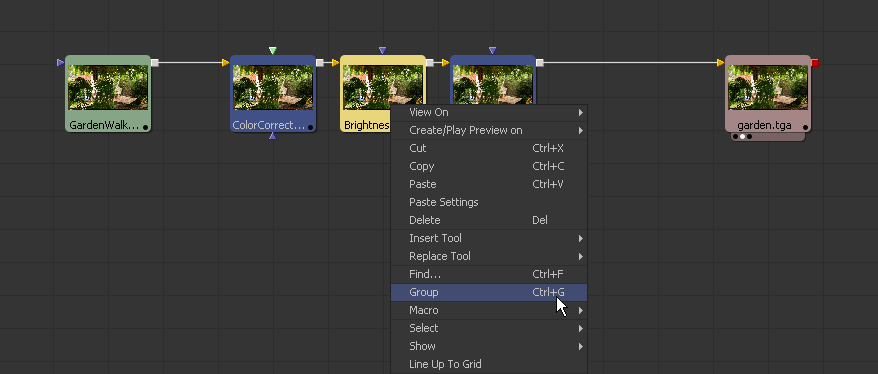
To create a group, select the tools to be added to the group. Right-click on one of the selected tools and choose Group from the context menu that appears. Alternately, you can use the Ctrl-G keyboard shortcut.
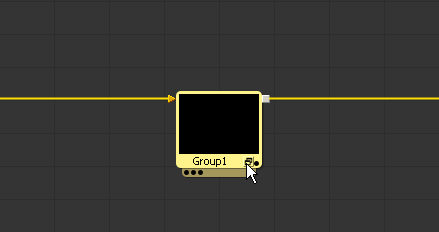
The tools contained within the group disappear from the flow and are replaced by a single tile that represents the collapsed group. If any of the tools in the group have any unconnected, or free, inputs when the group is created, those inputs will not be visible in the group. When a group is created to be saved to disk for later re-use, connect the input to another tool before creating the group if that input needs to be visible.
Expanding And Collapsing Groups
A collapsed group is represented by one tile on the flow. To open a collapsed group, click on the small icon to the left of the group's name in the tile.
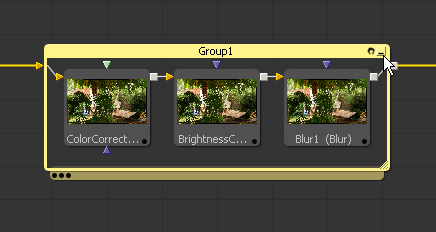
This will reveal a subflow list of the tools within the group. The subflow is a separate area that can be scaled, resized and panned independently of the main flow. To collapse the group again, click on the minimize icon at the top right corner of the subflow.
The controls for the various tools in a group can only be accessed if the group is expanded. Double-click on a tool tile within a group to display that tool's controls. The controls will disappear again when the group is collapsed. Tools can only be added, inserted or deleted from a group while that group is expanded.
Use the Ctrl-E keyboard shortcut when a group is selected to switch between expanded and collapsed modes for that group.
Ungrouping Tools
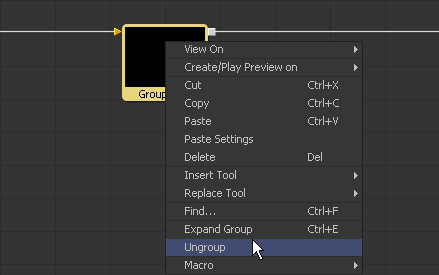
To remove the group without deleting the tools within it, right-click on the group and select Ungroup from the context menu. The tools inside the group will be placed back in the main flow.
Deleting Groups
Deleting a group is no different from deleting a single tool. The group is removed from the flow, including any tools contained within that group.
Renaming Groups
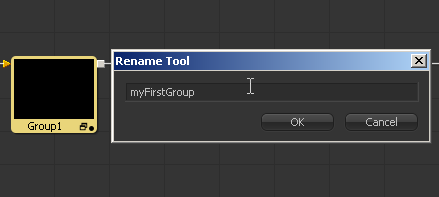
To rename a group, select the group and hit the F2 key, or right-click on the group and select Rename from the context menu.
Saving And Reusing Groups
One of the best features of a group is that the group and its settings can be saved for later use. Use one of the following methods to save a group's settings.
- Drag And Drop
- Drag a group from the flow into the bins. A dialog will appear that requests the name of the new settings file and the path where it should be saved on disk. The .settings file will be saved in the specified location and placed in the bins for easy access in the future.
- Context Menu
- A group can also be saved by right-clicking on the group and selecting Settings>Save As from the context menu.
- Locking, Panning And Scaling The Group's Subflow
- Click on the small hand icon in the title bar of an open group to enable/disable mouse panning and scaling for the group's subflow. This defaults to enabled for new groups.
