Eyeon:Manual/Tool Reference/Particles/pRender
From VFXPedia
|
Particle Tools | |
|
pRender | |
|
pRender [pRn] | |
|
The pRender tool converts the particle system to either an image or geometry. The default is a 3D particle system, which must be connected to a Renderer 3D to produce an image. This allows the particles to be integrated with other elements in a 3D scene before they are rendered. | |
In 3D mode the only controls in the pRender tool that have any affect at all are Restart, Pre-roll and Automatic Pre-Roll, Sub-Frame Calculation Accuracy and Pre-Generate frames. The remaining controls affect 2D particle renders only.
While the pRender defaults to 3D output, it can be made to directly render a 2D image instead, as with DF4. This is done with the 3D and 2D buttons on the Output Mode control. If the pRender is not connected to a 3D-only or 2D-only tool, you can also switch it by selecting View>2D Viewer from the display view's context menu.
The pRender tool also has a Camera input on the flow that allows connection of a Camera 3D tool. This can be used in both 2D and 3D modes to allow control of the viewpoint used to render an output image.
Render And The Display Views
When the pRender tool is selected in a flow, all of the onscreen controls from particle tools connected to it are presented in the display views. This provides a fast, easy-to-modify overview of the forces applied to the particle system as a whole.
About Pre-Roll
Pre-Roll is necessary because the state of a particle system is completely dependent on the last known position of the particles. If the current time were changed to a frame where the last frame particle state is unknown, the display of the particle is calculated on the last known position, producing inaccurate results.
To demonstrate, add a pEmitter and pRender tool to the composition. View the pEmitter in one of the display views. Right-click in the display view and select Views>2D Viewer from the context menu.
Set the Velocity of the particles to 0.1. Place the pEmitter on the left edge of the screen and set the Current Frame to 0. Set a Render Range from 0-100 and press the Play button. Observe how the particle system behaves.
Stop the playback and return the current time to frame 0. Make sure that the Automatic Pre-Roll option is off in the pRender tool. Now try jumping from frame 0 to 10, then to frame 60 and 90. Do not pass through the frames in between. Use the current time edit control or click in the ruler directly to jump straight to the frame.
See how the particle system only adds to the particles it has already created and does not try to create the particles that would have been emitted in the intervening frames. Try selecting the Pre-Roll button in the Pre-Render tool. Now the particle system state is represented correctly.
For simple, fast rendering particle systems, it is recommended to leave the Automatic Pre-Roll option on. For slower particle systems with long time ranges, it may be desirable to only Pre-Roll manually, as required.
Pre-Roll Options
Particle tools generally need to know the position of each particle on the last frame before they can calculate the affect of the forces applied to them on the current frame. This makes changing current time manually by anything but single frame intervals likely to produce an inaccurate image.
The controls here are used to help accommodate this by providing methods of calculating the intervening frames.
This control also works in 3D. Clicking on the Restart button will restart the particle system at the current frame, removing any particles created up to that point and starting the particle system from scratch at the current frame.
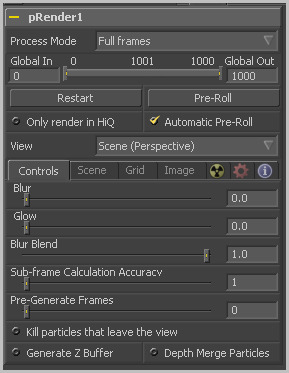
This control also works in 3D. Clicking on this button will cause the particle system to recalculate, starting from the beginning of the render range up to the current frame. It will not render the image produced. It will only calculate the position of each particle. This provides a relatively quick mechanism to ensure that the particles displayed in the views are correctly positioned.
If the pRender tool is displayed when the Pre-Roll button is selected, the progress of the pre-roll is shown in the display view, with each particle shown as point style only.
Selecting the Automatic Pre-Roll checkbox causes the particle system to automatically pre-roll the particles to the current frame whenever the current frame changes. This prevents the need to manually select the Pre-Roll button whenever advancing through time in jumps larger than a single frame. The progress of the particle system during an Automatic Pre-Roll is not displayed to the views, to prevent distracting visual disruptions.
Selecting this checkbox causes the style of the particles to be over-ridden when the Hi-Q checkbox is de-selected, producing only fast rendering Point style particles. This is useful when working with a large quantity of slow image-based or blob-style particles. To see the particles as they would appear in a final render, simply enable the Hi-Q checkbox.
This drop-down list provides options to determine the position of the camera view in a 3D particle system. The default option of Scene (Perspective) will render the particle system from the perspective of a virtual camera, the position of which can be modified using the controls in the Scene tab. The other options provide orthographic views of the front, top and side of the particle system.
It is important to realize that the position of the onscreen controls for particle tools is unaffected by this control. In 2D mode the onscreen controls are always drawn as if the display view were showing the front orthographic view. (3D mode gets the position of controls right at all times.)
The View setting is ignored if a Camera 3D tool is connected to the pRender tool's Camera input on the Flow, or if the pRender is in 3D mode.
Controls Tab
These sliders applies a Gaussian blur, glows and blur blending to the image as it is rendered, which can be used to soften the particles and blend them together. The end result is no different than adding a Blur after the pRender tool in the flow. 2D particles only.
This determines the number of sub-samples taken between frames when calculating the particle system. Higher values will increase the accuracy of the calculation but also increase the amount of time taken to render the particle system.
This control is used to cause the particle system to pre-generate a set number of frames before its first valid frame. This is used to give a particle system an initial state from which to start.
A good example of when this might be useful is in a shot where particles are used to create the smoke rising from a chimney. Pre-Generate Frames would be set to a number high enough to ensure that the smoke is already present in the scene before the render begins, rather than having it just starting to emerge from the emitter for the first few frames.
Selecting this checkbox control will automatically destroy any particles that leave the visible boundaries of the image. This can help to speed render times. Particles destroyed in this fashion will never return, regardless of any external forces acting upon them.
Selecting this checkbox will cause the pRender tool to produce a Z Buffer channel in the image. The depth of each particle is represented in the Z Buffer. This channel can then be used for additional depth operations like Depth Blur, Depth Fog, and Downstream Z Merging.
Enabling this option is likely to increase the render times for the particle system dramatically.
Enabling this option will cause the particles to be merged together using Depth Merge techniques, rather than layer-based techniques.
Scene Tab
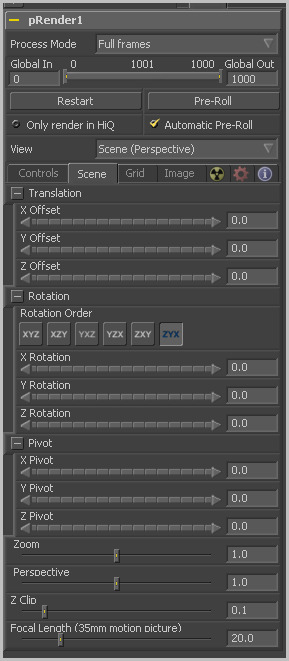
None of the controls in this tab have any effect on a 3D particle system. They apply only to 2D particle systems.
The controls in this tab are used to reposition the virtual camera in 3D space through rotation, translation and axis conversions. Zoom and perspective adjustments can also be made to the camera view. The default values are essentially identical to a front orthographic view.
The transformations applied here do not affect the drawing of onscreen controls for particle tools (with the exception of the particle grid described below). Use the front orthographic view for an accurate display of onscreen controls when working with 2D particles.
These controls can be animated.
The Z Clip control is used to set a clipping plane in front of the camera. Particles that cross this plane are clipped, preventing them from impacting on the virtual lens of the camera and dominating the scene.
Grid Tab
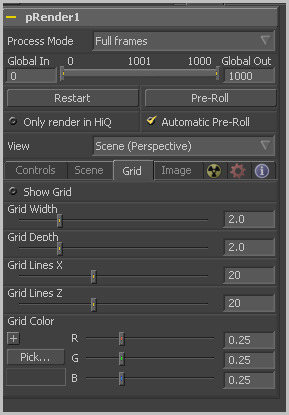
None of the controls in this tab have any effect on 3D particles.
The Grid is a helpful, non-rendering display guide used to orient the 2D particles in 3D space. The grid is never seen in renders, just like a center crosshair is never seen in a render.
The width, depth, number of lines and grid color can be set using the controls found in this tab. These controls cannot be animated.
Image Tab
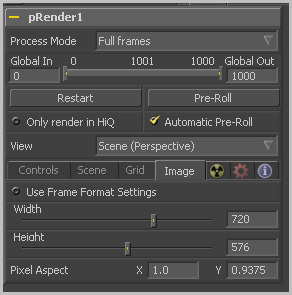
The controls in the Image tab of this tool determine the width, height and aspect of the image. Refer to the Creator Common Controls page for details on the use of these controls.
Motion Blur
As with other 2D tools in Fusion, motion blur is enabled from within the Fusion tab. You may set Quality, Shutter Angle, Sample Centre and Bias, and blur will be applied to all moving particles. Note: motion blur on 3D mode particles (rendered with a Renderer 3D) also requires that identical motion blur settings are applied to the Renderer 3D tool.
Tips for pRender (edit)
EyeonTips:Manual/Tool Reference/Particles/pRender
| The contents of this page are copyright by eyeon Software. |


