Eyeon:Manual/Display View/Displaying an Image in the Views
From VFXPedia
Contents |
Displaying A Tool's Output (Image or Scene) In The Views
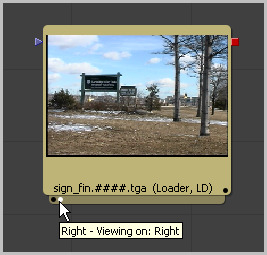
There are several methods to display the output of a tool in the display views. When a tool is displayed in one of the views, a status light appears on the left side of the tool's tile in the flow. To determine in what view the tool is displayed, hold the mouse pointer directly over the status light until a tooltip appears.
Generally, the leftmost indicator is for the left display view. The next one to the right is for the right display view. Additional indicators are used for floating views and video output devices.
The name of the currently-viewed tool is displayed on the horizontal toolbar at the bottom of the display view.
Viewing Images With Drag And Drop
- From The Flow View
- Click-drag any tool in the flow into a display view, then release the mouse button to display that tool's output.
- From The Tool Controls
- Click-drag the tool's control header from the control view on the left into a display view to display that tool's output.
- From The File Browser
- Drag and drop an image from the operating system's file browser into a display view to view that image. This will not add a tool into the flow. It is used only to rapidly preview an image before actually adding it to the flow.
Note: Holding down the Alt key while dragging an image tool into a display view will create a flipbook preview in that view instead. The Render Settings dialog will be displayed, and upon accepting the settings, the tool will be rendered and the resulting frames stored in RAM for fast playback on that view. This is similar to selecting Create Preview On from the tool's context menu. Hold down Shift+Alt instead to skip the dialog and immediately start rendering the preview with the last-used settings.
Viewing Images With The Context Menu
- From The Flow View
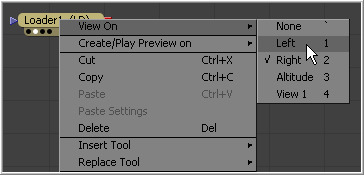
- Right-click on a tool's tile in the flow to display its context menu. Select View On, then choose the display view to use.
- From The Tool Controls
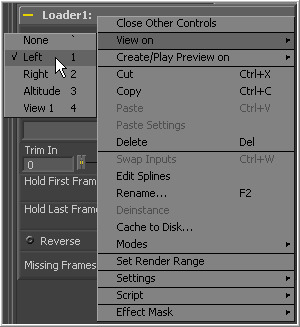
- Right-click on the tool's control header on the left to display the context menu for that tool. Select View On, then choose the display view to use.
- From The Timeline
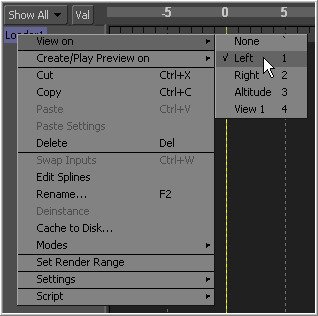
- Right-click on the tool's name in the tree menu to the left of the timeline to display the context menu for that tool. Select View On, then choose the the display view to use.
Viewing Images With Keyboard Shortcuts
Each display view in Fusion is assigned a numeric shortcut between 1-9, which can be used to quickly display the result of the currently selected tool. The left display view is accessed by pressing `1'. The right display view is accessed with `2', and successive floating views or hardware frame buffers are assigned numbers in the order in which they are created.
To determine the shortcut assigned to a display view, bring up the View On menu in any tool's context menu. The shortcut assigned is displayed to the left of the tool's name in the menu. These shortcuts are available for use when the flow editor or the tool controls are active.
Note (5.1) As of Fusion 5.1, the numeric keypad may also be used for display view shortcuts, in addition to the numeric keys arranged horizontally above the keyboard.
Removing Images From The View
To remove all images from all display views in one action, press the tilde (`) key. This key is usually found to the left of the 1 key on American keyboards.
Viewing Images From Disk
Use the display views to show stills, videos or sequences, even if they have not been loaded into the composition using a loader. From the desired view, click the right mouse button and select Load Image from the context menu. This will open a file browser. Navigate to the folder with the footage or image to be viewed and click OK. Still images will be displayed on the view statically. For image sequences and multi-frame formats, the transport controls will appear in the bottom of the control area to play, review, and loop the sequence.
Viewing Images Using Other Methods
Each tool tile has a small strip along the bottom that shows a small white indicator for each view. The strip is generally not visible until the tool is displayed in a view, selected, or the mouse pointer is positioned over the tile.
By hovering the mouse pointer over an indicator, a small popup will identify the view associated with the indicator. Generally, the leftmost indicator is for the left display view. The next one to the right is for the right display view. Additional indicators are used for floating views and video output devices.
When the indicators are visible, click directly on them to display or remove the tool's output image from a display. A white indicator shows that the view is displaying the image, otherwise, the indicator is black.


