Eyeon:Manual/Fusion 6/ErodeDilate
From VFXPedia
[ Main Manual Page ]
- Create Bumpmap
- Custom Filter
- Erode / Dilate
- Filter
- Rank Filter
Contents |
Controls
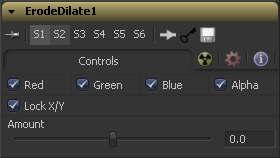
The filter defaults to operating on R, G, B and A channels. Selective channel filtering is possible by clicking the checkboxes beside each channel to make them active or inactive. This is not the same as the RGBA checkboxes found under the common controls. The tool takes these controls into account before it processes. Deselecting a channel will cause the tool to skip that channel when processing, speeding up the rendering of the effect. In contrast, the channel controls under the common controls tab are applied after the tool has processed.
The Lock X/Y checkbox is used to separate the Amount slider into amount X and amount Y, allowing a different value for the effect on each axis.
A negative value for Amount causes the image to erode. Eroding simulates the effect of an underexposed frame, shrinking the image by growing darker areas of the image so that they eat away at brighter regions.
A positive value for Amount causes the image to dilate, similar to the effect of overexposing a camera. Regions of high luminance and brightness grow, eating away at the darker regions of the image. Both techniques will eradicate fine detail in the image and tend to posterize fine gradients.
Tips for ErodeDilate (edit)
The scale of the Amount slider is 1 = image width. So if you want to erode or dilate by exactly 1 pixel on an HD image, you have to enter 1 / 1920 or 0.00052083.
| The contents of this page are copyright by eyeon Software. |

