Eyeon:Manual/Tool Reference/Primatte/Part3
From VFXPedia
Contents
Part 1
2. Accessing Primatte from Fusion
Part 2
7. External Garbage Matte Input
Part 3
8. Primatte Tools and Buttons Descriptions
8a. Primatte Tab
- 8a1. Auto Compute Tools
- 8a1a. Auto Compute Button
- 8a1b. Foreground Factor Slider
- 8a1c. Background Factor Slider
- 8a1d. Precision Slider
- 8a2. Operational Mode Selector Tools
- 8a2a. Select Background Color
- 8a2b. Clean Background Noise
- 8a2c. Clean Foreground Noise
- 8a2d. Spill Sponge
- 8a2e. Matte Sponge
- 8a2f. Restore Detail
- 8a2g. Make Foreground Transparent
- 8a2i. Spill (+)
- 8a2j. Spill (-)
- 8a2k. Matte (+)
- 8a2l. Matte (-)
- 8a2m. Detail (+)
- 8a2n. Detail (-)
- 8a3. Primatte Algorithm Menu
- 8a3a. Primatte
- 8a3b. Primatte RT
- 8a3c. Primatte RT+
- 8a4. Crop Button
- 8a4a. Crop Tools Menu
- 8a5. Reset Buttons
- 8a5a. Reset
- 8a5b. Soft Reset
8b. Fine Tuning Tab
- 8b1. Fine Tuning Sliders
- 8b2. Pick... Color Chip
8c. Replace Tab
8d. Degrain Tab
- 8d1. Grain Tools
- 8d1a. Grain Size
- 8d1b. Grain Size Options
- 8d1c. Grain Tolerance Slider
- 8d1d. Grain Tools Tutorial
8e. Matte Tab
- 8e1. Matte Blur Slider
- 8e2. Blur inward Selector
- 8e3. Matte Contract/Expand Slider
- 8e4. Matte Gamma Slider
- 8e5. Matte Threshold Indicator
- 8e6. Invert Matte Selector
- 8e7. Invert Garbage Matte
- 8e8. Garbage Matte Modes
- 8e9. Make Transparent
- 8e10. Make Solid
- 8e11. Multiply Garbage Matte Selector
Part 4
9. More About the Primatte Polyhedral Slicing Algorithms...
8. Primatte Tools and Buttons Descriptions

8a. Primatte Tab
Auto Compute 
- The AutoCompute button opens up the Auto Compute Tools Menu.
Auto Compute Tools Menu 
- The Auto Compute tools can be used as the first step in the Primatte operation. It's purpose is to try and do the first three steps of the Primatte operation for you. It will try to automatically detect the backing screen color, remove it and do some clean-up on the foreground and background noise. If the clip was shot with an evenly lit, well saturated backing screen, the Auto Compute button will leave you with an image that may only need some spill removal to complete your keying operation.
- Auto Compute Button

- The Auto Compute button is used to activate the Auto Compute feature.
- Foreground Factor Slider

- The Foreground Factor slider can be used to modify how the Auto Compute algorithm deals with foreground noise. Change the position of this slider and you can see the results of the Auto Compute operation change.
- Background Factor Slider

- The Background Factor slider can be used to modify how the Auto Compute algorithm deals with background noise. Change the position of this slider and you can see the results of the Auto Compute operation change.
- Precision Slider

- The Precision slider controls how much of the image to pass off to the Auto Compute routine. This feature is available for speed considerations. For large images a setting of .25 (or 25%) is probably sufficient and would deliver good results in a minimum amount of time. When using smaller images or cropped images a user may actually want to autocompute the entire image. This precision slider allows the user to control how much of the image is used inside of the Auto Compute feature, 1.0, being the whole image.
Operational Mode Tools
- Select Background Color

- When this operational mode is selected, the Primatte operation will be initially computed by having the user sample the target background color within the image window. For keying operations, this is the first step and should be followed by the steps described immediately below.
- Clean Background Noise

- When this operational mode is selected, the user samples pixels on the image window known to be 100% background. White noisy areas in the 100% background region will become black. This is usually the second step in using Primatte.
- Clean Foreground Noise

- When this operational mode is selected, the user samples pixels on the image window known to be 100% foreground. The color of the sampled pixels will be registered by Primatte to be the same color as in the original foreground image. This will make dark gray areas in the 100% foreground region become white. This is usually the third step in using Primatte.
- Spill Sponge

- When this operational mode is selected, the background color component in the sampled pixels (or spill) within the image window is keyed out and removed for the color region selected. This operation can only be used once on a particular color and the amount of spill suppression applied is not adjustable. It is the fastest way to remove spill from a composite image. For more accurate spill suppression, a Fine Tuning or Spill (+) operation should follow or be used instead. This can usually be the fourth (and final) step in using Primatte unless additional adjustments are necessary.
- Matte Sponge

- When this operational mode is selected, the sampled color within the image window becomes 100% foreground. However, if the sampled color is already keyed out and removed, it leaves the current 'suppressed' color. It only affects the key or matte information. This tool is usually used to quickly remove stray transparent pixels that have appeared during the chromakeying procedure. It is a quick and easy way to make final adjustments to a composite.
- Restore Detail

- With this mode selected, the completely transparent background region sampled in the image window becomes translucent. This operation is useful for restoring lost hair details, thin wisps of smoke and the like. It shrinks the small polyhedron slightly.
- Make Foreground Transparent

- When this mode is selected, the opaque foreground color region sampled in the image window becomes slightly translucent. This operation is useful for the subtle tuning of foreground objects which are otherwise 100 percent covered with smoke or clouds. It can only be used one time on a particular color. For a more flexible way to thin out a color region and be able to make multiple samples, you should use the Matte (-) tool. It expands the medium polyhedron slightly.
- Spill (+)

- When this operational mode is selected, color spill will be returned to the sampled pixel color (and all colors like it) in the amount of one Primatte increment. This tool can be used to move the sampled color more in the direction of the color in the original foreground image. It can be used to nullify a Spill (-) step. This tool dents the Primatte large polyhedron in the color region sampled.
- Spill (-)

- When this operational mode is selected, color spill will be removed from the sampled pixel color (and all colors like it) in the amount of one Primatte increment. If spill color remains, another click using this operational mode tool will remove more of the color spill. Continue using this tool until all color spill has been removed from the sampled color region. This tool expands the Primatte large polyhedron in the color region sampled.
- Matte (+)

- When this operational mode is selected, the matte will be made more opaque for the sampled pixel color (and all colors like it) in the amount of one Primatte increment. If the matte is still too translucent or thin, another click using this operational mode tool will make the sampled color region even more opaque. This can be used to thicken smoke or make a shadow darker to match shadows in the background imagery. It can only make these adjustments to the density of the color region on the original foreground image. It can be used to nullify a Matte (-) step. This tool dents the Primatte medium polyhedron in the color region sampled.
- Matte (-)

- When this operational mode is selected, the matte will be made more translucent for the sampled pixel color (and all colors like it) in the amount of one Primatte increment. If the matte is still too opaque, another click using this operational mode tool will make the sampled color region even more translucent. This can be used to thin out smoke or make a shadow thinner to match shadows in the background imagery. This tool expands the Primatte medium polyhedron in the color region sampled.
- Detail (+)

- When this operational mode is selected, foreground detail will become less visible for the sampled pixel color (and all colors like it) in the amount of one Primatte increment. If there is still too much detail, another click using this operational mode tool will make more of it disappear. This can be used to remove smoke or wisps of hair from the composite. Sample where is visible and it will disappear. This is for moving color regions into the 100% background region. It can be used to nullify a Detail (-) step. This tool expands the Primatte small polyhedron in the color region sampled.
- Detail (-)

- When this operational mode is selected, foreground detail will become more visible for the sampled pixel color (and all colors like it) in the amount of one Primatte increment. If detail is still missing, another click using this operational mode tool will make detail more visible. This can be used to restore lost smoke or wisps of hair. Sample where the smoke or hair just disappears and it will return to visibility. This is for restoring color regions that were moved into the 100% background region. It may start to bring in background noise if shooting conditions were not ideal on the foreground image. This tool dents the Primatte small polyhedron in the color region sampled.
Primatte Algorithm Menu
- Primatte

- The Primatte algorithm mode delivers the best results and supports both the Solid Color and the Complement Color spill suppression methods. It is the algorithm that uses three multi-faceted polyhedrons (as described further down in the this document) to separate the 3D RGB colorspace. It is also the default algorithm mode and, because it is computationally intensive, it may take the longest to render.
- Primatte RT

- Primatte RT is the simplest algorithm and therefore, the fastest. It uses only a single planar surface to separate the 3D RGB colorspace (as described further down in the this document) and, as a result, does not have the ability to separate out the foreground from the backing screen as carefully as the above Primatte algorithm. Other disadvantages of the Primatte RT algorithm is that it does not work well with less saturated backing screen colors and it does not support the Complement Color spill suppression method.
- Primatte RT+

- Primatte RT+ is in between the above two options. It uses a six planar surface color separation algorithm (as described further down in the this document) and will deliver results in between the other two in both quality and performance. Other disadvantages of the Primatte RT+ algorithm is that it does not work well with less saturated backing screen colors and it does not support the Complement Color spill suppression method.
Crop Button 
- This button opens the Crop Tools Menu (see below) and allows the user to create a rectangular garbage matte with the Primatte node..
- Crop Tools Menu
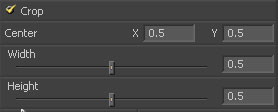

- These 2 sliders and centering are are used to create a rectangular garbage matte. All pixels outside of the rectangle will be forced to 100% background pixels.
Reset Buttons 
- Resets either all of the Primatte key control data back to a blue or greenscreen or resets just the Primatte features used since the Select Background Color operation was last completed.
- Reset
- Resets all of the Primatte key control data back to a blue or greenscreen.
- Soft Reset
- Resets just the Primatte features used since the Select Background Color operation was last completed.

Fine Tuning Tab
Fine Tuning Sliders 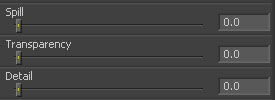

- When this operational mode is selected, the color of the sampled pixel within the image window is registered as a reference color for fine tuning. It is displayed in the Color Chip below the Detail slider. To perform the tuning operation, sample a color region on the image, select a Fine Tuning slider and move the slider to achieve the desired effect. See the Fine Tuning Sliders tool descriptions further on in this chapter for more details on slider selection.
- Spill or Large Polyhedron Slider (Spill Removal)

- When in the Fine Tuning operational mode, this Spill slider can be used to remove spill from the registered color region. After choosing the Fine Tuning operational mode and selected a color region, this slider can be moved to remove spill from the registered color region. The more to the right the slider moves, the more spill will be removed. The more to the left the slider moves, the closer the color component of the selected region will be to the color in the original foreground image. If moving the slider all the way to the right does not remove all the spill, re-sample the color region and again move the slider to the right. These slider operations are additive. This result achieved by moving the slider to the right can also be achieved by clicking on the color region using the Spill (-) operational mode. This slider bulges the Primatte large polyhedron near the registered color region.
- Transparency or Medium Polyhedron Slider (Adjust Transparency)

- When in the Fine Tuning operational mode, this Transparency slider can be used to make the matte more translucent in the registered color region. After choosing the Fine Tuning operational mode and selected a color region, moving this slider to the right makes the registered color region more transparent. Moving the slider to the left makes the matte more opaque. If moving the slider all the way to the right does not make the color region translucent enough, re-sample the color region and again move the slider to the right. These slider operations are additive. This result achieved by moving the slider to the right can also be achieved by clicking on the color region using the Matte (-) operational mode. This slider bulges the Primatte medium polyhedron near the registered color region.
- Detail or Small Polyhedron Slider (Add/Restore Lost Detail)

- When in the Fine Tuning operational mode, this Detail slider can be used to restore lost detail. After choosing the Fine Tuning operational mode and selected a color region, moving this slider to the left makes the registered color region more visible. Moving the slider to the left makes the color region less visible. If moving the slider all the way to the left does not make the color region visible enough, re-sample the color region and again move the slider to the left. These slider operations are additive. This result achieved by moving the slider to the left can also be achieved by clicking on the color region using the Detail (-) operational mode. This shrinks the small polyhedron (which contains all the blue or green background colors) and releases pixels that were close to the background color. The Small Polyhedron Slider in the Fine Tuning mode is useful for restoring pixels that were lost because they were so similar to the background color. This slider dents the Primatte small polyhedron near the registered color region.
- Pick... Color Chip

- This is the display color chip that shows the color selected (or registered) by the Fine Tuning operational mode.
- Average of Selected Color
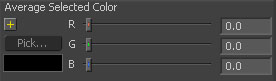

- This is the display color chip and the RGB value indicators that show the color selected (or registered) by the Fine Tuning operational mode. By clicking on the + sign
 you can open a more detailed display...
- This is the display color chip and the RGB value indicators that show the color selected (or registered) by the Fine Tuning operational mode. By clicking on the + sign
- Average of Selected Color (open)
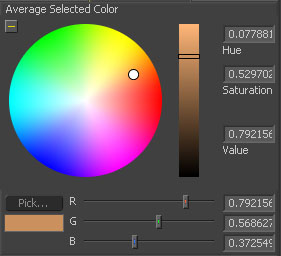
- Average of Selected Color (open)

- This is the display color chip, the RGB value indicators and the HSV value indicators that show the color selected (or registered) by the Fine Tuning operational mode.

Replace Tab
Complement/Solid/Defocus Spill Replacement 
- Allows the user to choose between the three methods of color spill replacement as covered in detail in Section 5. Spill Replacement Options above.
- Complemental Replacement - Replaces the spill color with the complement of the backing screen color.
- Image or Defocus Replacement - Replaces the spill color with colors from a defocused version of the background image.
- Color or Solid Color Replacement - Replaces the spill color with a 'user selected' solid color.

Degrain Tab
Grain Tools 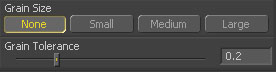

- The Grain Tools are used when a foreground image is highly compromised by film grain. As a result of the grain, when backing screen noise is completely removed, the edges of the foreground object often become harsh and jagged leading to a poor key. These tools were created to, hopefully, help when a compositing artist is faced with a grainy image.
- Grain Size

- The Grain Size selector gives the user a range of grain removal from Small to Large. If the foreground image has a large amount of film grain induced pixel noise, you may lose a good edge to the foreground object when trying to clean all the grain noise with the Clean Background Noise Operation Mode. These tools allow the user to clean up the grain noise without affecting the quality of the key. A short tutorial explaining when and how to use these tools is at the end of this section. Click here.
- None

- When None is selected, the user gets the color of the exact pixel sampled.
- Small

- When Small is selected, the user gets the average color of a small region of the area around the sampled pixel. This should be used when the grain is very dense.
- Medium

- When Medium is selected, the user gets the average color of a medium-sized region of the area around the sampled pixel. This should be used when the grain is less dense.
- Large

- When Large is selected, the user gets the average color of a larger region of the area around the sampled pixel. This should be used when the grain is very loose.
- Grain Tol.

- Adjusting this slider this should increase the affect of the Clean Background Noise tool without changing the edge of the foreground object.
Grain Tools Tutorial
- If you have a noisy image as in the example below...

- ...you will find that the matte is also noisy:

- Currently you can use the Clean Background Noise operation to remove the noisy pixels, but this can also modify the edge of the foreground object in a negative manner. Using the Grain Tools in the following way may help you clean up the image and still get a good edge on the matte:
- 1. Use the Clean Background Noise operation just a small amount to remove some of the white noise in the Alpha View but do use it so much that you affect the edge of the foreground object.
- 2. Then select the Grain Size tool and select Small as a first step to reduce the grain:
- 2. Then select the Grain Size tool

- With the Grain Tolerance slider set at 0, move it around some. This should increase the affect of the Clean Background Noise tool without changing the edge of the foreground object. Sometimes this may not be enough to totally remove the grain so by adjusting the Grain Tolerance slider, you can tell the Primatte algorithm what brightness of pixels you think is grain. You should try not to use too high of a value otherwise it will affect the overall matte. For an example of an 'over adjusted' image see below...

- The Primatte grain algorithm uses a 'Defocused Foreground' image to compute the noise. You can see the results of the defocused foreground by changing the View Mode to Defocus Foreground
 :
:

- NOTE: The Small, Medium and Large settings for the Grain Tools all produce defocused foregrounds that have larger blurs respectively. NOTE: It is important to make sure that the crop settings are correctly applied otherwise when the defocus image is generated, if there is 'garbage' on the edges of the images, then that garbage will be blurred into the defocus foreground. As a review:
- 1. Select the Select Background Color Operation Mode and click on a backing screen color.
- 2. Select the Clean Background Noise Operation Mode and use it sparingly so that it has minimum affect to the edge of the foreground object.
- 3. If there is still grain in the backing screen area, then use the Grain Size functionality starting at the Small setting to reduce the grain.
- 4. If the grain is still present, then try increasing the Grain Tol. slider a little - not too much.
- 5. If grain is still a problem then try changing the Grain Size to Medium of Large and also changing the grain tolerance until the desired effect is achieved.
- NOTE: The grain functionality does not always remove grain perfectly but is sometimes useful to minimize its effects.

Matte Tab
Matte Blur Slider 
- Matte Blur blurs the edge of the matte using a standard constant speed gaussian blur. A value of zero results in a sharp, cutout-like hard edge. The higher the value, the more blur applied to the matte. When using this tool, some noise may appear around the edges of the foreground object. To avoid this problem, toggle the to the Solid Color Replacement mode. Note: With using this feature, foreground details and smoothness of motion blur may be adversely affected. Set it to 0 for optimum results.
Blur Inward Selector 
- This feature forces the blur inward toward the center of the foreground subject. The conventional matte blur feature affected the matte edges in both directions (inward and outward) and sometimes introduced a halo artifact around the object edge in the composite view. This was most evident when using the Complemental Replacement mode. With the Inward Defocus switch ON, the matte defocus functions only in the inward direction of the foreground subject (toward the center of the white area). The final result is that it removes small and dark noise in the backing area without picking them up again in the Clean BG Noise mode and sometimes results in softer, cleaner edges on the foreground objects.
Matte Contract/Expand Slider 
- This slider shrinks or grows the semi-transparent areas of the matte. Values above 0.0 expand the matte while values below 0.0 contract it. This control is usually used in conjuction with the Matte Blur to take the hard edge of a matte and reduce fringing. Since this control only affects semi-transparent areas, it will have no affect on a hard edge's matte.
Matte Gamma Slider 
- Matte Gamma raises or lowers the values of the matte in the semi-transparent areas. Higher values cause the gray areas to become more opaque and lower values cause the gray areas to become more transparent. Completely black or white regions of the matte remain unaffected. Since this control only affects semi-transparent areas it will have no affect on a hard edge's matte.
Matte Threshold Indicator 
- Any value below the lower threshold becomes black or transparent in the matte. Any value above the upper threshold becomes white or opaque in the matte. All values within the range maintain their relative transparency values. This control is often used to reject salt and pepper noise in the matte.
Invert Matte Selector 
- When this checkbox is selected, the alpha channel created by the keyer is inverted, causing all transparent areas to be opaque and all opaque areas to be transparent.
Invert Garbage Matte 
- This feature inverts the Garbage Matte.
Garbage Matte Modes 
- Garbage mattes are mask tools or images connected to the Garbage Matte input on the tool's tile. The garbage matte is applied directly to the alpha channel of the image. Generally, garbage mattes are used to remove unwanted elements that cannot be keyed, such as microphones and booms. They are also used to fill in areas that contain the color being keyed, but that the artist wishes to maintain. Garbage mattes of different modes cannot be mixed within a single tool. A matte control tool is often used after a keyer tool to add a garbage matte with the opposite effect of the matte applied to the keyer.
Make Transparent 
- Select this button to make the Garbage Matte transparent.
Make Solid 
- Select this button to make the Garbage Matte solid.
Multiply Garbage Matte Selector 
- Select this option to cause the keyer to multiply the color channels of the image against the alpha channel it creates for the image. This option is usually enabled, and is on by default. Deselect this checkbox and the image can no longer be considered pre-multiplied for purposes of merging it with other images. Use the Subtractive option of the Merge tool instead of the Additive option. For more information, see the Merge tools section in the Fusion documentation.
Sampling Selectors 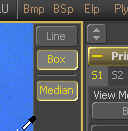

- Line/Box/Median Point Sample Selector
- These selectors allow the user to choose between a Median Point sample, an interactive Box pixel selector or to sample using a Line 'click and drag' method.
- Line (or 'Snail Trail') Sample

- A Line or 'Snail Trail' sample is like a trail of pixels selected as the cursor moves over the image. Line sample is similar to the Box sample method in that it either averages or uses all the pixel information of the trail (dependending on the operation being done).
- Box Sample

- When Box sample is selected, the user clicks and drags to create a rectangular selection area. When using the Select Background Color, Spill +/-, Detail +/-, Matte +/- tools, the selection is then created from the average of all the pixels in the rectangular area. The rest of the operations (e.g. Clean Background Noise, Clean Foreground Noise, etc.), take account of all the pixels in the rectangular region.
- Median Point Sample

- The Median Point sample mode is the same as Point selection except that each point is the result of taking a 3x3 region around the point the user clicked and then applying a median filter. This can potentially reduce any noisy pixels.
