Eyeon:Manual/Fusion 6/Locator 3D
From VFXPedia
[ Main Manual Page ]
The Locator 3D tool's purpose is to transform a point in 3D space to 2D co-ordinates that other tools can use as part of expressions or modifiers.
When the Locator is provided with a camera and the dimensions of the output image, it will transform the co-ordinates of a 3D control into 2D screen space. The 2D position is exposed as a numeric output which can be connected to from other tools. For example, to connect the center of an ellipse to the 2D position of the Locator, right click on the mask center control and select Connect To > Locator 3D > Position.
The scene provided to Locator's input must contain the camera through which the co-ordinates are projected. As a result, the best practice is to place the locator after the merge that introduces the camera to the scene.
If an object is connected to the Locator tool's second input, the locator will be positioned at the object's center, and the Transformation tab's Offset XYZ sliders will function in the object's local co-ordinate space rather than Global scene space. This is useful for tracking an object's position regardless of any additional transformations applied further downstream.
External Inputs
- Locator3D.SceneInput
- [ orange, required ] This input expects a 3D scene.
- Locator3D.Target
- [ green. optional ] This input expects a 3D scene. When provided, the transform center of the scene is used to set the position of the locator. The transformation controls for the Locator become offsets from this position.
Controls
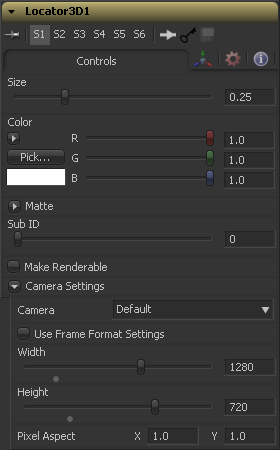
The Size slider is used to set the size of the locator's onscreen crosshair.
A basic Color control is used to set the color of the locator's onscreen crosshair.
Matte
Enabling the IsMatte option will apply a special texture to this object, causing this object to not only become invisible to the camera, but also making everything that appears directly behind the camera invisible as well. This option will override all textures. See the Matte Objects section of the 3D chapter for more information.
When activated, objects whose pixels fall behind the matte objects pixels in Z do not get rendered.
Sets the alpha value of the matte object to 1. This checkbox is only visible when the IsMatte option is enabled.
Sets the value in the z channel to infinite. This checkbox is only visible when the IsMatte option is enabled.
The SubID slider can be used to select an individual sub-element of certain geometry, such as an individual character produced by a Text 3D tool, or a specific copy created by a Duplicate 3D tool.
Defines if the Locator is rendered as a visible object by the OpenGL renderer. The software renderer is not currently capable of rendering lines, and hence will ignore this option.
This checkbox control appears when the Make Renderable option is selected. If the Unseen by Cameras checkbox is selected, the locator will be visible in the display views, but not rendered into the output image by the Renderer 3D tool.
Controls
This drop down control is used to select the camera in the scene that defines the screen space used for 3D to 2D co-ordinate transformation.
Select this checkbox to override the Width, Height and Pixel Aspect controls, and force them to use the values defined in the compositions Frame Format preferences instead.
In order for the locator to generate a correct 2D transformation, it must know the dimensions and aspect of the image. These controls should be set to the same dimensions as the image produced by a renderer associated with the camera specified above. Right clicking on these controls will display a context menu containing the frame formats configured in the compositions preferences.
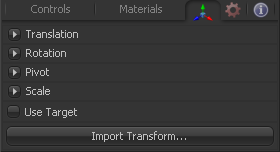
Transform Tab
The options which appear in this tab determine the position of the geometry created by this tool. Since these controls are identical on all tools that generate geometry, these controls are fully described in the Common 3D Controls section of this documentation.
Tips for Locator 3D (edit)
This video demonstrates the use of the Locator3D tool.
You can also use the Locator3D in reverse to derive the location of a 2D feature in 3D space. This tip and this YouTube video explain how.
| The contents of this page are copyright by eyeon Software. |


