Eyeon:Manual/Fusion 6/Cube 3D
From VFXPedia
[ Main Manual Page ]
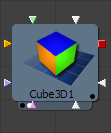
The Cube 3D tool is a basic primitive geometry type capable of generating a simple cube. The tool also provides six additional image inputs that can be used to map a texture onto the six faces of the cube.
Cubes are often used as shadow casting objects and for environment maps. For other basic primitives, see the Shape 3D tool.
External Inputs
- Cube3D.SceneInput
- [ orange, optional ] This input expects a scene from a 3D tool output.
- Cube3D.NameMaterialInput
- These 6 inputs are used to define the materials applied to the six faces of the cube. They will accept either a 2D image or a 3D material as valid.
Controls
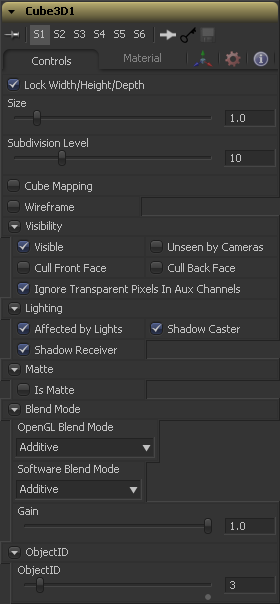
This checkbox locks the Width, Height and Depth dimensions of the cube together, so that they are always the same size. When selected, only a Size control is displayed, otherwise separate Width, Height and Depth sliders are shown.
If the Lock checkbox is selected then only the Size is shown, otherwise separate sliders are displayed for Width, Height and Depth. The Size and Width sliders are the same control renamed, so any animation applied to Size will also be applied to Width when the controls are unlocked.
Use the Subdivision Level slider to set the number of subdivisions used when creating the image plane. If the Open GL display and renderer are set to vertex lighting so, the more subdivisions in the mesh, the more vertices will be available to represent the lighting. For this reason, high subdivisions can be useful when working interactively with lights.
Enabling the Cube Mapping checkbox causes the cube to wrap its first texture across all six faces using a standard cubic mapping technique. This approach expects a texture laid out in the shape of a cross.
Enabling this checkbox will cause the mesh to render only the Wireframe for the object. When this manual was printed, only the OpenGL renderer supported wireframe, but that may have changed in the time between printing and release.
Visibility
If the visibility checkbox is not selected, the object will not visible in the display views, nor will it be rendered into the output image by the Renderer 3D tool. A non-visible object does not cast shadows.
If the Unseen by Cameras checkbox is selected, the object will be visible in the display views (unless the Visible checkbox is turned off), except when viewed through a camera. The object will not be rendered into the output image by the Renderer 3D tool. Shadows cast by an Unseen object will still be visible when rendered by the software renderer, though not by the OpenGL renderer.
Use these options to cull (eliminate) rendering and display of certain polygons in the geometry. If Cull Back Face is selected, all polygons facing away from the camera not be rendered, and will not cast shadows. If Cull Front Face is selected, all polygons facing towards the camera will likewise be dropped. Selecting both checkboxes has the same effect as deselecting the Visible checkbox.
In Fusion 5 transparent pixels were rejected by the SW/GL renderers. To be more specific the SW renderer rejected pixels with R=G=B=A=0 and the GL renderer rejected pixels with A=0. This is now optional. The reason you might want to do this is to get aux channels (eg. normals, z, UVs) for the transparent bits. For example, suppose in post you want to replace the texture on an 3D element with a texture that is transparent in certain areas with a texture that is transparent in different areas, then it would be useful to have transparent bits set aux channels (in particular UVs). As another example suppose you are doing post DoF... you will probably not want the z channel to be set on transparent areas as this will give you a false depth. Also keep in mind that this rejection is based on the final pixel color including lighting if it is on. So if you have a specular highlight on a clear glass material, this checkbox will not affect it.
Lighting
If this checkbox is not selected, lights in the scene will not affect the object, it will not receive nor cast shadows, and it will be shown at the full brightness of its colour, texture or material.
If this checkbox is not enabled, the object will not cast shadows on other objects in the scene.
If this checkbox is not enabled, the object will not receive shadows cast by other objects in the scene.
Matte
Enabling the IsMatte option will apply a special texture to this object, causing this object to not only become invisible to the camera, but also making everything that appears directly behind the camera invisible as well. This option will override all textures. See the Matte Objects section of the 3D chapter for more information.
When activated, objects whose pixels fall behind the matte objects pixels in Z do not get rendered.
Sets the alpha value of the matte object to 1. This checkbox is only visible when the IsMatte option is enabled.
Sets the value in the z channel to infinite. This checkbox is only visible when the IsMatte option is enabled.
Blend Mode
A blend mode specifies which method will be used by the renderer when combining this object with the rest of the scene. The blend modes are essentially identical to those listed in the documentation for the 2D Merge tool. For a detailed explanation of each mode see the documentation for that tool.
Use this menu to select the blending mode which will be used when the geometry is processed by the OpenGL renderer. This is also the mode used when viewing the object in the display views. Currently the OpenGL renderer only support three blending modes.
Use this menu to select the blending mode which will be used when the geometry is processed by the Software renderer. Currently the Software renderer supports all of the modes described in the Merge tool documentation except for the Dissolve mode.
Object ID
This control is used to set the numeric identifier assigned to this object. The object ID is an integer number that will be rendered into the ObjID auxiliary channel of the rendered image when the Object ID option is enabled in the Renderer 3D tool. See the Object and Material ID section in the 3D chapter for more information.
Material Tab
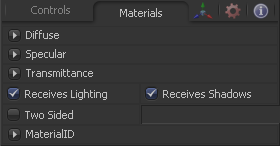
The options which appear in this tab determine the appearance the geometry created by this tool. Since these controls are identical on all tools that generate geometry, these controls are fully described in the Common 3D Controls section of this documentation.
If an external 3D material is connected to the tool tiles material input then the controls in this tab will be replaced with the "Using external material" label.
Transform Tab
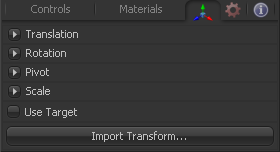
The options which appear in this tab determine the position of the geometry created by this tool. Since these controls are identical on all tools that generate geometry, these controls are fully described in the Common 3D Controls section of this documentation.
Tips for Cube 3D (edit)
EyeonTips:Manual/Fusion 6/Cube 3D
| The contents of this page are copyright by eyeon Software. |


