Eyeon:Manual/Fusion 6/Duplicate 3D
From VFXPedia
[ Main Manual Page ]
The Duplicate 3D tool can be used to quickly duplicate any geometry in a scene, applying a successive transformation to each, and creating repeating patterns and complex arrays of objects. The options in the Jitter tab allows for non-uniform transformations, such as random positioning or sizes.
Controls
- Duplicate3D.SceneInput
[ orange, required ] This input expects a 3D scene.
Controls
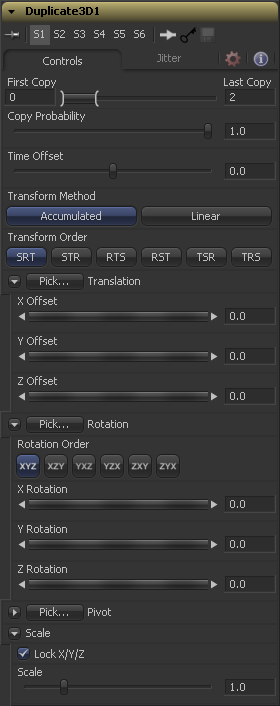
Use this range control to set how many copies of the geometry to make. Each copy is a copy of the last copy so, if this control is set to [0,3], the parent is copied, then the copy is copied, then the copy of the copy is copied, and so on. This allows for some interesting affects when transformations are applied to each copy using the controls below.
Using a value for both the First Copy and the Last Copy will show only the original input. Setting the First Copy to a value greater than 0 will exclude the original input and show only the copies.
Use the Time Offset slider to offset any animations that are applied to the source geometry by a set amount per copy. For example, set the value to -1.0 and use a cube set to rotate on the Y axis as the source. The first copy will show the animation from a frame earlier. The second copy will show animation from a frame before that, and so forth. This can be used with great effect on textured planes, for example, where successive frames of a clip can be shown.
Transform Method
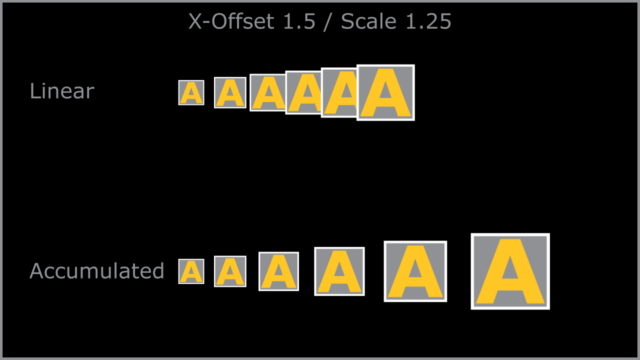
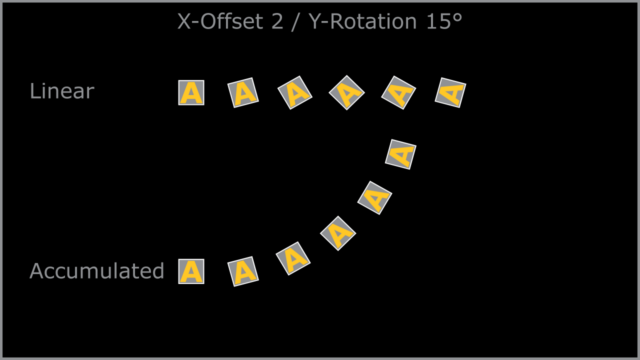
When set to Accumulated each object copy starts at the position of the previous object, and is transformed from there. The result is transformed again for the next copy.

When set to Linear transforms are multiplied by the number of the copy, and the total scale, rotation and translation are applied in turn, independent of the other copies.

With these buttons the order in which the transforms are calculated can be set. It defaults to Scale-Rotation-Transform (SRT). Using different orders will result in different positions of your final objects.
These three sliders tell the tool how much offset to apply to each copy. So an X Offset of 1 would offset each copy 1 unit 1 unit along the X axis from the last copy.
These buttons can be used to set the order in which rotations are applied to the geometry. Setting the rotation order to XYZ would apply the rotation on the X axis first, followed by the Y axis rotation, then the Z axis rotation.
These three rotation sliders tell the tool how much rotation to apply to each copy.
The Pivot controls determine the position of the pivot point used when rotating each copies.
When the Lock XYZ checkbox is selected any adjustment to the duplicate scale will be applied to all three axis simultaneously. If this checkbox is disabled the Scale slider will be replaced with individual sliders for the X, Y and Z scale.
The Scale controls tells duplicate how much scaling to apply to each copy.
Jitter
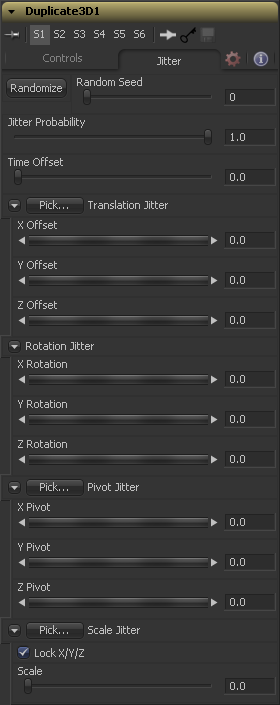
The Random Seed is used to 'seed' the amount of jitter applied to the duplicated objects. Two Duplicate tools with identical settings but different random seeds will produce two completely different results. Click on the randomize button to assign a random seed value.
Use the Time Offset slider to offset any animations that are applied to the source geometry by a set amount per copy. For example, set the value to -1.0 and use a cube set to rotate on the Y axis as the source. The first copy will show the animation from a frame earlier. The second copy will show animation from a frame before that, and so forth. This can be used with great effect on textured planes, for example, where successive frames of a clip can be shown.
Use these three controls to adjust the amount of variation in the translation of the duplicated objects.
Use these three controls to adjust the amount of variation in the rotation of the duplicated objects.
Use these three controls to adjust the amount of variation in the rotational pivot center of the duplicated objects. This affects only the additional jitter rotation, not the rotation produced by the Rotation settings in the Controls tab.
Use this control to adjust the amount of variation in the scale of the duplicated objects. Uncheck the Lock XYZ checkbox to adjust the scale variation independently on all three axis.
Tips for Duplicate 3D (edit)
| The contents of this page are copyright by eyeon Software. |


