Eyeon:Manual/Fusion 6/Tools
From VFXPedia
[ Main Manual Page ]
In Fusion a Tool is an operation that affects one or more images. Tools are responsible for loading images from disk, saving the results of the composition, merging multiple images together, and applying effects like blurs, glows, color corrections and more. This chapter discusses how to add tools to a composition, connect them together, and other basic operations.
Tools are often referred to by artists as nodes, tiles or operators. These terms are synonymous.
When a tool is added to a composition, a tool tile is added to the Flow editor, and the tools name appears in the Spline and Timeline editors as well. The flow is the only interface where an artist can easily manipulate the connections between tools, so typically this is where the majority of time is spent when working with tools.
Tool Basics
Tool Tiles
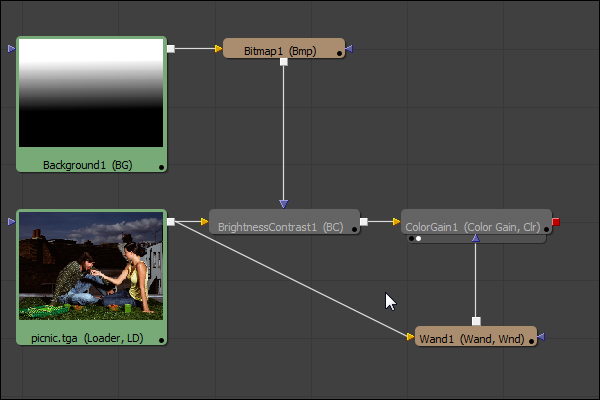
Almost every tool in a composition adds a tool tile to the flow. These tiles display show the inputs and output for the tool as small colored icons around the edges of the tile. The arrow-shaped nodes represent the image inputs, and the grey or red square nodes represent the tool's processed output.
The tools name will appear in the center of the tile. Tool tiles can be displayed as a small rectangle or as a larger square. The rectangular form displays the tools name in the center of the tile, while the square form shows either the tools icon or a thumbnail of the image it is outputting. More detail on setting the display options for the tool tiles can be found in the Flow Editor chapter.
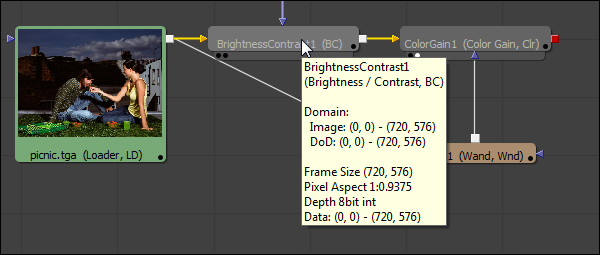
Hovering the mouse over a tool will display a pop up with more information about the tool and the image or data it is currently processing.
Inputs and Outputs
All tools have one output. They generally also have one or more inputs. Tools are connected together using by drawing connections between the output of one tool and the input of one or more tools. Inputs and Outputs can transmit multi-channel and single channel image data, 3d scene and material data, or particle information. The exact type of data required by each input and produced by each output is described in the tool reference documentation for the specific tool.
Tools cannot have more than one output.
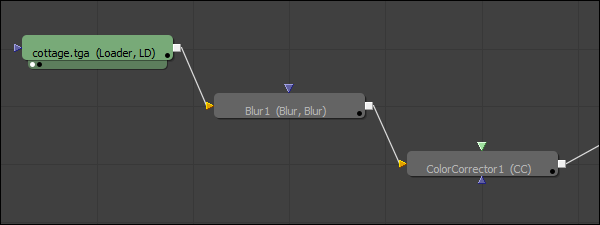
In the example image below a Loader tool's output is connected to a Blur tools input. The Blur tools output is then connected to a Color Corrector.
Holding the mouse pointer over a tool's input will cause a small pop-up containing the input's name to appear after a short time.
Tool Controls
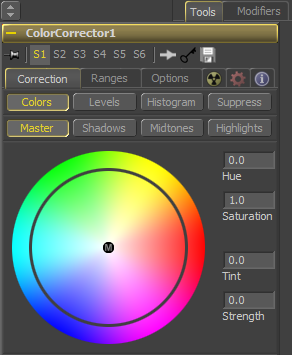
When a tool is selected it's options and settings will appear in the controls panel on the right side of the Fusion interface. See the controls panel documentation for more information.
Adding Tools
Tools are added to the composition's Flow Editor using one of the methods described below.
Using The Menus
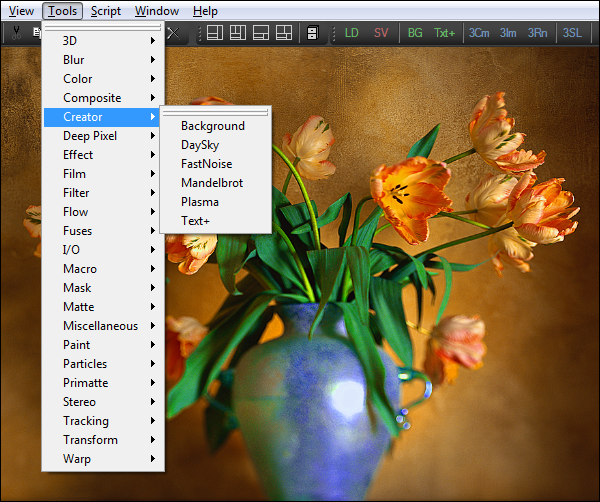
The Tool menu at the top left of the Fusion window displays every single tool known to Fusion. These tools are organized into general categories. To add a tool to the composition from this menu, navigate down the category list and select the desired tool.
If another tool is currently active on the flow, the new tool is automatically inserted downstream of the existing tool. The new tool is inserted into the existing connection fo the active tool.
If there is no tool currently active tool in the flow, the new tool will be placed in the first empty space in the flow.
Using The Toolbars
The Toolbars can also be used to add tools to the flow. These small bars display an abbreviated form of each tool's name (i.e. BC for the brightness/contrast tool). Hold the mouse over any toolbar button for a moment to display a pop-up with the unabbreviated name of that tool.
Clicking on a tool's button in a toolbar adds it to the composition exactly as if the tool had been selected from the Tool menu (as described above). The artist can also drag the button into the flow to position the tool manually. Dropping the dragged tool over the connection between tools will automatically insert the tool into the connection.
Tools can also be dragged from the toolbars into the left and right display views. This allows tools to be added to the project even if the flow is not currently visible. Tools that are dragged onto a view from the toolbar are added to the flow immediately after the currently viewed tool, regardless of the currently active tool.
For details on using and customizing the toolbars, refer to the toolbars chapter later in this manual.
Using The Context Menu
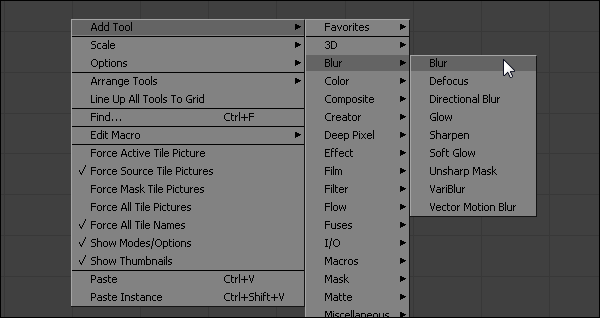
The Flow context menu (displayed when right clicking on an empty part of the flow) and the Tool context menu (displayed when right clicking on a tool tile) contain one or more sub-menus that can be used to add tools to the composition.
- Add Or Insert Tool
- Selecting a tool from the Add Tool or Insert Tool sub-menus will insert a tool into the flow at the position where the mouse pointer was when the context menu was opened.
- If the mouse pointer is positioned over a connection between two tools, the new tool will be inserted into the flow already connected to that pipe (between the existing tools).
- Replace Tool
- The Replace Tool sub-menu only appears when the context menu is opened by right-clicking directly on an existing tool's tile in the flow. Selecting a tool from the Replace menu will replace the current tool with a new one.
- If the new tool has controls with the same name as the existing tool, those settings will be copied into the new tool. For example, replacing a Transform tool with a DVE will preserve the values of the center, angle and size controls.
Using The Bins
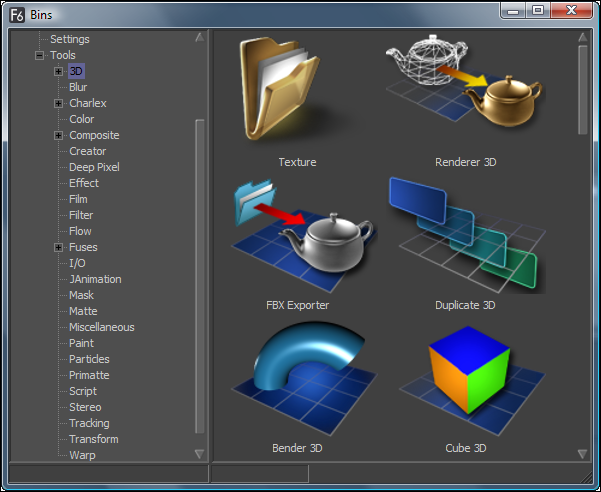
The Bins can display thumbnail icons for each of the tools and third party plugins that are known to Fusion. To toggle the bins on and off, select Ctrl + B from the keyboard, or select File -> Bins from the menu.
To add a tool from the bins to the project, drag and drop the tool's icon from the bin into the flow.
Bins can contain much more than just tools. They provide a useful place for storing shortcuts to saved tool settings, groups, macros and media, making the Bins more flexible than even toolbars. For more information, refer to the Bins chapter of this manual.
Using The File Browser
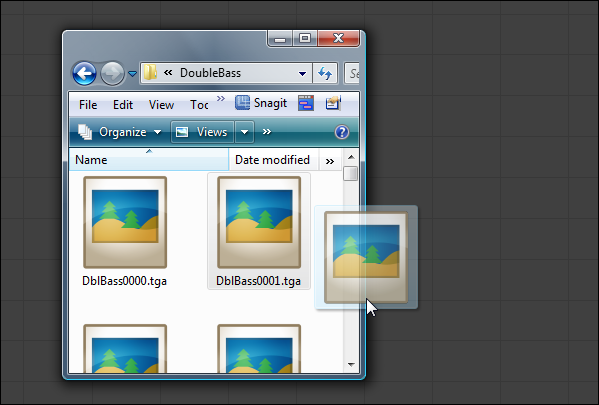
Dragging and dropping files from the operating system's file browser is an efficient way to quickly add footage or saved tool settings to a flow.
- Footage
- Dragging a file from the file browser to the flow will automatically add a loader to the flow, directly loading the file or file sequence. If multiple files are dragged into the flow, a separate loader is added for each file.
- Saved Tool Settings
- Dragging a tool's settings (.settings) file from the file browser to the flow will add the tool (or tools) saved in that file to the flow, configured with the settings that were saved into the file.
Selecting Tools
In order to move, copy, view or adjust a tools controls it is first necessary to select the tool.
This can be done by left-clicking directly on a tools tile, or on the title bar of the tools control window, or even by clicking on the tool's name in the Spline and Timeline Editors. A tool selected this way is known as an active tool. The tool tile for the active tool will turn bright yellow. Only one tool can be actively selected at a time.
One or more tools can also be selected by left clicking and dragging a rectangle that surrounds the tool or tools to be selected. The tools within the rectangle will be added to the selection group, and the color of the tool tiles will change to blue.
Tools can be added or removed from a selection group by holding down the CTRL key while making selections. A selection group may or may not contain an active selection tool.
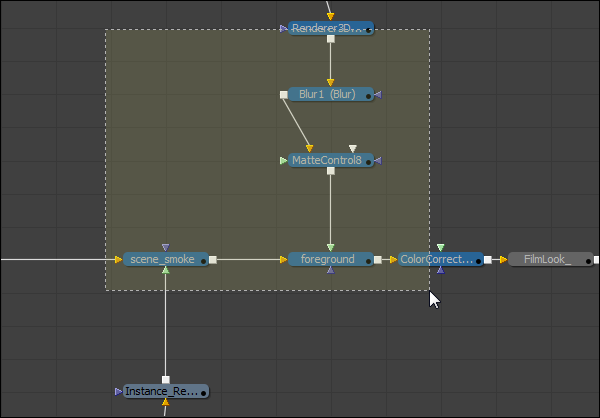
In the image below there are four tools selected, one of which is active. Two other tools are not selected.
Deleting Tools
To delete a tool or tools from the composition, first select the tool or tools and then press the Delete key on the keyboard. Alternately, right-click on one of the selected tools and then select Delete from the context menu that appears.
Moving Tools
To move tools around in the flow select one or more tools and then left-click and drag to move them to a new location. All of the currently selected tools will be moved. Larger flows can become disorganized and difficult to understand so several techniques for organizing the flow exist to assist.
Connecting Tools
Build a flow by connecting tool tiles together using their inputs and outputs. For example, to connect the output of a background tool to a color corrector tool, the artist would left-click on the output node on the Background tool and drag a connection over the input node of the Color Corrector. A thin line will be drawn between these two nodes to represent that connection.
Disconnecting Tools
The pipe connecting two tools is divided into two halves; the output half and the input half. To disconnect a tool's inputs or output, click on the input half of the connection between the tools (or click on the input arrow itself) and drag to pull the connection away from the tool.
An entire tool can be disconnect by holding down the Shift key while moving the tool. If the Shift key is still held when releasing the tool then all existing connections to that tool will be removed.
Replacing an Input
Dragging a connection over to an input that already has a connection will create a new connection that replaces the old one.
Branching
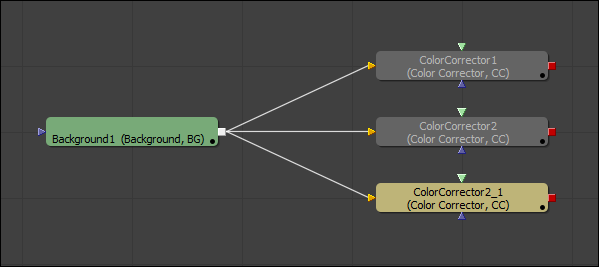
The output of any tool can be connected to multiple inputs on other tools, which is a technique called branching. Branching permits a single image to be simultaneously processed by two or more streams of tools.
Only one connection per input is allowed but a tool output can have any number of branches and outbound connections.
Copy, Cut and Paste
Copying Tools
There are four ways to copy the currently selected tools to the system clipboard.
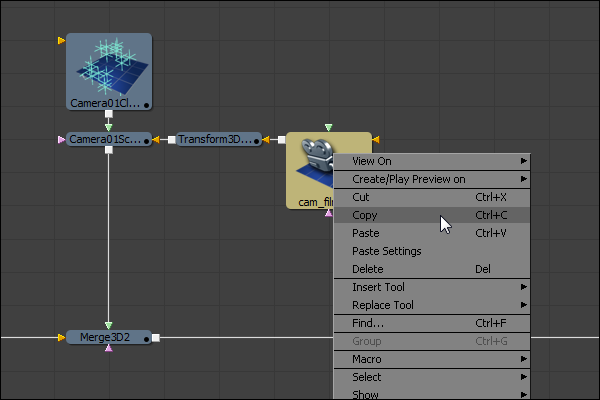
- select Copy from the tool context menu
- choose Edit -> Copy from the Fusion menus
- click on the Copy icon in the toolbar
- use the Ctrl-C keyboard shortcut
Cutting Tools
Cutting removes the selected tools from the composition places them in the system clipboard.
- select Cut from the tool context menu
- choose Edit -> Cut from the Fusion menus
- click on the Cut icon in the toolbar
- use the Ctrl-X keyboard shortcut
Pasting Tools
Pasting will make a copy the tools currently in the clipboard in the composition.
- select Paste from the flow context menu
- select Paste from the tool context menu
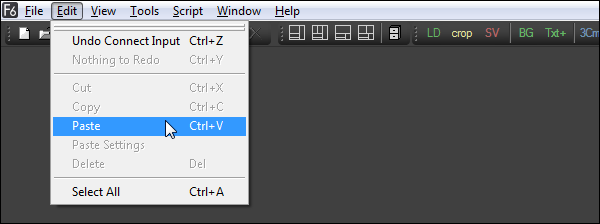
- choose Edit -> Paste from the Fusion menus
- click on the Paste icon in the toolbar
- use the Ctrl + V keyboard shortcut
The location of the pasted tools in the flow editor varies a lot depending on how the tools are pasted, and whether any tools are selected at the time. The best way to control where the tools appear is to either left-click in the flow and then use the CTRL + V keyboard shortcut, or to use the context menus. In either case, the tools will be placed at the location of the pointer when the mouse was clicked.
To replace a tool already in the flow with the contents of the clipboard, right-click directly on the tool to be replaced and then select Paste from the tool's context menu instead. To insert a tool from the clipboard between two other tools, right-click directly on the pipe between the two tools and select Paste from the context menu.
When the pasted tool is a creator (one that does not have any inputs) the pasted tool will automatically be combined with the active tool using a Merge tool. This auto-merge behavior can be changed with the Default Preference panel in the Global Preferences.
Pasting Tool Settings
Fusion also offers the ability to paste the settings of the tool from the clipboard into another tool. This function has no keyboard shortcut but can be accessed by right-clicking directly on the tool into which the copied settings will be placed.
When copying the settings from one tool to another, only the settings that match between two tools will be copied. For example, when pasting settings from a merge to a transform, the center control values, the blend and the size & angle controls will be copied from one to the other.
Using a Text Editor
As of Fusion 5.1 and later, tools can be copied from the flow and pasted into a text editor. This will display the tools' data as it would be saved to disk. The text can then be edited and pasted back into the flow, either as a new tool, or to replace the settings of an existing tool.
Renaming Tools
When a tool is added to the composition it will automatically be assigned a name that reflects the name of the tool followed by an number. For example the first Blur tool added to a composition will be called "Blur1".
A tool can be renamed by selecting rename from the tools context menu or by using the F2 keyboard shortcut. If multiple tools are selected a dialog will appear asking for a name for each tool.
Valid tool names use alphanumeric characters only and cannot contain any spaces. A tool name may not start with a number. This ensures that the tools name remains a valid identifier in the eyeonscript and python languages. Fusion will automatically replace spaces with _ and strip away invalid characters.
Tool Defaults and Settings
Saving New Defaults
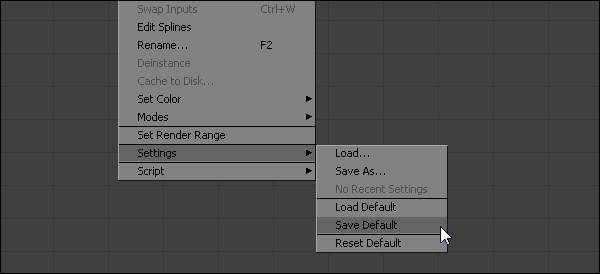
When a tool is added to the composition it's controls are set to the default values. The artist can override the default settings with their own custom settings by right clicking on the tool and selecting Settings -> Save Default.
When Fusion is constructing the tool it first looks for a .settings file with the same name of as the tool in the folder defined by the
For example, the default setting for a Blur tool would be called Blur_Blur.setting. The template for the name of the default settings file is INTERNALNAME_PUBLICNAME.settings. This is partly to ensure that plugin tools with identical names to Fusion tools do not overwrite the defaults for Fusion tools.
Removing a Saved Default
To remove a saved default for a tool either delete the .settings file from the Defaults folder or right click on the tool and select Settings -> Reset Default.
Saving Tool Settings
The current settings for one or more tools can be saved to disk for later retrieval. These settings can then be loaded from disk, added to the toolbars or bins and retrieved from the tool context menu.
The following methods can be used to save settings for one or more tools.
- Select and then right click on the tool(s) and then choose Settings -> Save As from the context menu. A file browser dialog will appear pointing at the folder specified by the
- Select and then drag the tool(s) into the bins. This automatically displays the same dialog described above, and also adds a shortcut for the saved settings into the bin.
Loading Saved Settings
To load a setting to an existing tool select Settings -> Load from the tools context menu and locate the .setting file using the Filebrowser. The Settings sub-menu also displays a list of the last few .settings created with that tool for easy access.
Saved settings can also be used to create new tools by dragging the settings file into the flow from the toolbars, bins or a standard file browser.
Custom Bin Icon for Saved Settings
To create a custom icon for a saved setting create a 32 bit bitmap (.bmp) with exactly the same name as the .settings file and save it to the same folder. The bitmap will be used as the icon for the file when it is added to the bins. The bitmap can be any size, but it is suggested to keep it small for performance.
| The contents of this page are copyright by eyeon Software. |
