Eyeon:Manual/Fusion 6/Time Stretcher
From VFXPedia
[ Main Manual Page ]
Contents |
Controls Tab
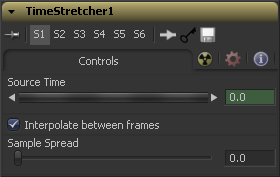
This control designates from which frame in the original sequence to begin sampling.
When a Time Stretcher tool is added to the flow, the Source Time control already contains a Bezier spline with a single keyframe set to 0.0. The position of the keyframe is determined by the current time when the tool is added to the flow.
(The Source Time spline may not be immediately visible until Edit is selected from the Source Time's context menu, or display all splines from the spline window's context menu.)
This toggles whether the Time Stretcher will interpolate between the next and previous frames.
This determines the strength of the interpolated frames on the current frame. A value of 0.5 causes 50% of the frame before and 50% of the frame ahead of the current frame to be blended with 0% of the current frame. A value of 0.25 would blend 25% of the previous and next frames with 50% of the current frame. Set this control over 0.25 only in extreme cases.
Example
Make certain that the current time is either the first or last frame of the clip to be affected in the project. Add the Time Stretcher tool to the flow. This will create a single point on the Source Time spline at the current frame. The value of the source time will be set to zero for the entire Global Range.
Set the value of the Source time to the frame number to be displayed from the original source, at the frame in time it is to be displayed in during the project.
To shrink a 100-frame sequence to 25 frames, follow these steps
- Change the Current Time to frame 0.
- Change the Source Time control to 0.0.
- Advance to frame 24.
- Change the Source Time to 99.
- Check that the spline result is linear.
- Fusion will render 25 frames by interpolating down the 100 frames to a length of 25.
- Hold the last frame for 30 frames, then play the clip backward at regular speed. Continue the example from above and follow the steps below.
- Advance to frame 129.
- Right-click on the Source Time control and select Set Key from the menu.
- Advance to frame 229 (129 + 100).
- Set the Source time to 0.0.
Tips for Time Stretcher (edit)
EyeonTips:Manual/Fusion 6/Time Stretcher
| The contents of this page are copyright by eyeon Software. |

