Eyeon:Manual/Tool Reference/Primatte
From VFXPedia
PRIMATTE V4
for
eyeon Fusion
Manual/Tutorial
Version 4.0
November 6, 2007
Main office:
IMAGICA Corp. of America
1840 Century Park East, #750 Los Angeles, CA, USA 90067
Primatte office:
IMAGICA Corp. of America
3113 Woodleigh Lane
Cameron Park, CA 95682
Phone: 1-530-677-9980
FAX: 1-530-677-9981
Cell: 1-530-613-3212
E-mail: sgross@imagica-la.com
Web Site: http://primatte.com
Contents
Part 1
2. Accessing Primatte from Fusion
- 3a. The Auto Compute tools...
- 3b. Step 1 - Select Background Color...
- 3c. Step 2 - Clean Background Noise...
- 3d. Step 3 - Clean Foreground Noise...
- 3e. Step 4 - Removing spill setup...
Part 2
7. External Garbage Matte Input
Part 3
8. Primatte Tools and Buttons Descriptions
- 8a. Primatte Tab
- 8b. Fine Tuning Tab
- 8c. Replace Tab
- 8d. Degrain Tab
- 8e. Matte Tab
- 8f. Sampling Selectors
Part 4
9. More About the Primatte Polyhedral Slicing Algorithms...
Proprietary Notices:
Primatte is distributed and licensed by IMAGICA Corp. of America, Los Angeles, CA, USA
Primatte was developed by IMAGICA Corp., Tokyo, Japan
Primatte is a trademark of IMAGICA Corp., Tokyo, Japan
Installation Information:
Please contact eyeon Software (http://www.eyeonline.com) for download, installation and licensing instructions.
Accessing Primatte V4 from Fusion:
Start up Fusion and load the foreground and background clips you will want to use...
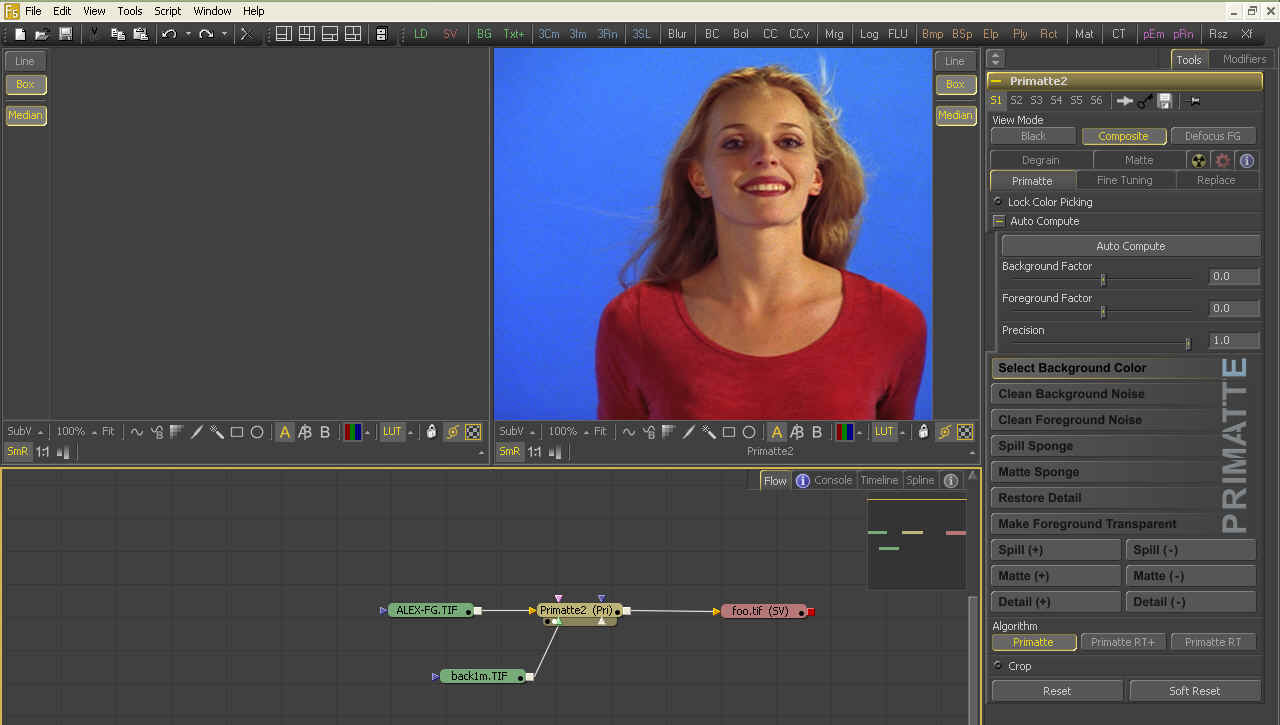
A basic Primatte configuration will look like this in the Fusion Flow Editor...
- NOTE: The brown/orange input, which is the background input on most Fusion tools is actually the foreground input on Primatte (technically it's the "primary" input, which for Primatte is the foreground image). There is also a background input (the secondary, or green one), a replacement image input (the pink one), a garbage matte input (the white one), and an overall post-masking input (the dark blue one).
- NOTE: If the background input is connected, but the replacement image input is not, then the image replacement mode will use the background image, and the keyed foreground will be placed over that background. If the replacement image input is connected, then it'll be used for image replacement, and the keyed foreground will still be placed over the image from the background input.
- If you click on the Primatte tool, your Fusion screen should look like this...
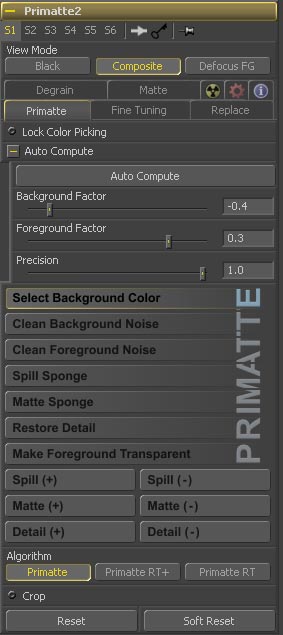
- The main Primatte interface window will initially appear like this...
- You are now ready to start using the Primatte chromakeying tool.
Basic Operation Tutorial
- NOTE: This describes the operation of the Primatte for Fusion tool. A more detailed explanation of how the Primatte algorithm actually works can be found in Section 9 of this manual.
Auto Compute Tools
- NOTE: This version of Primatte has a new feature that may eliminate the first three steps of using Primatte. It is called the Auto Compute button
 and may make your keying operation much easier. You can click on this button as a first step and it may automatically sense the backing screen color, eliminate it and even get rid of some of the foreground and background noise that would normally be cleaned up in Steps 2 (Clean Background Noise) and 3 (Clean Foreground Noise) of the Primatte operation. If you get good results then click here to jump ahead to the spill removal tools.
- NOTE: The Auto Compute button has two sliders that modify its behavior; the Background Factor
 and the Foreground Factor
  sliders. These may be moved to get better results with the Auto Compute button. This is useful when doing a set of clips that have similar backgrounds and lighting. Once the sliders are configured for a particular lighting set-up, al the clips will key quickly using just the Auto Compute button.
- If you don't get the results you wanted from Auto Compute, please continue from this point on to get the basic Primatte operation procedures...
The basic functionality for the Primatte interface is centered around the Operational Mode Selector buttons and the image window.
Select Background Color
There are four main steps to using the Primatte and Select Background Color is the first step. Ensure that the Select Background Color ![]() button is selected (it should be at this time as it is the default Operational Mode when you start Primatte).
button is selected (it should be at this time as it is the default Operational Mode when you start Primatte).
Position the cursor in the bluescreen area (or whatever background color you are using), usually somewhere near the foreground object. Sample the targeted background color. Release the mouse button and Primatte will start the compositing process. If the foreground shot was done under ideal shooting conditions, Primatte will have done 90-95% of the keying in this one step.
- NOTE: Primatte will work equally well with any color backing screen. It does not have to be a specific shade of green or blue.
- TIP: If you dragged the cursor in the blue area, Primatte averages the multi-pixel sample to get a single color to adjust to. Sometimes Primatte works best when only a single pixel is sampled instead of a range of pixels. The color selected at this point in the Primatte operation is critical to the operation of the spark from this point forward. Should you have difficulties further along in the tutorial after selecting a range of blue shades, try the Select Background Color operation again with a single dark blue pixel or single light blue pixel. You can also switch to the alpha channel view and click around in the bluescreen area and see the different results you get when the initial sample is made in different areas. Make sure the View Mode buttons at the top of the Primatte interface has the Black Mode selected.
- TIP: If you would rather make a 'rectangular or box selection' and not use the 'snail trail or line' sampling method, you can switch between the two methods by clicking on either the Line or Box buttons in the top right hand corner of the image window. The third method, Median, is the same as Line selection except that each point sampled is the result of taking a 3x3 region around the point the user clicked and then applying a median filter. This can potentially reduce any noisy pixels.
- TIP: If the foreground image has a shadow in it that you want to keep it in the composite, do not select any of the dark blue pixels in the shadow and the shadow will come along with the rest of the foreground image.
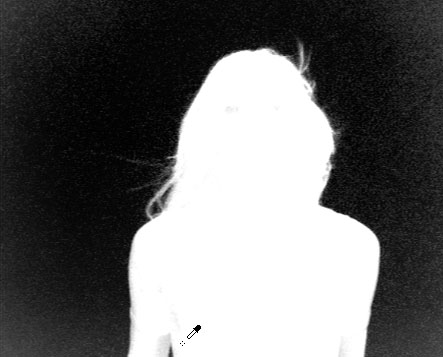
The second and third steps in using Primatte require viewing the Matte View in the monitor window. Make sure the View Mode buttons at the top of the Primatte interface has the Black Mode ![]() selected. Click on on the Alpha Channel/RGB
selected. Click on on the Alpha Channel/RGB ![]() button located below the image display area. The image displayed will change to a black and white ‘matte’ view of the image that looks like this...
button located below the image display area. The image displayed will change to a black and white ‘matte’ view of the image that looks like this...
Clean Background Noise
Change the Operational Mode Selector from Select Background Color to Clean Background Noise ![]() . If there are any white regions in the dark, `bluescreen area', it is 'noise' (or shades of blue that did not get picked up on the first sample) and should be removed. Move the cursor through these areas if using the Line sampling method (or make a box around them if using the Box Sampling method) and sample these whitish noise regions. When you let up on the pen or mouse button, Primatte will process the data and eliminate the noise. Repeat this procedure as often as necessary to clear the noise from the background areas. Sometimes increasing the brightness of your monitor or the screen gamma allows you to see noise that would otherwise be invisible.
. If there are any white regions in the dark, `bluescreen area', it is 'noise' (or shades of blue that did not get picked up on the first sample) and should be removed. Move the cursor through these areas if using the Line sampling method (or make a box around them if using the Box Sampling method) and sample these whitish noise regions. When you let up on the pen or mouse button, Primatte will process the data and eliminate the noise. Repeat this procedure as often as necessary to clear the noise from the background areas. Sometimes increasing the brightness of your monitor or the screen gamma allows you to see noise that would otherwise be invisible.
 | 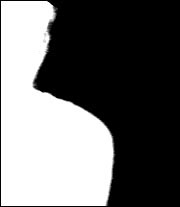 |
| Before Background noise removal | After Background noise removal |
- NOTE: You do not need to remove every single white pixel to get good results. Most pixels displayed as a dark color close to black in a key image will become transparent and virtually allow the background to be the final output in that area. Consequently, there is no need to eliminate all noise in the bluescreen portions of the image. In particular, if an attempt is made to meticulously remove noise around the foreground object, a smooth composite image is often difficult to generate.
- TIP: When clearing noise from around loose, flying hair or any background/foreground transitional area, be careful not to select any of areas near the edge of the hair. Leave a little noise around the hair as this can be cleaned up later using the Fine Tuning tool.
Clean Foreground Noise
- If there are dark regions in the middle of the mostly white foreground object, that is, if the key is not 100% in some portion of the targeted foreground, choose Clean Foreground Noise from the Operational Mode Selector pop-up menus. Use the same techniques as for Clean Background Noise, but this time sample the dark pixels in the foreground area until that area is as white as possible.
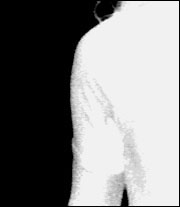 | 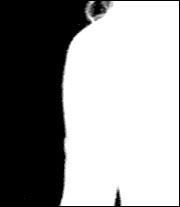 |
| Before Foreground noise removal | After Foreground noise removal |
Removing Spill Setup
- These were the steps necessary to create a clean 'matte' or 'key' view of the image. With this key, the foreground can be composited onto any background image. However, if there is `spill' on the foreground object from light that was reflected off the background, a final operation is necessary to remove that background spill get a more natural looking composite.
- For the fourth step in the Primatte operation, return the Composite view to the monitor window by clicking again on the Alpha/RGB toggle button which will now look like this ![]() . Now change the View Mode to composite
. Now change the View Mode to composite ![]() . This will turn off the alpha channel viewing mode and the monitor window will again display the Composite view with the background image..
. This will turn off the alpha channel viewing mode and the monitor window will again display the Composite view with the background image..
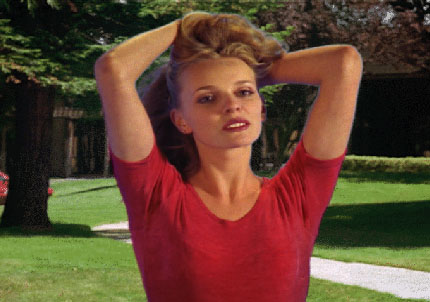
- The sample image below has gone through the first three steps and has examples of spill. Notice the blue fringe to her hair and a blue tint on her right cheek, arm and chest.
Spill Removal - Method #1
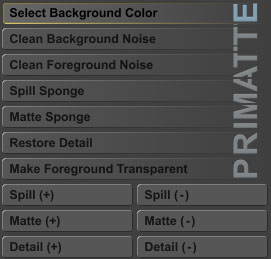
- There are three ways in Primatte to remove the spill color. The quickest method is to select the Spill Sponge ![]() button from the Operational Mode area and then sample the spill areas away. By just positioning the cursor over a bluish pixel and selecting it, the blue will disappear from the selected color region and be replaced by a more natural color. Additional spill removal should be done using the tools under the Fine Tuning tab or by using the Spill (-) feature. Both are explained further on in this manual.
button from the Operational Mode area and then sample the spill areas away. By just positioning the cursor over a bluish pixel and selecting it, the blue will disappear from the selected color region and be replaced by a more natural color. Additional spill removal should be done using the tools under the Fine Tuning tab or by using the Spill (-) feature. Both are explained further on in this manual.
- Note: All spill removal/replacement operations in Primatte can be modified using the Background Spill Replacement tools under the Replace tab. Spill can be replaced with either the complement of the background color, a solid color selected by the user or by colors brought from a defocused copy of the background. Depending on the spill conditions, one of these options should provide the results you are looking for. See the information in Section 5. Spill Replacement Options for more details.
- Note: Primatte's spill removal tools work on 'color regions'. In the image above, samples should be made on the light flesh tones, the dark flesh tones, the light blonde hair, the dark blonde hair and the red blouse color regions. One sample in each color region will remove spill from all similar colors in the foreground image.
- If the spilled color was not been totally removed using the Spill Sponge or the result of the Spill Sponge resulted in artifacts or false coloring, a fine-tuning operation Spill (-) tool should be used instead for a more subtle and sophisticated removal of the spilled background color.
Spill Removal - Method #2
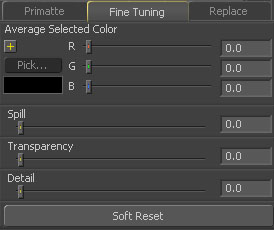
- Select the Fine Tuning ![]() tab in the Primatte interface. This will bring up an interface with these tools...
tab in the Primatte interface. This will bring up an interface with these tools...
- Using the zoom and pan capabilities of the Fusion application, zoom into an area that has some blue edges or spill.
- Using the cursor, sample a color has spill in it. When you let up on the pen or mouse button, Primatte will register the color selected (or an average of multiple pixels) in the Pick... Color Chip ![]() . For most images, the Spill
. For most images, the Spill ![]() slider is all that is required to remove any remaining bluespill. The more to the right the slider moves, the more background screen color will be removed from the sampled pixels. The more to the left the slider moves, the more the selected pixels will move toward the color in the original foreground image.
slider is all that is required to remove any remaining bluespill. The more to the right the slider moves, the more background screen color will be removed from the sampled pixels. The more to the left the slider moves, the more the selected pixels will move toward the color in the original foreground image.
- Note: When using the slider in the Fine Tuning tab to remove spill, spill color replacement will be replaced based on the setting of the Spill Replacement options . For more information on these tools, see the section of this manual on Spill Replacement in Chapter 8. Primatte Tools and Buttons.
- Note: In the Fine Tuning mode, re-computation of the composite image may not be accomplished if the pressure-sensitive pen is released too slowly.
- TIP: It is better to make several small adjustments to the bluespill areas than a single major one.
- You can use the other two sliders in the same way for different key adjustments. The Detail ![]() slider controls the matte softness for the color which is closest to the background color. For example, you can recover lost rarefied smoke in the foreground by selecting the Fine Tuning mode, clicking on the area of the image where the smoke just starts to disappear and moving the Detail slider to the left. The Transparency
slider controls the matte softness for the color which is closest to the background color. For example, you can recover lost rarefied smoke in the foreground by selecting the Fine Tuning mode, clicking on the area of the image where the smoke just starts to disappear and moving the Detail slider to the left. The Transparency ![]() slider controls the matte softness for the color which is closest to the foreground color. For example, if you have thick and opaque smoke in the foreground, you can make it semi-transparent by moving the Transparency slider to the right after selecting the pixels in the Fine Tuning mode.
slider controls the matte softness for the color which is closest to the foreground color. For example, if you have thick and opaque smoke in the foreground, you can make it semi-transparent by moving the Transparency slider to the right after selecting the pixels in the Fine Tuning mode.
- TIP: If the foreground image changed color dramatically during the fine tuning process, you can recover the original color by selecting an area of the off-color foreground image and moving the Spill slider slightly to the left. This may introduce bluespill back into that color region. Again, use the Fine Tuning option to suppress the blue, but make smaller adjustments this time.
Spill Removal - Method #3
- This method uses a fairly recent Primatte tool that is covered in detail in the next section Chapter 4. Repeatable Sampling Tools.
- NOTE: If these final 'spill suppression' operations have changed the final compositing results, you may have to return to earlier operations to clean up the matte. If the composite view looks good, it is a good idea to go back and take a final look at the alpha channel view. Sometimes in the Primatte operation, a 100% foreground area (all white) will become slightly transparent (gray). You can clean those transparent areas up by using the Matte Sponge
 tool. After selecting the Matte Sponge tool, just click on the transparent pixels and they will become 100% foreground. All of the spill-suppression information will remain intact. Alternatively, you can go to the alpha channel view and then using the Fine Tuning option, select those transparent areas and move the Transparency slider slightly to the left. This will move that color region from 0-99% foreground with spill suppression to 100% foreground with spill suppression and should solve the problem. The Matte (+) tool will also work to solve this problem.
