Eyeon:Manual/Fusion 6/Text 3D
From VFXPedia
[ Main Manual Page ]
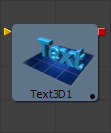
The Text3D tool is a 3D version of the 2D Text tool. The controls for this tool are mostly identical to the controls for the 2D version in almost all respects, except that it currently only supports one shading element. See Text Plus for more details on the controls found in this tool.
The Text 3D tool was based on a tool which pre-dates the Fuson 3D environment. As a result, some of the controls found in the basic primitive shapes and geometry loaders are not found in this tools controls. Specifically many of the material, lighting and matte options are not found in this tools controls. The Text 3D tool has a built in material, but unlike the other 3D tools it does not have a material input. The shading tab contains controls to adjust the diffuse and specular components. To replace this default material with a more advanced material follow the Text Plus tool with a Replace Material 3D tool. The Override 3D tool can be used to control the lighting, visibility and matte options for this tool.
One thing to beware of when network-rendering a comp that contains a Text3D tool is that each machine that does not have the font installed will fail. Fusion can not share or copy fonts to renderslaves due to legal issues.
External Inputs
- Text3D.SceneInput
- [ orange, required ] This input expects a 3D scene.
- Text3D.ColorImage
- [ orange, required ] This input expects a 2D image. It is only visible when the Image mode is enabled in the Material section of the Shading tab.
- Text3D.BevelTexture
- [ orange, required ] This input expects a 2D image. It is only visible when the Image mode is enabled in the Bevel Material section of the Shading tab.
Text
Extrusion
An extrusion of 0 produces completely 2D text. Any value greater than 0 will extrude the text to generate text with depth.
Increase the value of the Bevel Depth slider to bevel the text . The text must have extrusion before this control has any effect.
Use the Bevel Width control to increase the width of the bevel.
Use this control to adjust the smoothing angle applied to the edges of the bevel.
Use these checkboxes to enable beveling for the front and back faces of the text separately
Shading
Reducing the material's Opacity will decrease the color and alpha values of the specular and diffuse colors equally, making the material transparent and allowing hidden objects to be seen through the material.
Deselecting this option will reveal a second set of material controls for the beveled edge of the text.
Material
To use a solid color texture select the Solid mode. Selecting the Image mode will reveal a new external input on the tools tile that can be connected to another 2D image.
Specular Color determines the color of light that reflects from a shiny surface. The more specular a material is, the glossier it appears. Surfaces like plastics and glass tend to have white specular highlights, whereas metallic surfaces like gold have specular highlights that tend to inherit their color from the material color. The basic shader material does not provide an input for textures to control the specularity of the object. Use tools from the 3D Material category when more precise control is required over the specular appearance.
Specular Intensity controls how strong the specular highlight is. If the specular intensity texture port has a valid input, then this value is multiplied by the alpha value of the input.
Specular Exponent controls the falloff of the specular highlight. The greater the value, the sharper the falloff, and the smoother & glossier the material appears. The basic shader material does not provide an input for textures to control the specular exponent of the object. Use tools from the 3D Material category when more precise control is required over the specular exponent.
This control determines the source of the texture applied to the material. If the option is set to Tool then an input will appear on the tool tile that can be used to apply the output of a 2D tool as the texture. Selecting Clip will expose a file browser that can be used to select a image or image sequence from disk. The Brush option will provide a list of clips found in the Fusion:\Brushes folder.
Bevel Material
This reveal only appears when the Use One Material checkbox control is selected. The controls under this reveal are an exact copy of the Material controls above, but are applied only to the beveled edge of the text.
Transform
These controls can be used to transform the material applied to the text. See the Text Plus tool for a complete description of these tools.
Tips for Text 3D (edit)
Character Level Styling
The Text 3D tool doesn't support Character Level Styling directly. You have to create a Text+ tool first and modify its text field with a character level styling modifier. Then either connect the Text 3D's text field to the modifier that is now available or copy the Text+ tool and paste its settings to the Text 3D tool (right-click -> paste settings).
Uncapped 3D Text
To hide the front face of extruded text, uncheck "Use One Material" on the Shading tab and reduce the 1st material's color to black including its alpha value.
-- mentioned by Jeff Krebs on the Laffey list
| The contents of this page are copyright by eyeon Software. |


