Eyeon:Manual/Keying
From VFXPedia
Contents |
Keying Introduction
Most footage captured with a camera does not contain an alpha channel. This information is required if an element of a scene is to be isolated for further use in a composite.
Prior to the digital age of special effects, transparency information for video and film was created using a process known as matting, where a cutout of the section of the image that was to be isolated was laboriously created by hand, then used to create a negative that contained only the required elements for the effect.
Eventually, techniques for isolating elements of a scene were developed around a process that involved shooting the element against a color-saturated screen. That color was then used to create the matte channel with the assistance of customized hardware designed to isolate that color and remove it from the scene.
Matte channels produced in this fashion were called keys and the matte created was often called the key channel.
These terms are still used in the digital era (often interchangeably) to refer to any process that results in the creation of transparency information from video or film images. Keying is one of the most common tasks performed by a visual effects artist.
A variety of methods for creating mattes and keys are included with Fusion. This chapter discusses the various methods of creating a matte in Fusion. It is intended to help a compositor decide which is the correct tool, or combination of tools, for the job.
Types Of Keyers
Ultra Keyer
The Ultra Keyer is specifically optimized for the creation of an alpha channel from an image shot against a highly-saturated blue or green background. The key color (green or blue) is used to identify regions of the image intended to be transparent.
See the Ultra Keyer tool in the Tools Reference.
Chroma Keyer
The Chroma Keyer functions in much the same way as the ultra keyer, only more generalized. The chroma keyer is capable of creating an alpha channel from any color. This tool is most often used to create mattes from computer-generated images that lack an alpha channel but have a fairly pure background color.
See the Chroma Keyer tool in the Tools Reference.
Luma Keyer
The Luma Keyer is used to create an alpha channel from an image based on the luminance or brightness of the image. Dark pixels in the image are made transparent in the alpha channel and bright regions are made solid, with values becoming transparent to a greater or lesser degree based on the brightness of the pixel. The luma keyer is most often used to generate mattes from video, film and computer-generated images that contain a black background. The name of the luma keyer is a bit misleading, especially since this keyer can use virtually any channel of the image to create a matte.
See the Luma Keyer tool in the Tools Reference.
Difference Keyer
The Difference Keyer generates an alpha channel based on the differences between two images. Normally, one image is a clean plate, with the subject missing from the frame. The second image contains the exact same shot but with the subject present. This keyer is excellent for generating a rough alpha channel from images where mounting a blue screen is inconvenient or impossible.
Use of the difference keyer requires that the camera position, angle and scenic lighting remain exactly consistent between the two images to create reasonable results. For this reason, its use is usually restricted to static camera shots or scenes that are shot with complex and expensive motion tracking devices.
See the Difference Keyer tool in the Tools Reference.
Matte Tool
The Matte Tool is provided to assist with making modifications to an image's matte alpha channel. It can be used to clamp or blur an existing alpha channel, and is often used as a host for creating garbage mattes or removing rigging and other undesirable elements that cannot be isolated via keying.
See the Matte Control tool in the Tools Reference.
Using Ultra Keyer
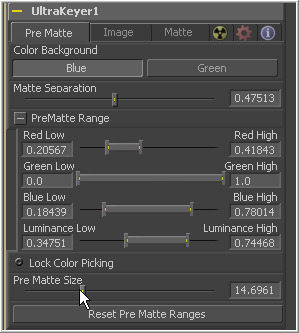
To use an Ultra Keyer to create a matte, add the Ultra Keyer (Uky) to the flow and connect the image to be keyed to its input. Use the buttons labeled Color Background to identify the color of the background, either green or blue. If the image background is not green or blue, use the Chroma Keyer (Cky) instead of the Ultra Keyer.
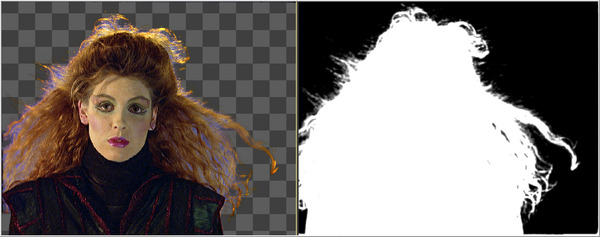
A rudimentary matte will be created based on the pure color values of the key color present in the scene. To see the alpha channel in the display views, press the A key or click the Alpha Channel button (the white A) in the view's toolbar.
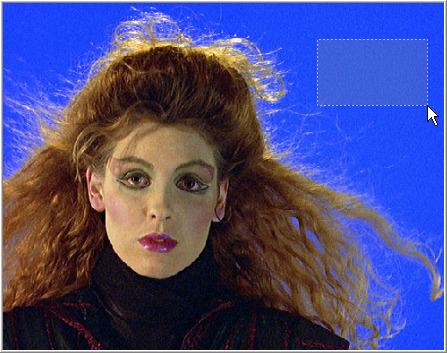
Make sure that the ultra keyer tool is selected in the flow and click-draw a rectangle around a portion of the blue or green colors to be removed from the scene.
Continue to select from the background colors until a reasonably large amount of the image has been keyed.
It is often useful to keep an eye on the key further downstream by displaying the tool that combines the keyed image with the intended background (almost always a merge tool). Locate or create this tool and view it in the second view or video monitor.
Once the image background contains a mostly-black alpha channel, select the Lock Color Picking checkbox to prevent the accidental selection of additional colors from the scene. Do not be surprised if the key is not perfect yet. A fair amount of tweaking will likely be required. The matte and image tabs contain additional controls for further modifications.
Using Chroma Keyer
Functionally, the Chroma Keyer is virtually identical to the Ultra Keyer. Colors are selected for removal from the matte using the same technique described above. Where the Ultra Keyer is optimized for blue or green backgrounds, the Chroma Keyer tool is for creating a key from any color (or chroma) range.
The chroma keyer also provides the ability to increase the amount of colors included in the key via the Soft Range Slider. Use this control with the chroma keyer to grow the matte to include color variations difficult to isolate with a region selection. It will otherwise behave in exactly the same way as the ultra keyer.
Using The Luma Keyer
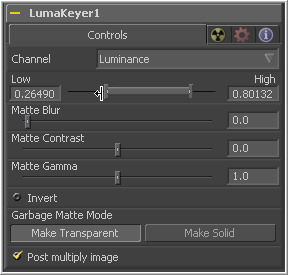
To use a Luma Keyer to create a matte, add the luma keyer to the flow and connect the image to be keyed to its input. Although the name of the tool implies that only the luminance channel of the image can be used to create the matte, any of the available color channels can be used. Select the desired channel from the drop-down menu.
Adjust the Low control to force more dark colors to transparent and the High control to increase the range of the image made completely opaque.
Use the Matte Blur, Contrast and Gamma controls provide further opportunities for adjustments to improve the result.
Using The Difference Keyer
To use a Difference Keyer to create a matte, add the difference keyer to the flow and connect the clean plate (without the subject) to its background input. Connect the image that contains the subject to the foreground.
The clean plate may consist of a single image, while the subject plate may be many frames long. Use the Extend Last Frame feature of the loader to increase the length of the clean plate to match the subject plate's length.
The Range control of the difference keyer is used to adjust the amount of variation permitted by the difference keyer before a pixel is marked as opaque in the alpha channel. Increase this control to include more of the image in the matte. Decrease it to eliminate noise from the background.
Adjust the matte via Matte Blur, Matte Contrast and Matte Gamma controls.
Matte Controls
Matte Blur
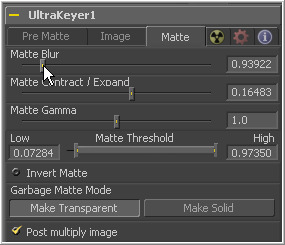
The Matte Blur control can be used to apply a slight gaussian blur to the alpha channel generated by the keyer.
Expanding Or Contracting The Matte
The Matte Contract/Expand slider affects the semi-transparent pixels in the matte, pushing them toward white (expand) when the values are above 0 and toward black when it is below 0. If the matte does not have a very soft edge, use the matte blur control to create one before using this control.
Use the Expand/Contract control in small amounts to soften the hard edges on the matte, and contract or expand the matte to better fit the subject. Often, significantly contracting the matte and blurring it work well in combination to blend the edges of the subject into the new background. Completely opaque or completely transparent pixels will be unaffected by this control.
Closing Holes And Removing Grain From The Matte
Portions of the image that contain semi-transparent areas will occasionally have large holes introduced during the keying process. Decrease the High value of the Matte Threshold control to close holes in semi-transparent regions, or try increasing the Matte Gamma value.
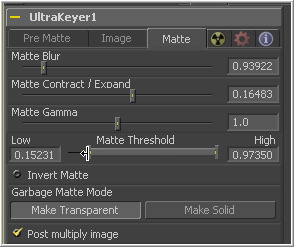
The keyer may not completely remove the background, peppered with slight grain that keeps it from being completely transparent. Increase the Low value of the matte threshold control slightly to help reject these stray pixels.
Increasing the low threshold to .1, for example, will cause any pixels in the matte that were less than .1 to become clipped to 0, or black. Setting the high threshold to .9 will cause any pixels in the matte greater than .9 to become clipped to 1, or white.
Spill Suppression
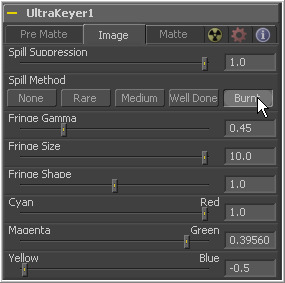
Spill Suppression can be applied to remove unwanted reflections of the background color on the subject. Generally, the spill suppression slider should be set to maximum and a mode is selected from the available options. Once an appropriate mode has been found, adjust the slider down to fine-tune the effect further.
Blue screens most often require the use of the Medium or Well Done modes, while green screens rarely require much more than Medium to accomplish their task. If the shot is truly difficult, an additional mode, Burnt, is available.
Due to the effect of this control on the colors of the image, color correction of the subject is almost always required after the application of stronger methods of spill suppression.
Fringe Color Correction
Adjust the various Fringe controls to brighten, darken and apply color correction to the extreme edges of the matte. This will also reintroduce fine detail that has been removed from the matte, such as hair.
Confirming The Key
Once a satisfactory result has been obtained of one frame, test other frames to confirm that the matte works for all of the frames in the shot. If conditions such as lighting change during the shot, it may be necessary to animate some of the parameters and tweak the matte further.
Remember that any of the controls can be animated to adapt to changes over time. These controls are described in greater detail in the tools reference later in this manual.
Post Multiplication
The alpha channel generated by the keyers is additive by default. To create a subtractive alpha channel instead, deselect the Post Multiplication checkbox in the keying tool's control header.
Post multiplication is used to create an additive alpha channel, which is the kind of alpha channel expected by the merge tool in its default mode. Post multiplication refers to the process of multiplying the color values of a pixel by its alpha values to generate a legally additive image.
Convert a subtractive image to an additive image by passing it through the Matte Control tool and selecting the Post Multiply Image checkbox.
Garbage Mattes
Garbage Mattes are used to manually include or exclude an area of the image in the keyed matte channel. The most common use for garbage mattes is to remove rigging and set pieces that cannot be keyed from the image using traditional methods.
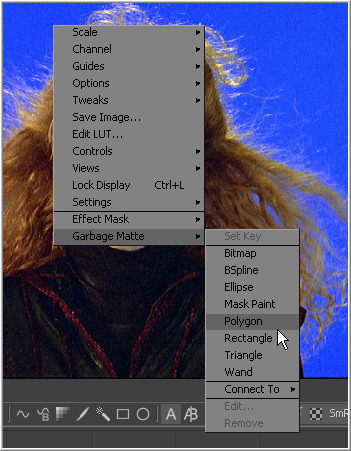
Create garbage mattes using the standard masking tools. Instead of connecting them to the effect mask input on the tool's tile, use the grey garbage matte input that is visible on all tools in the matte category.
A garbage matte can be set to make all of the pixels it contains completely transparent or completely opaque. Select which operation will be applied using the Garbage Matte button array in the tool's controls.
Make Transparent will set the alpha of the pixels in the region enclosed by the garbage matte to black (transparent). Make Solid will cause the alpha of the pixels enclosed by the matte to become white (opaque).
The garbage mattes applied to a tool all have to operate in the same mode. To mix transparent garbage mattes with solid ones, use a separate matte tool after the keyer.
Rotoscoping
Frequently, footage will require a matte and no reasonable method of keying will present itself. In such cases, it becomes necessary to create a matte manually using animated garbage mattes.
This process is commonly referred to as Rotoscoping, and is usually the most time-consuming portion of any compositor's job.
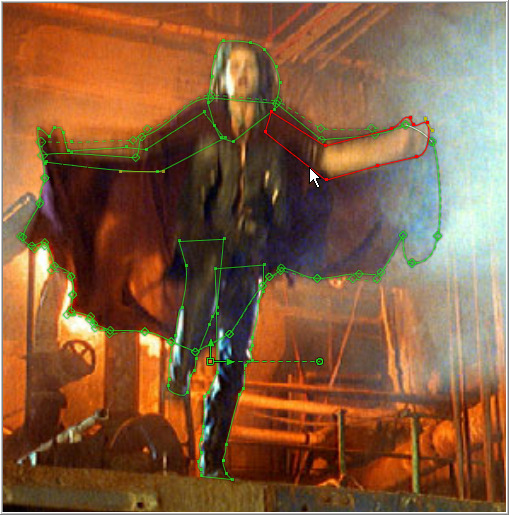
Almost all rotoscoping in Fusion is performed using a matte tool with animated polygonal garbage mattes.
Before creating the mask, examine the footage and break the subject of the matte down into several simpler shapes. Use multiple masks in combination to perform the rotoscoping.
This will allow for corrections and changes to the matte more rapidly, helping to understand the matte more clearly at a glance.
For example, when rotoscoping an actor from a scene, the task is easier to understand if separate masks are used for the arms, legs, torso and head.
If sections of the matte need to be transparent, use an additional matte for these areas. It is useful to use an overlapping mask set to subtract mode to cut holes in the image, rather than creating one overly-complicated matte.
Make several passes on the image sequence. At first, create and animate only the roughest shape of the subject, using the minimum number of points possible. Use additional passes through the footage to refine the movement and shape of the mask, until the result is correct. Try to avoid setting keys at every single frame.
Combining Color And Alpha Channels
Occassionally, the keying and rotoscoping has been completed in advance and the alpha channel is provided with the footage. Often, this information is contained in a separate file or image and is referred to in linear edit suites as a downstream key.
To use these files with Fusion, it is necessary to combine the alpha channel files with the associated image. The matte tool contains a foreground input intended to help with combining alpha channels from a different image.
When an image is provided and it contains the alpha channel as a greyscale image in the RGB channels, copy these to the alpha channel using a matte tool. Connect the target sequence to the matte tool's background input and connect the alpha image to the foreground input. Change the Matte Combine drop-down menu to Combine Green and set the Combine Op to Copy.
In the above example, the green channel was used, although the red or blue would have worked just as well (generally all three channels are identical in a greyscale image containing an alpha channel).
