Third Party Fuses/FlareCircle Description
From VFXPedia
[ Main Manual Page ]
| FlareCircle_v1_61 | Download |
Draws a polygon or circle commonly found in lens flares. Far from Knoll or Optical Flares, but works in 64bit and it's a nice example of Fusion's shape-drawing API that can be accessed by Fuses and C++ plugins.
The flare can be positioned more exactly than Fusion's built-in lens flares (using the Hotspot tool) and it has additional features like an outer border, variable softness and chromatic aberration. Use multiple FlareCircles connected to a main HotSpot tool to mimic real-life lensflares or feed a single sprite into a "fairy dust"-style particle system.
If you have a lot of flares, things can get quite slow. It's usually wiser to blur the result rather than apply softness to every single flare. You can also work on a scaled-down background. The whole Fuse is resolution-independent so you can also make this decision retroactively. Also, this Fuse supports high and low quality rendering. The latter does all internal rendering in half-res. Together with Fusion's auto-proxy feature, you can usually drag around several connected flare nodes quite interactively.
This Fuse also has two auxilliary outputs that other tools can connect to: the flare's actual position and the angle between flare and lightsource. This way you can augment your flares by hand-drawn or photographed sprites and glows. Check out FlareMulti and FlareStar for additional ways to draw lens flares.
Since version 1.5 this Fuse supports DoD and thus requires Fusion 6.2 or later. It also fixes the position of the secondary flare when the axis value is off-center. Here's the old version 1.3 in case you still need it.
Download stereoscopic flare example comp
Main Inputs
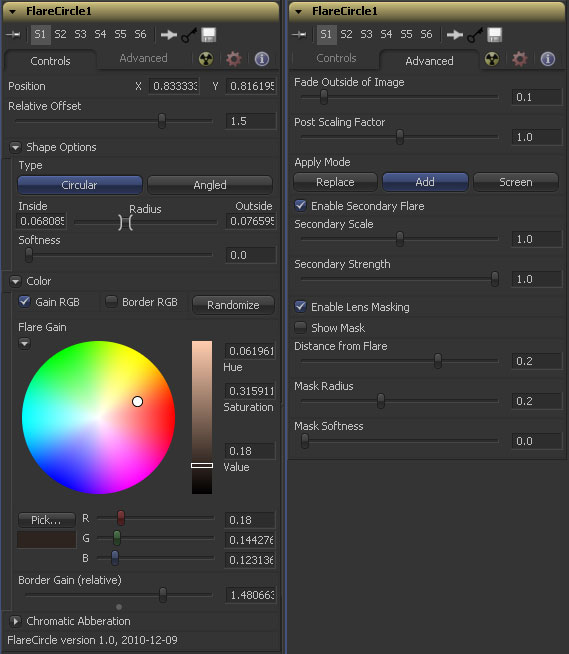
Controls Tab
Put this where the light source is. Multiple flares should obviously share the same published point or animation path.
The "pivot" of the lens flare effect. Usually at 0.5/0.5 but if your plate is cropped or you want to use the Fuse for stereoscopic work, adjust this.
Shifts the flare along a line between Position and Axis which defines the way it moves in relation to the light source.
0 = on light source, 1 = centered, 2 = opposite of light source
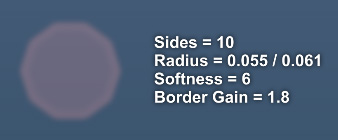
Toggles between a circular flare and an imitation of a camera shutter with discernible shutter blades.
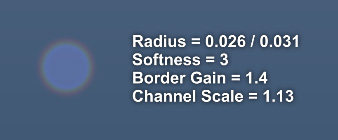
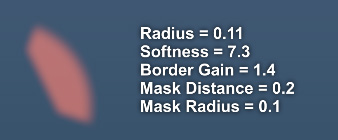
Define the size and border thickness of the flare by adjusting the inner and outer radius.
Blurs the flare. If you use multiple flares, you can speed up rendering by blurring them together using a Blur tool instead of this value.
Click this button to randomize hue and saturation of the flare while keeping its luminance.
Color of flare. Use the Gain RGB checkbox to toggle between a color picker and a single luminance slider (like in the eLinBC Fuse).
Brightness of flare outline (if outer radius > inner radius). This is relative to the main color. Use the Border RGB checkbox to toggle between a color picker and a single luminance slider.
- Channel Scale
- Scales red and blue in relation to green channel.
- Channel Shift
- Move red and blue towards and away from center.
To make a lens flare more realistic, it has to change its intensity depending on the light source location. This dropdown allows you to choose between a couple of different modes:
- Fade Outside of Image
- the traditional behavior, where the flare gets weaker when the light source moves outside the image.
- Edge Flare
- the flare will be strongest when the light source is exactly on the image edges and will fade once the light moves towards the center or outside the image.
- Center Flare
- flare will only be visible if the light source is close to the center (threshold is defined by the next option).
- Linear/Quadric Falloff
- these options don't use a user-defined threshold. Instead, the flare will fade depending on the distance (or distance squared) of the light source from the image center.
When the light source moves outside of the image the flare will get weaker. This slider determines the distance until the flare disappears (0 = never fade). Also used for Center Flare and Edge Flare falloff modes.
Legacy Option. Shrinks or enlarges the whole flare. This is an easy way to speed up rendering by scaling up smaller flares. This option was originally necessary to prevent clipping of flares when fuses didn't support DoD yet.
Usually you'll want to add the flare and work in linear gamma space. You can screen it if you need to. "Max" will use the Lighten blend mode. Replace will blank the input image before drawing the flare.
This will create a secondary flare opposite the first one. You can scale and fade it independently although it will still be affected by the Occlusion map and the Fade Outside option.
Some flares, especially at the opposite side of the light source, will get clipped by the lens body. Use this feature to create such a clipping mask. You can temporarily view the mask to help with positioning. Note: since version 1.6, the mask overlay will no longer be rendered. It's a viewer overlay instead.
Development History and Discussion on PigsFly
--Tilt


