< Previous | Contents | Next >
— Choose File > Export Project, and when the Save dialog appears, choose a location, enter a name, and click Save. The result is a self-contained file with a .drp file suffix saved at the location you chose.
— Select the Export button at the bottom of the Project Manager, and when the Save dialog appears, choose a location, enter a name, and click Save. The result is a self-contained file with a .drp file suffix saved at the location you chose.
![]()
— Right-click a Project icon or Item in the Project Manager, then choose one of the following commands;
— Export Project: Exports project data with no LUTs and no stills. Best when you need to export the smallest possible file.
— Export Project With Stills and LUTs: Exports the project, including both still frames in the Gallery and LUTs used in grades. Best when you want to export the most self-contained file and you can’t guarantee the recipient will have the same LUTs you do.

TIP: You can export multiple projects from the Project Manager at the same time by either command-clicking or lassoing the projects, right-clicking on one of them, and selecting Export Projects from the drop-down menu. All projects will be saved in the same location.
TIP: You can export multiple projects from the Project Manager at the same time by either command-clicking or lassoing the projects, right-clicking on one of them, and selecting Export Projects from the drop-down menu. All projects will be saved in the same location.
TIP: You can export multiple projects from the Project Manager at the same time by either command-clicking or lassoing the projects, right-clicking on one of them, and selecting Export Projects from the drop-down menu. All projects will be saved in the same location.
— When the Save dialog appears, choose a location, enter a name, and click Save. The result is a self- contained file with a .drp file suffix saved at the location you chose.
Project Manager View Options
Four buttons at the top right let you control how projects are viewed in the Project Manager.

Select Thumbnail or List View
— Zoom slider: (Only appears in Thumbnail view) Lets you adjust the size of the thumbnails in Thumbnail view.
— Project Sort Order drop-down: (Only appears in Thumbnail view) Lets you choose the sort order of projects in Thumbnail view.
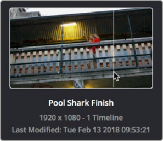
— Information: (Only appears in Thumbnail view) Lets you show or hide additional project information displayed underneath each project’s thumbnail, including the frame size, number of timelines within, and when that project was last modified.
— Thumbnail view: Each project is represented by a large image that can be hover-scrubbed to reveal five representative images from that project.
![]()