< Previous | Contents | Next >
Connecting the Speed Editor via USB-C
Connecting the DaVinci Resolve Speed Editor directly via USB-C is the simplest and most reliable way to use the Speed Editor on your Windows or Mac computer. Simply connect the Speed Editor to your computer’s USB type C port, using a USB-C cable. No additional configuration is required. The Speed Editor will show up automatically in DaVinci Resolve, and the DaVinci Control Panels Setup applications, ready for use.
Charging the Speed Editor
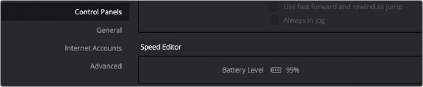
Connecting the DaVinci Resolve Speed Editor via USB-C will also charge the unit’s internal battery allowing it to be used wirelessly via Bluetooth. You can check the current Battery Level of the Speed Editor by going to the Control Panels section of the System Preferences.
![]()
The Speed Editor Battery Level indicator in the System Preferences.
Updating the Speed Editor Firmware
From time to time, Blackmagic updates the functionality of the Speed Editor through firmware changes. New firmware can be checked for and installed by opening the separate DaVinci Control Panels Setup utility through the menu Help > DaVinci Control Panels Setup. The speed editor must be connected via USB to update the firmware.
Troubleshooting the Speed Editor via USB
If you are having difficulty using the DaVinci Resolve Speed Editor via direct USB connection, try the following troubleshooting tips:
— Make sure you are using DaVinci Resolve 17 or higher. The Speed Editor is not compatible with any Resolve version lower than 17.
— Check whether the USB-C cable is properly connected on both ends.
— If the Speed Editor is connected to a USB-C Hub, try bypassing the hub and directly connect it to the computer.
— Try bypassing any USB Type-C to Type-A adapters if possible.
— Try using a different USB-C cable.
— Make sure you are using the correct USB-3 ports on your computer. The DaVinci Resolve Speed Editor does not work on USB 2 ports or below.