< Previous | Contents | Next >
When you have finished creating a composition in Fusion, you need to render the files out to disk for playback and integration into a larger timeline. Fusion Studio and the Fusion page in DaVinci Resolve use very different workflows for rendering. To finish a composite in the Fusion Page, you use a MediaOut node to cache the results into the Edit or Cut page Timeline. The DaVinci Resolve Deliver page handles the final render of the entire Timeline. To get completed composites out of Fusion Studio, you configure and render them starting with a Saver node in the Node Editor. Fusion Studio is also capable of distributing a variety of rendering tasks to other machines on a network.
Rendering in the Fusion Page
In the Fusion page, a MediaOut node is required for getting your composite from the Fusion page back into the Edit or Cut page Timeline. Whatever the MediaOut node displays when you see it in the viewer is what gets rendered back into the Edit or Cut page. This process is semi-automatic
in DaVinci Resolve, where the Smart Render Cache setting begins caching the MediaOut node almost immediately when you return to the Edit or Cut page Timeline. The cache file format and any
resolution scaling to fit the composition into the Timeline Resolution is handled in the DaVinci Resolve Project Settings.
Rendering in Fusion Studio
In Fusion Studio, all rendering goes through Saver nodes. Similar to MediaOut nodes in the Fusion page, Saver nodes are most often appended to the end of a node tree to render the final composite. The Saver node determines the name, format, and location of the rendered files.
![]()
Rendering with the Saver Node
To begin rendering in Fusion Studio, you must add at least one Saver node to the node tree. Most of the time, you will place at least one Saver node at the very end of your tree to render the final image.
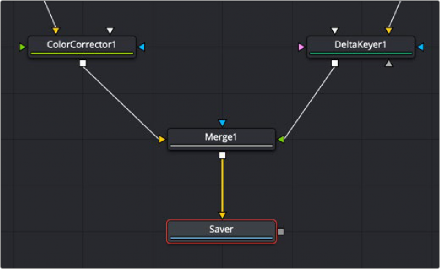
A single Saver node is added to the end of a node tree to render the final composite.
You can attach multiple Saver nodes anywhere along the node tree to render out different parts of a composite. In the example below, three Saver nodes are added at different points in the node tree. The top two render out each half of the composite while the bottom renders the results of the entire composite.
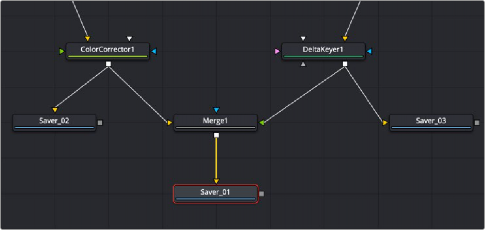
Multiple Saver nodes can be added to different parts of a node tree.
![]()
You can also use multiple Saver nodes stemming from the same node in order to create several output formats. The below example uses the three Savers to export different formats of the same shot.
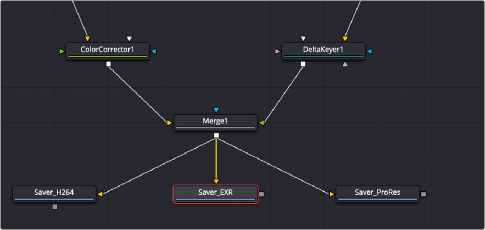
Multiple Saver nodes can be added to create different formats for output.
Adding a Saver node to a node tree automatically opens a Save dialog where you name the file and navigate to where the exported file is saved. You can then use the Inspector to configure the output format.
For more information on the Saver node, see Chapter 104, “I/O Nodes,” in the DaVinci Resolve Reference Manual or Chapter 42 in the Fusion Reference Manual.