< Previous | Contents | Next >
![]()
If you are connecting your device via Ethernet, you may need to enter its IP address before it can be configured in DaVinci Control Panels Setup. To do so, click on the “+” icon in the lower left corner of the interface. An Add DaVinci Control Panel window will appear, allowing you to type in the device’s IP address. The device must be on the same Ethernet network as the computer you’re connecting it to.
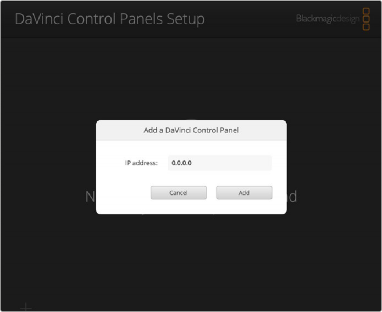
You can manually add an Ethernet-connected device by typing in its IP address.
Settings
You can access your device’s settings by clicking on the setup icon directly below your device. Different hardware devices will have different settings, but generally they will be broken down into the following categories:
Setup
— Name: You can set a specific name for your hardware device to differentiate it in the interface and bluetooth selection preferences.
— Software: The current firmware version of the device.
Network
If your device has an ethernet connection, you can set up its networking settings. If you are new to networking, it is suggested that you leave the Protocol setting to DHCP, and let the computer figure it out. If you are part of a larger facility, you may want to consult with your IT department for the appropriate manual settings instead.
— Protocol: Choose whether you want the device’s IP address to be set automatically by DHCP or to provide your own manual static IP address below.
— IP Address: You can manually assign the IP address for the device.
— Subnet Mask: You can manually assign the Subnet Mask for the device.
— Gateway: You can manually assign the Gateway address for the device.
Reset
![]()
— Factory Reset: Resets your device back to the factory defaults. This maybe useful in some troubleshooting situations.
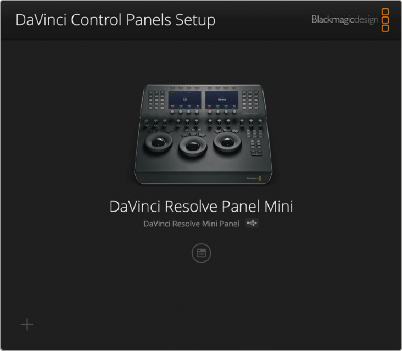
The DaVinci Control Panels Setup showing the DaVinci Resolve Mini Panel attached
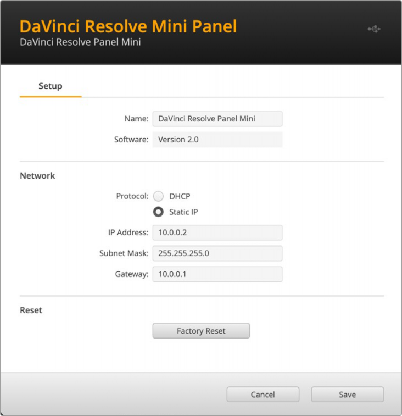
The Settings for the DaVinci Resolve Mini Panel