< Previous | Contents | Next >
Using the Render Settings Dialog for Network Rendering
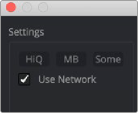
When starting a preview or a final render, selecting the Use network checkbox from the Render Settings dialog and submitting the render adds a composition to the end of the current queue in the Render Manager. The Render Master used is based on the Fusion preferences from the workstation submitting the comp.
The Use Network checkbox enables network rendering from the Render Settings dialog.

NOTE: Distributed network rendering works for image sequences like EXR, TIFF, and DPX. You cannot use network rendering for Quicktime, H264, ProRes, or MXF files.
NOTE: Distributed network rendering works for image sequences like EXR, TIFF, and DPX. You cannot use network rendering for Quicktime, H264, ProRes, or MXF files.
NOTE: Distributed network rendering works for image sequences like EXR, TIFF, and DPX. You cannot use network rendering for Quicktime, H264, ProRes, or MXF files.
Using the Render Manager Window for Network Rendering
![]()
The Render Manager uses a render queue that lets you batch render comps. Compositions are rendered in the order in which they are listed in the Render Manager, with the top entry rendered first, followed by the next item down, and so on. Multiple comps in a queue may render simultaneously depending on the group of Render nodes they are using and the priority assigned to each comp.
— Click the Add Comp button and navigate to the comp on your hard drive.
— Right-click in the queue list and select Add Comp from the drop-down menu, and then navigate to the comp on your hard drive.
— Drag a comp file from an OS window into the Render Manager’s queue list.
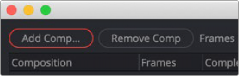
The Add Comp button in the Render Manager adds a comp to the queue for batch rendering over the network.