< Previous | Contents | Next >
To have the Generator template appear in the Effects Library > Fusion Generators category of DaVinci Resolve, save the macro in the following locations:
— On macOS: Macintosh HD/Users/username/Library/Application Support/Blackmagic Design/ DaVinci Resolve/Fusion/Templates/Edit/Generators
— On Windows: C:\Users\username\AppData\Roaming\Blackmagic Design\DaVinci Resolve\ Support\Fusion\Templates\Edit\Generators
— On Linux: home/username/.local/share/DaVinciResolve/Fusion/Templates/Edit/Generators
Using Your New Generator Template
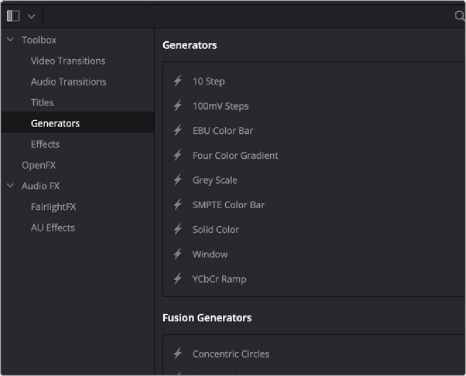
After you’ve saved your macro, you’ll need to quit and reopen DaVinci Resolve. When you open the Effects Library on the Edit page, the new Generator template is listed in the Generators category, in the Fusion Generators list.
![]()
Custom Fusion Generator saved in the Edit page Effects Library.
Applying this Generator to the Timeline and opening the Inspector shows the parameters you enabled for editing, if any.
Creating a Fusion Effect Template
You start building a Fusion Effect template by bringing a clip from the Edit page Timeline into Fusion. This clip is only used for creating the template and will not be saved with the effect.
Once inside Fusion, you use Fusion’s nodes to create the effect you want. You can use a single node or a hundred, depending on the effect you want to create. For instance, using Fusion’s Color Correction nodes, you can create a simple color corrector you can use on the Edit page.
1 Insert the Color Corrector node between the MediaIn and MediaOut nodes.
2 Select the Color Corrector node in the Node Editor, and then press Cmd-A to select the remaining nodes.
3 Right-click over any of the selected node and choose Macro > Create Macros from the contextual menu. Enabling the checkboxes in this window determines the parameters that appear in the Edit page Inspector.
4 The Macro Editor window opens. Here, you can enable the checkboxes for any parameters you want to be shown in the Edit page Inspector.
5 Enter the name of your effect at the top of the Macro Editor window.
6 To save the Macro, click Close at the bottom of the window, then click Yes in the dialog that appears asking you to save the changes.
The Macros must be saved into the correct folder for DaVinci Resolve to recognize the Macro as an effect.
— On macOS: Macintosh HD/Users/username/Library/Application Support/Blackmagic Design/ DaVinci Resolve/Fusion/Templates/Edit/Effects
— On Windows: C:\Users\username\AppData\Roaming\Blackmagic Design\DaVinci Resolve\ Support\Fusion\Templates\Edit\Effects
— On Linux: home/username/.local/share/DaVinciResolve/Fusion/Templates/Edit/Effects
You can save and organize your Fusion Effects into separate subfolders underneath the paths above. These subfolders will show up in the Effects section in the Edit page.
![]()
To see the effect in the Edit page Effects Library, you’ll need to quit DaVinci Resolve and relaunch the application.
Creating a Fusion Effect Template for Two or More Layers
If the effect you want to create requires multiple images like a video wall, you start by creating a Fusion clip on the Edit page Timeline that includes the number of layers you want the effect to have. The clips are only used to create the number of image inputs for the template and will not be saved with the effect.
Once inside Fusion, use Fusion’s nodes to create the effect you want.
Save the Macro following the same steps you use for single clip effects. Enable any of the parameters you want to control in the Edit page. To be able to switch the order of video layers within the effect, make sure you have the Layer checkbox enabled for all the MediaIn nodes.
Once you’ve saved the Macro and relaunched DaVinci Resolve, to use the effect on multiple timeline layers, you must create a Fusion clip. The Fusion clip should contain the same number of layers the effect requires. The order of the Timeline layers, going from the bottom track to the top, matches the MediaIn numbers. For instance, video track 1 will match the position and appearance of MediaIn1, video track 2 matches MediaIn2 and so on. If you want to change how tracks map to MediaIn nodes, you can change the Layer number in the Inspector, assuming you enabled the MediaIn Layer checkbox when creating the Macro.