< Previous | Contents | Next >
However, when the frame aspect is set to a specific value, the guides will conform to the exact boundaries of the specified format and any image area outside of that will be dark gray.
— To show or hide specific guides: Right-click in the viewer and then choose an option from the Guides submenu. A variety of specific guides are provided, each of which can be individually enabled and disabled.
— Monitor Safety: Monitor Safety indicates the safe action area viewable on most monitors and TV screens.
— Safe Title: Safe Title indicates the safe area for titles viewable on all TV and monitor screens.
— Center: Center shows a crosshair for the center point and x- and y-axis of the view.
— Film: Some frame formats include film guides preset for you, whereas some will require customization. The film guides can be customized in the Preferences > Frame Format window.
Frame Format Settings
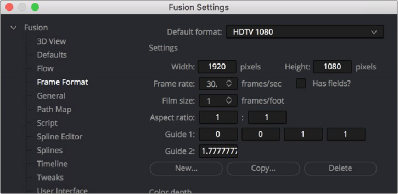
In the Frame Format panel of the Fusion Settings window (available in the Fusion menu), there are two film guide settings that you can use to customize these guides.
— Guide 1 contains four fields that specify the offset from the edges of the image for the left, top, right, and bottom guides, in that order. As with all offsets in Fusion, this is a resolution-
independent number where 1 is the width of the full image and 0.5 is half the width of the image.
— Guide 2’s text box is used to set the aspect ratio of the projection area.
![]()
The Frame Format Guides settings
Domain of Definition and Region of Interest
As a compositing environment, the Fusion page uses the standard compositing conventions of Region of Interest (RoI) and Domain of Definition (DoD) to dramatically improve performance.
Domain of Definition (DoD)
In compositing, the Domain of Definition, frequently abbreviated to DoD, refers to a rectangular region that defines what part of an image actually contains data. DoD makes the concept of an
image’s actual frame somewhat flexible, since rendering is no longer limited to the actual width and height of the image. This has two effects on the way Fusion renders images.
Firstly, nodes will no longer be required to render portions of the image that will not be affected by the node. This helps the renderer to optimize its performance. Secondly, Fusion can now keep track of and apply a node’s effect to pixels that lie outside the visible portion of the image.
For example, consider the output of a Text+ node rendered against a transparent background. The text occupies only a portion of the pixels in the image. Without Domain of Definition, you would be required to process every pixel in the image needlessly. With a DoD, you are able to optimize effects applied to the image, producing faster results and consuming less memory in the process.
The following image shows an image with the DoD outlined.
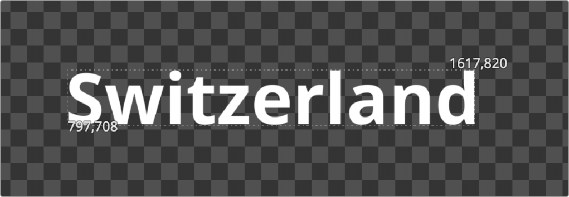
The DoD is shown as two XY coordinates indicating the corners of an axis-aligned bounding box (in pixels)
![]()
For the most part, the DoD is calculated automatically and without the need for manual intervention. For example, all the nodes in the Generator category automatically generate the correct DoD. For nodes like Fast Noise, Mandelbrot, and Background, this is usually the full dimensions of the image. In the case of Text+ and virtually all of the Mask nodes, the DoD will often be much smaller or larger.
The OpenEXR format is capable of storing the data window of the image, and Fusion will apply this as the DoD when loading such an image through a Loader node and will write out the DoD through the Saver node.
When using the Fusion page in DaVinci Resolve, clips from the Edit page timeline or Media Pool will typically have the DoD default to the full image width of the source media. The exception is media stored in OpenEXR format.
The DoD is established as soon as the image is created or loaded into the composition. From there, it passes downstream, where viewers combine it with their Region of Interest in order to determine exactly what pixels should be affected by the node. As you work, different nodes will automatically shrink, expand, or move the DoD as they apply their effect to an image, causing the DoD to change from node to node.
Showing the DoD
If the current DoD for a node is different from the frame size of that image, it’s shown in the tooltip that appears when the pointer hovers over a node in the Node Editor. The DoD is also visible in the viewer when you right-click in a viewer and choose Region > Show DoD from the contextual menu.