< Previous | Contents | Next >
Once you’ve started keyframing node parameters, you can edit their timing in the Keyframes Editor and/or Spline Editor. For more information about keyframing in Fusion, see Chapter 71, “Animating in Fusion’s Keyframes Editor,” in the DaVinci Resolve Reference Manual or Chapter 9 in the Fusion Reference Manual.
Removing Animation From a Parameter
1 Right-click over the name of the keyframed parameter in the Inspector.
2 Choose Remove “node name:parameter name” from the contextual menu.
TIP: If you change the default spline type from Bézier, the contextual menu will display the name of the current spline type.
TIP: If you change the default spline type from Bézier, the contextual menu will display the name of the current spline type.
TIP: If you change the default spline type from Bézier, the contextual menu will display the name of the current spline type.
Attaching a Parameter to an Existing Animation Curve
Multiple parameters can be connected to the same animation curve. This can be an invaluable timesaver if you are identically animating different parameters in a node.
To connect a second parameter to the same animation curve:
1 Right-click on the second parameter you want to attach.
2 In the contextual menu, hover over the Connect To submenu.
![]()
3 In the Connect To submenu, choose the name of the animated parameter.
Connecting Parameters
It is often useful to connect two parameters together even without an animation curve. There are two methods you can use.
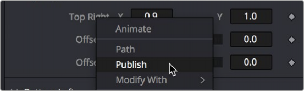
Connecting Parameters by Publishing
If you want to tie two parameters together so adjusting one adjusts the other, you must connect them together using the Publish menu command on the first parameter and the Connect menu command on the second parameter.
1 Right-click the name of the parameter you want to publish, and choose Publish from the contextual menu.
2 Right-click on the second parameter you want to attach, and choose the name of the parameter you just published from the Connect To submenu.