< Previous | Contents | Next >
When a composition grows to include hundreds of nodes, locating specific node layers can quickly become difficult. Timeline filters can be created and applied to sift out nodes that are not necessary to the current operation. The Global Timeline preferences include a number of pre-made filters that you can enable, or you can create new ones as needed.
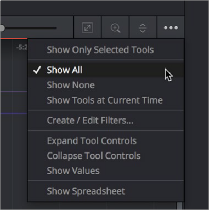
Open the Keyframes Editor Option menu and choose an item from the top of the menu. Default Timeline filters include;
— Show All, which shows all node layers in the current composition.
— Show None, which hides all layers.
— Show Tools at Current Time, which only displays node layers under the playhead.
— If you’ve created custom filters, they appear here as well, in alphabetical order.
— Choose Show All from the Keyframes Editor Option menu. All layers will reappear.
![]()
Choosing a Timeline filter
1 Choose Create/Edit Filters from the Keyframes Editor Option menu to open the Timeline panel of the Fusion Settings window. This is where you can create new Timeline filters.
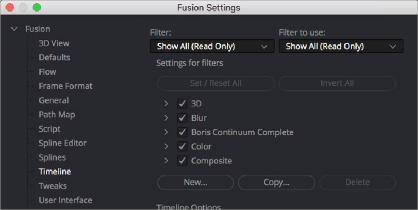
The Global Timeline preferences for enabling filters