< Previous | Contents | Next >
Working with Keyframes and Splines
Once you animate a parameter and display the Spline Editor, you can manipulate the spline’s keyframes (and thus the animation) in a variety of ways. By selecting Keyframe control points, you can move, copy, and change the interpolation of your animation.
Adding Keyframes
Once you create one keyframe, additional keyframes are automatically added to a spline whenever you move the playhead and change the value of that spline’s parameter. For example, if you change the strength of an animated glow at frame 15, a keyframe with the new value occurs on frame 15.
In the Spline Editor, control points can also be added directly to a spline by clicking on the spline where you want to add the new keyframe.
If you want to add a new keyframe at the current playhead location, pressing Command-K on the keyboard or right-clicking in the graph and choosing Set Key adds a keyframe under the playhead.
![]()
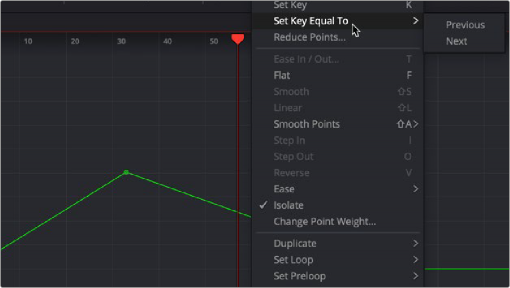
If you want to hold a value over several frames, right-clicking in the graph area and choosing Set Key Equal To displays a submenu to add a new keyframe with a value equal to the next or the previous keyframe.

To hold a value between two keyframes choose from the Set Key Equal To submenu
Locked and Unlocked Controls Points
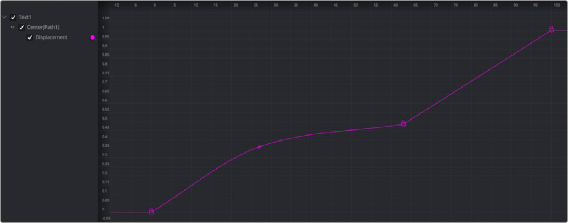
When animating the Center X/Y or Pivot X/Y parameters on any tool, you create a displacement spline in the Spline Editor. The displacement spline represents the relative offset position of the animated object along its path. Since the displacement spline is relative, keyframes use a value between 0.0 and
1.0. A displacement value of 0.0 in the Spline Editor indicates that the object is at the very beginning of a path. A value of 1.0 indicates that the object is positioned at the end of the path.

The displacement spline represents the relative position along a motion path

TIP: You can convert displacement splines to X and Y coordinates by right-clicking over the motion path in the viewer and choosing Path#: Polyline > Convert to X/Y Path.
TIP: You can convert displacement splines to X and Y coordinates by right-clicking over the motion path in the viewer and choosing Path#: Polyline > Convert to X/Y Path.
TIP: You can convert displacement splines to X and Y coordinates by right-clicking over the motion path in the viewer and choosing Path#: Polyline > Convert to X/Y Path.
Displacement paths are composed of locked and unlocked points. Whether a point is locked is determined by how you added it to the polyline. Locked points on the spline have an associated point in the viewer’s motion path; unlocked points do not have a corresponding point in the viewer’s motion path. Each has a distinct behavior, as described below.
Locked Points
![]()
Locked points are the motion path equivalents of keyframes. They are created by moving the playhead position and changing the parameter value. These points indicate that the animated object must be in a specified position on a specified frame. Since these keyframes are only related to position along the path, they can only be moved horizontally along the spline’s time axis.
The locked points appear as larger-sized lock icons in the Spline Editor. Each locked key has an associated point on the motion path in the viewer.
Deleting a locked point changes the overall timing of the motion.
Unlocked Points
Unlocked points are created by clicking directly on the spline in the Spline Editor. These points give additional control over the acceleration along the motion path without adjusting the path itself.
Conversely, you can add unlocked points in the viewer to control the shape of the motion path without changing the timing.
You can change an unlocked point into a locked point, and vice versa, by selecting the point(s), right- clicking, and choosing Lock Point from the contextual menu.
For more information on motion paths and locked keyframes, see Chapters 70 and 72 in the DaVinci Resolve manual or Chapters 8 and 10 in the Fusion Studio manual.