< Previous | Contents | Next >
If you want to change the default path type to XY path, you can choose Fusion > Preferences > Globals in Fusion Studio or Fusion > Fusion Settings in DaVinci Resolve. In the Settings window, select the Defaults category and choose XY Path for the Point With drop-down menu. The next time you keyframe the Center X/Y parameter or choose Animate from CenterX/Y’s contextual menu, an XY path modifier will be used instead of a Polyline path.
Types of Control Points
The control points along an XY path in the viewer are locked to the control points on the X and Y curve in the Spline Editor. The number of points are identical, and adding a control point in one place adds
it to the other. That is not the case with a Polyline path. Polyline paths are composed of locked and unlocked points. Whether a point is locked is determined by how it was added to the Polyline. Locked points on the motion path in the viewer will have an associated point on the Displacement spline in the Spline Editor; unlocked points will not have corresponding points. Each has a distinct behavior, as described below.
Locked Points
Locked points are the motion path equivalents of keyframes. They are created by changing the playhead position and moving the animated control. These points indicate that the animated control must be in the specified position at the specified frame.
![]()
The locked points are displayed as larger-sized hollow squares in the viewer. Each locked key has an associated point on the path’s Displacement curve in the Spline Editor.
Locked points on a path in the viewer
Deleting a locked point from the motion path will change the overall timing of the motion.
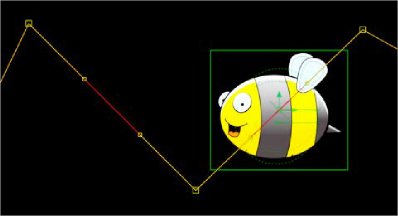
1 Connect an object to a Transform node.
2 Position the where you want to start the motion path.
A graphic placed on the right side of the frame
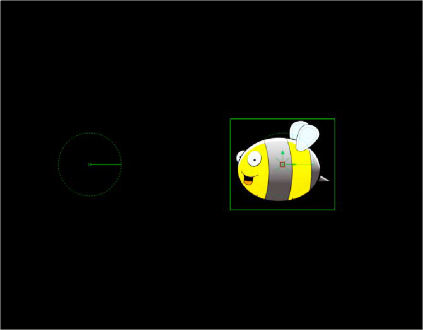
3 Set the playhead at frame 0.
4 Select the Transform node and in the Inspector, click the Keyframe button to the right of the Center X/Y parameter.
This adds the path modifier and creates the first locked point of the path.
5 Position the playhead at frame 45.
![]()
6 Move the object’s center to the lower center of the screen.
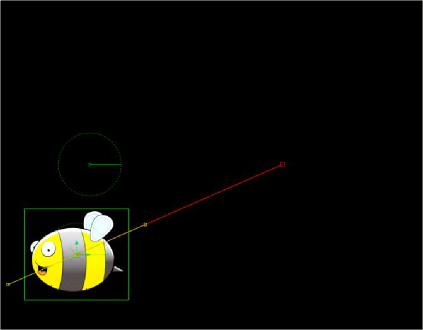
Moving the playhead and repositioning the bee adds a second locked point
This sets the second locked point.
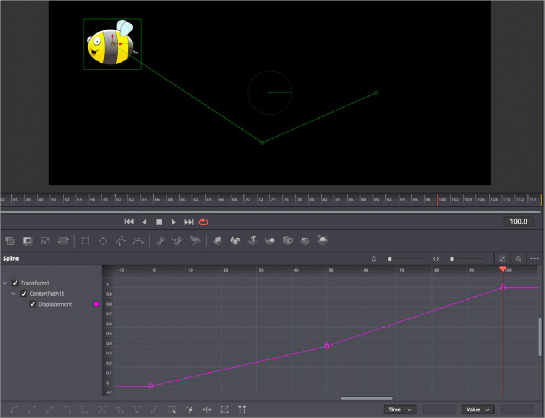
7 View the Spline Editor and display Path1’s Displacement spline.

The path’s Displacement spline with locked keyframes
At a value of 0.0, the control will be located at the beginning of the path. When the value of the Displacement spline is 1.0, the control is located at the end of the path.
8 Select the keyframe at frame 45 in the Displacement spline and drag it to frame 50.
The motion path is now 50 frames long, without making any changes to the motion path’s shape.
If you try to change this point’s value from 1.0 to 0.75, it cannot be done because the point is the last in the animation, so the value must be 1.0 in the Displacement spline.
![]()
9 Position the playhead on frame 100 and move the bee center to the upper-left corner of the screen.
Moving locked points changes the duration of a motion path without changing its shape
This will create an additional locked point and set a new ending for the path.