< Previous | Contents | Next >
A modifier’s controls are displayed in the Modifiers tab of the Inspector. When a selected node has a modifier applied, the Modifiers tab will become highlighted as an indication. The tab remains grayed out if no modifier is applied.
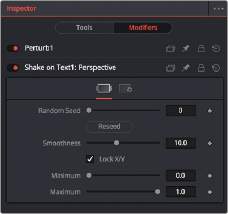
The Modifiers tab with two modifiers applied
Modifiers appear with header bars and header controls just like the tools for nodes. A modifier’s title bar can also be dragged into a viewer to see its output.
Combining Modifiers and Keyframes
Modifiers that auto-animate parameters like Perturb and Shake can be combined with keyframes to create more natural, organic looking animations. For instance, you can create the general motion path for an element by keyframing the Center X and Y parameters, and then apply a modifier to the same parameters to create a secondary wiggling motion.
![]()
1 Add a Transform to an image like a butterfly or spaceship.
2 Select the Transform node in the Node Editor.
3 In the Inspector, click the Keyframe button to the right of the Center X and Y parameters.
4 Position the butterfly or spaceship image where you want the start of the animation to begin.
5 Continue to move the playhead in the render range and reposition the image until you create a figure-8 motion path.
6 Right-click over the Center X label in the Inspector and choose Modify With > Perturb.
7 Click the Modifiers tab at the top of the Inspector and adjust random, wiggling motion by setting the Strength, Wobble, and Speed parameters while the animation plays.
Publishing a Parameter
The Publish modifier makes the value of a parameter available, so that other parameters can connect to it. This allows you to simultaneously use one slider to adjust other parameters on the same or different nodes. For instance, publishing a motion path allows you to connect multiple objects to the same path.
