< Previous | Contents | Next >
Publish a parameter in order to link other parameters to it
Once a parameter is published, you can right-click another parameter and choose Connect To > [published parameter name] from the contextual menu. The two values are linked, and changing the parameter value of one in the Modifiers tab changes the other.
Using the pick whip between two parameters provides similar linking behavior with more flexibility. Pick whipping between parameters is covered later in this chapter.
Connecting Multiple Parameters to One Modifier
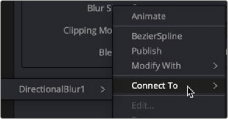
A single modifier or published parameter can be applied to multiple parameters so they all act as one. This is handled through the Connect To submenu. As with modifier assignment, the list is filtered to show only options that are suitable for the parameter you’ve right-clicked on. When you do this, the connection is bidirectional; editing either parameter will cause the other parameter to change.
![]()
The Connect To menu connects modifiers to multiple parameters
Adding and Inserting Multiple Modifiers
Modifiers can be connected to each other and branched, just like nodes in the Node Editor. For example, the Calculation modifier outputs a number, but has two Number parameters, both of which can have modifiers added to them. If you want to insert a modifier between the existing modifier and the modified parameter, use the Insert submenu of the parameter’s contextual menu.
— Anim Curves: Adds an animation curves modifier that allows you to dynamically adjust the timing, scaling, and acceleration of an animation.
— Bézier Spline: Adds a Bézier spline to the Spline Editor for animating the selected parameter.
— B-Spline Spline: Adds a B-Spline spline to the Spline Editor for animating the selected parameter.
— Calculation: Creates an indirect link that includes a mathematical expression between two parameters.
— CoordTransform Position: Calculates the current 3D position of a given object even after multiple 3D transforms have repositioned the object through the node tree hierarchy.
— Cubic Spline: Adds a Cubic spline to the Spline Editor for animating the selected parameter.
— Expression: Allows you to add a variable or a mathematical calculation to a parameter, rather than a straight numeric value. The Expression modifier provides controls in the Modifiers tab, giving you more room and parameters than the SimpleExpression
— From Image: This modifier takes color samples of an image along a user-definable line and creates a gradient from those samples.
— Gradient Color Modifier: Creates a customized gradient and maps it into a specified time range to animate a value.
— KeyStretcher: Used to stretch keyframes in a Fusion Title template when trimming the template in the Edit page or Cut page timeline.
— MIDI Extractor: Modifies the value of a parameter using the values stored in a MIDI file.
— Natural Cubic Spline: Adds a Natural Cubic spline to the Spline Editor for animating the selected parameter.
— Offset (Angle, Distance, Position): The three Offset modifiers are used to create variances, or offsets, between two positional values. For instance, when this modifier is added to a size parameter, you can change the size of an object using the distance between two onscreen controls (position and offset).
— Path: Produces two splines to control the animation of of an object: An onscreen motion path (spacial) and a Time spline visible in the Spline Editor (temporal).
— Perturb: Generates smoothly varying random animation for a given parameter.
— Probe: Auto-animates a parameter by sampling the color or luminosity of a specific pixel or rectangular region of an image.
![]()
— Publish: The first step in linking two non-animated parameters is to use the Publish modifier to publish a parameter. That allows other parameters to use the Connect To submenu and link to the published parameter.
— Resolve Parameter: Allows you to modify the duration of a Fusion transition template from the Edit page Timeline. The Resolve Parameter Modifier is applied to any animated parameter instead of keyframing the transition.
— Shake: Similar to Perturb, Shake generates smoothly varying random animation for a given parameter.
— Track: Attaches a single point tracker to the selected parameter. The tracker can then track an object onscreen to animate the parameter. This is quicker and more direct than using the normal Tracker node; however, it offers less flexibility since the resulting tracker is only a single point and can only be used for the selected parameter.
— Vector Result: Similar to the Offset modifier, Vector Result is used to offset position parameters using origin, distance, and angle controls to create a vector. This vector can then be used to adjust any other parameter.
— XY Path: Produces an X and Y spline in the Spline Editor to animate the position of an object..
For more information on all modifiers available in Fusion, see Chapter 122, “Modifiers,” in the DaVinci Resolve Reference Manual and Chapter 60 in the Fusion Reference Manual.