< Previous | Contents | Next >
A sample of the nodes available in the Particles bin of the Effects Library
![]()
All particle nodes begin with the letter “p,” and they’re designed to work together to produce sophisticated effects from relatively simple operations and settings. The next section shows different ways particle nodes can be connected to produce different effects.
Anatomy of a Simple Particle System
The simplest particle system you can create is a pEmitter node connected to a pRender node. The pEmitter node includes the core controls for creating various kinds of particles in different ways, while the pRender node is required to render a 2D or 3D result that can be composited with other scenes within your composition.
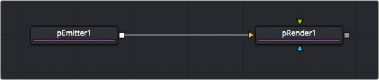
The minimum node tree required to create a simple particle system
If your needs are more complicated, you can combine two or more pEmitter nodes using a pMerge node (the particle system version of a Merge node), to create compound particle systems where multiple types of particles combine with one another to create a result.
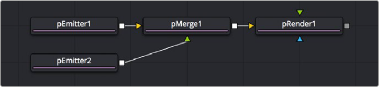
Compositing two pEmitter nodes to create a compound particle system, combining two kinds of particles together
If you’re trying to create particle systems with more natural effects, you can add “forces” to each emitter. These forces are essentially physics or behavioral simulations that automatically cause the particles affected by them to be animated with different kinds of motion, or to be otherwise affected by different objects within scenes.
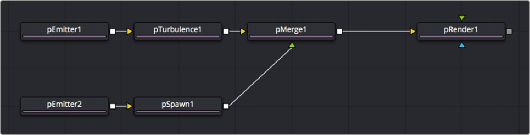
Customizing the effect of pEmitter nodes using different forces to add complexity to the particle animation
![]()
You can also attach the following types of nodes to a pEmitter node to deeply customize a particle system:
— Attach a 2D image to a pEmitter node to create highly customized particle shapes. Make sure your image has an appropriate alpha channel.
— Attach a Shape3D or other 3D geometry node to a pEmitter node to create a more specific region of emission (by setting Region to Mesh in the Region tab).
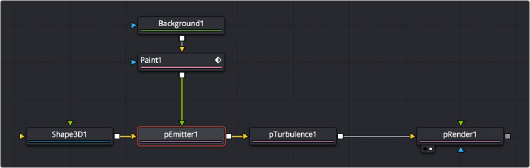
Customizing pEmitter nodes using mesh geometry to define regions and 2D images to define particle shape
The above examples assume that you’ll output 2D renders to combine into the rest of a 2D composition. However, because particle systems are fully 3D, you also have the option
of outputting your particle system in such a way as to be used from within other 3D scenes in your composition.
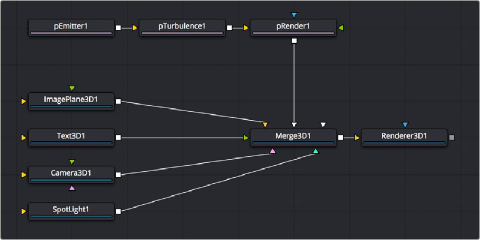
Connecting a particle system to a Merge3D node so the particles are subject to lighting and shadows within a 3D scene
![]()
The Output Mode of the pRender node, at the very top of the controls exposed in the Inspector, can be set to either 2D or 3D, depending on whether you want to combine the result of the particle system with 2D layers or with objects in a 3D scene.
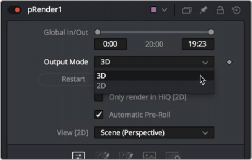
Choosing whether a particle system’s output is 2D or 3D in the pRender node’s Inspector controls
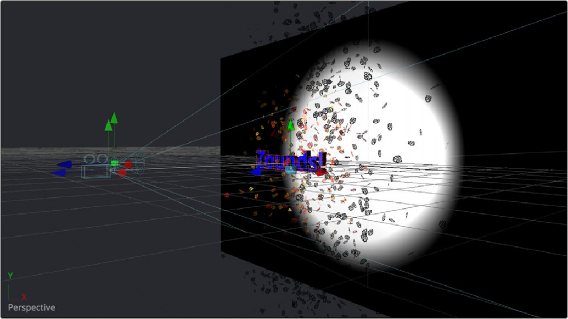
If you connect a pRender node to a Merge3D node, the Output Mode is locked to 3D, meaning that 3D geometry is output by the pRender node for use within the Merge3D node’s scene. This means that the particles can be lit, they can cast shadows, and they can interact with 3D objects within that scene.

NOTE: Once you set the pRender node to either 2D or 3D and make any change to the nodes in the Inspector, you cannot change the output mode.
NOTE: Once you set the pRender node to either 2D or 3D and make any change to the nodes in the Inspector, you cannot change the output mode.
NOTE: Once you set the pRender node to either 2D or 3D and make any change to the nodes in the Inspector, you cannot change the output mode.