< Previous | Contents | Next >
The Settings tab in the Inspector is also duplicated in both the Dissolve and Merge nodes. These common controls are described in the following “The Common Controls” section.
MultiMerge [MMrg]
The MultiMerge node
MultiMerge Node Introduction
The MultiMerge node allows you to combine several sources together in a layer-based structure. Unlike the standard Merge tool, which only accepts one foreground input, MultiMerge creates a new consecutive foreground input each time a new source is dragged to the tool.
These inputs are added to the Layer List in the Inspector and are displayed in a hierarchy from top to bottom as a stack. The layers are arranged so the layer closest to the foreground is at the top of the list, and the one closest to the background is at the bottom. Each layer has its own separate and
independent Merge controls (see the Merge node above) that appear in the lower half of the Inspector, allowing you to individually adjust the position, size, composite modes, etc., for each source input.
![]()
As your composite increases in complexity, you can end up with a large amount of standard Merge nodes scattered throughout the node tree. MultiMerge can be used to combine these Merge nodes together, both as an organizational tool and allowing you to control the order of operations in a layer-based, rather than a node-based environment. You could conceivably composite and organize hundreds of separate layers using one MultiMerge node on your node tree.
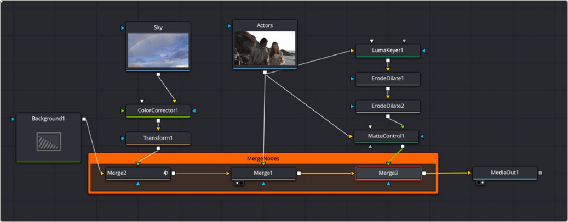
A sky replacement composite requiring three separate Merge nodes (above) is replaced by one single Multi Merge node (bottom). The pipe of the currently selected layer in the Layer List has a slight glow applied (Actors node to MultiMerge node).
Inputs
The MultiMerge node provides these image inputs:
— Background: The orange background input is for the first of the images you want to composite together. You should connect the background input before connecting the foreground input.
— Foreground: The foreground inputs are for each subsequent image you want to composite together, which is typically a foreground subject that should be in front of the background. Connecting a pipe from a new source onto the MultiMerge node automatically creates a new foreground input on the node and a new layer in the Layer List. Foreground inputs are all colored white.
![]()
— Effect Mask: (Optional) The effect mask input lets you mask a limited area of the output image to be merged where the mask is white (where the foreground image shows in front of the background), letting the background image show through by itself where the mask is black.
Basic Node Setup
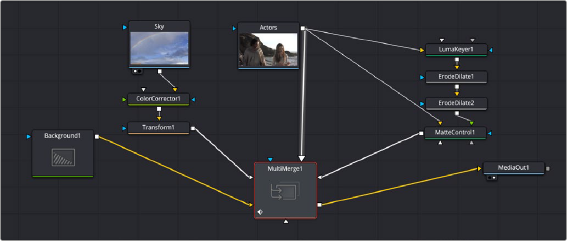
MultiMerge nodes are typically connected in the following way, with multiple input images connected to the foreground inputs, a background input, and the output connected to the next node in the composition. In this example, the effect mask input is not used, as this is not typical.
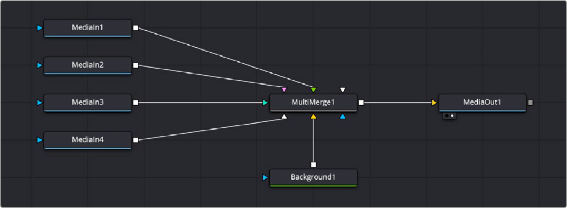
A typical MultiMerge node structure in DaVinci Resolve
Resolution Handling
While you can connect images of any resolution to the background and foreground inputs of the MultiMerge node, the image that’s connected to the background input determines the resolution of the output.
Inspector

The Layer List of the MultiMerge node. The input to Layer 4 has been disconnected (strike through the name) and disabled (unchecked). The Luma Key layer is having its name changed, the Sky layer is disabled (unchecked), while the Actors layer is enabled (checked).
Layer List
![]()
For each foreground input connected to the MultiMerge node, a new layer is created sequentially in the Layer List. The Layer List is hierarchically sorted from top to bottom, with layers on top being above any layers below them in the image. You can customize this layer structure in several ways.
Click on the layer in the Layer List to make that layer active. The active layer’s Merge controls will appear at the bottom of the Inspector, and the pipe connecting to the layer’s input on the MultiMerge node will glow slightly in the node tree.
You can multi-select layers by holding the Shift key down while clicking to select a range of layers, or the Command key to select multiple non-adjacent layers.
Right-clicking on any layer opens up a contextual menu with the following options:
— Go To Source: Selects the tool that is connected to the layer’s input on the MultiMerge node and opens the tool’s parameters in the Inspector.
— Split Here: Automatically creates another connected MultiMerge node and splits the existing layers between the two. The layer that was selected for the split, and all layers above it, will be spun off into a new MultiMerge node. The original MultiMerge node will be connected to the background input of the new MultiMerge node.
— Rename Layer X: Opens up a dialog box allowing you to rename the selected layer.
— Rename Layer to Match Source: Automatically changes the name of the layer to the name of the tool it’s connected to.
— Set Layer X to Default: This resets the layer’s merge settings below, back to the default.
— Delete Layer: This deletes the layer entirely from the Layer List and disconnects the pipe from the original tool. It does not delete the original tool.
Click and drag on the Layer name and move it up or down the list. A grey line will highlight where in the list the layer will now be placed. Let go of the mouse button to make the change.
By default each layer is named based in the input tool’s name. To change the Layer’s name to something more meaningful, double-click on the Layer’s name and type a new name in the text field. You can also right-click on a Layer’s name and select Rename Layer from the contextual menu.
Checking or unchecking the box next to the Layer’s name will enable or disable that layer respectively. Disabling the layer turns off that input’s contribution to the overall composite in the MultiMerge but does not delete it.
By design, if you disconnect the pipe from a the MultiMerge’s input, the layer will still remain in its place in the Layer List but with a strike-through its name to let you know that nothing is currently connected. This allows you to quickly iterate and audition several input sources (clips, graphics, etc.) to the same layer without having to constantly rearrange the order of your Layer List.
![]()
The Layer List itself is keyframable, using the standard keyframe controls to the right of the list. Parameters that can be keyframed are layer order, and layer enable and disable.
Merge Controls
Each layer has a separate and independent set of Merge controls that appear here when the layer is selected. For detailed information on how the Merge controls work, see the previous section in this chapter titled Merge [Mrg].