< Previous | Contents | Next >
The Ambient Occlusion node
Ambient Occlusion Node Introduction
Ambient Occlusion (AO) is the lighting caused when a scene is surrounded by a uniform diffuse spherical light source. Think of the scene as being surrounded by a humongous sphere that uniformly emits light from its surface. AO captures the low frequency lighting. It does not capture sharp shadows or Diffuse or Specular lighting. So, AO is usually combined with Diffuse and Specular lighting to create a full lighting solution.
The Ambient Occlusion node generates global lighting effects in 3D-rendered scenes as a post effect. It quickly approximates computationally expensive ray-traced global illumination. Being a post effect, it exposes similar aliasing issues like the Shader, Texture, and Volume Fog nodes. Hence, artifacts may appear in certain situations.
Usage
The AO node rarely works out of the box, and requires some tweaking. The setup process involves adjusting the Kernel Radius and Number Of Samples to get the desired affect.
![]()
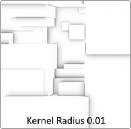
The Kernel Radius depends on the natural “scale” of the scene. Initially, there might appear to be no AO at all. In most cases, the Kernel Radius is too small or too big, and working values must be found.
Inputs
There are three inputs on the AO node. The standard effect mask is used to limit the AO effect. The Input and Camera connections are required. If either of these is not supplied, the node does not render an image on output.
— Input: This orange input accepts a 2D RGBA image, Z-Depth, and Normals.
— Camera: The green camera input can take either a 3D Scene or a 3D Camera that rendered the 2D image.
— Effect Mask: The optional blue effect mask input accepts a mask shape created by polylines, basic primitive shapes, paint strokes, or bitmaps from other tools. Connecting a mask to this input limits the Ambient Occlusion to only those pixels within the mask. An effects mask is applied to the tool after the tool is processed.
Basic Node Setup
The Ambient Occlusion node is typically placed after a Renderer 3D node. The Renderer 3D node must have Z-Depth and Normals enabled in its output channels. The Camera3D that is rendered by the Renderer3D node is then connected to the camera input on the AO node.
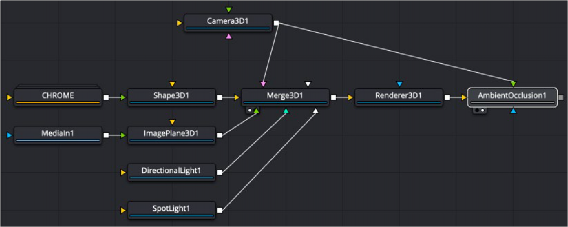
Ambient occlusion as a 2D post process
Inspector

![]()
Ambient Occlusion controls
Controls Tab
The controls tab includes all the main controls for compositing with AO. It controls the quality and appearance of the effect.
— Color: Using the Color menu option combines the incoming image with Ambient Occlusion applied.
— AO: This option outputs the pure Ambient Occlusion as a grayscale image. White corresponds to regions in the image that should be bright, while black correspond to regions that should be darker. This allows you to create a lighting equation by combining separate ambient/diffuse/ specular passes. Having the AO as a separate buffer allows creative freedom to combine the passes in various ways.
To determine the AO, rays are cast from a point on the surface being shaded, outward to a large enclosed sphere.
The AO factor is determined by the unoccluded rays that reach the sphere.
— Hemisphere: Rays are cast toward a hemisphere oriented to the surfaces normal. This option is more realistic than Sphere and should be used unless there is a good reason otherwise. Flat surfaces receive 100% ambient intensity, while other parts are darkened.
— Sphere: Rays are cast toward a sphere centered about the point being shaded. This option is provided to produce a stylistic effect. Flat surfaces receive 50% ambient intensity, while other parts are made darker or brighter.
Increase the samples until artifacts in the AO pass disappear. Higher values can generate better results but also increase render time.
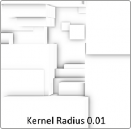
The Kernel Radius controls the size of the filter kernel in 3D space. For each pixel, it controls how far one searches in 3D space for occluders. The Filter Kernel should be adjusted manually for each individual scene.
If made too small, nearby occluders can be missed. If made too large, the quality of the AO decreases and the samples must be increased dramatically to get the quality back.
This value is dependent on the scene Z-depth. That means with huge Z values in the scene, the kernel size must be large as well. With tiny Z values, a small kernel size like 0.1 should be sufficient.
![]()
You can use the lift, gamma, and tint controls to adjust the AO for artistic effects.
Common Controls

TIP: Combining multiple AO passes with different kernel radii can produce better effects.
TIP: Combining multiple AO passes with different kernel radii can produce better effects.
TIP: Combining multiple AO passes with different kernel radii can produce better effects.
The Settings tab in the Inspector is also duplicated in other Deep Pixel nodes. These common controls are described in detail at the end of this chapter in “The Common Controls” section.


AO Tips and Limitations
Transparency/Translucency: AO is designed to work with opaque objects. There are known limitations with transparent receivers and those with transparent occluders. You can work around some of these limitations by splitting out the transparent/translucent objects into separate scenes and only computing AO on the opaque objects.
Particles: Because of the transparency/translucency limitations, do not use AO on particles, unless the particles are solid opaque geometry. Anti-aliased edges are another form of transparency, so they also cause problems with AO.
Supersampling: To render anti-aliasing with Ambient Occlusion, enable HiQ for the Z and Normals pass in the Renderer 3D.
Viewer Dependence: AO methods work in viewer space, and the results are viewer dependent. This means the amount of darkening can vary depending on the view location, when in reality it should be constant. If at a point on an object the AO is 0.5, moving the camera could change it to 0.4.
Baking of AO: The OpenGL UV renderer can be used to bake AO into the textures on models.