< Previous | Contents | Next >
Choosing a Cache Format and Location
The cache format is user selectable by opening the Master Settings panel of the Project Settings, and using the “Render Cache Format” drop-down menu to choose one of the ProRes, DNxHR, or uncompressed 10- or 16-bit float uncompressed .dvcc formats. Selecting a higher quality cache
![]()
format guarantees high quality image playback, but makes more demands on the throughput and size of your available disk storage. On the other hand, choosing a more highly compressed cache format makes real time playback possible on less capable computers with slower and smaller storage, at the expense of slightly compromised image quality. Ideally, you should choose the highest quality cache format that your workstation’s storage can accommodate.
The format you choose via the “Render Cache Format” menu will determine whether out-of-bounds image data (including “super white” or HDR strength highlights) is preserved when the signal is cached. Formats in this menu that end in “– HDR” preserve out-of-bounds image data, while formats that don’t, wont. If you find that image data (typically bright highlights) is clipped after caching
or optimizing, you should switch to 16-bit float, ProRes 4444, ProRes 4444 XQ, or DNxHR 444; in particular, any of these codecs are appropriate for HDR grading.
The Cache files location defaults to the first volume you add to the Scratch Disks list of the Media Storage panel of the System Preferences. If no scratch disk is specified, your System disk will be used, which may pose problems with capacity and/or performance depending on the size and type of System disk you’re using, and on the media format you choose to cache to. For this reason, it’s
nearly always advisable to set your first scratch disk to the largest, fastest storage volume available to your workstation.
When Caching Happens
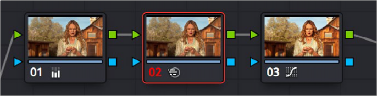
When caching is enabled, cache indicators along the bottom of the Timeline Ruler of the Edit page timeline shows the status of the cache. Red means “to be cached,” while blue means “has been cached.”

Source, Clip, and Sequence Cache bars seen in the Timeline of the Edit page; red bars show areas of the Timeline that need caching, blue shows areas that have been cached
In the Color page, cache indicators are node specific, showing the node in your grading node tree (including all upstream nodes) at which caching will take place.
Node Cache indicator seen as a red colored node number on node two of the Node Editor of the Color page
Caching happens in two ways. First, when either Smart or User caching is enabled, caching always happens whenever you play clips with red caching indicators.