< Previous | Contents | Next >
Introduction to the Primaries Palette
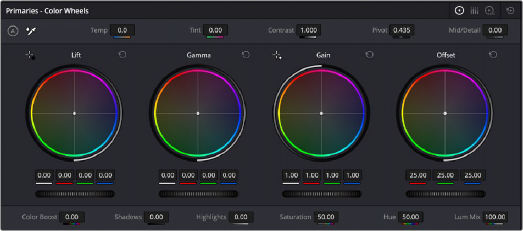
If you’ve had any exposure to color correction tools in any application, the Lift/Gamma/Gain controls found within the Wheels mode of the Primaries palette should look familiar. These controls
correspond to the most traditional and basic color correction functionality available in DaVinci Resolve and are designed to let users without control panels have easy access to color balance and YRGB contrast manipulation using a mouse, tablet, or trackpad.
Color Balance controls for primary grading, in Wheels mode
As the name implies, the Primaries palette has been designed for the kind of overall “primary” color adjustments to the image that typically serve as the foundation of any grade. “Secondary” adjustments then refer to more specific adjustments made to isolated subjects within the image.
However, it’s a time-tested practice that you do everything you can to get the overall image right using one or more primary corrections before moving on to more specific detail work built on top of these initial adjustments. For one thing, it’s a more structured, organized way to work. However, it’s also the most efficient way to make sure you’re tackling the image in a holistic way, that maximizes improvements while minimizing stress on the video signal.
The Primaries palette has three distinct modes of operation:
![]()
— Wheels mode contains the traditional DaVinci YRGB Lift/Gamma/Gain controls that allow tonally specific yet widely overlapping regions of adjustment. Wheels mode also provides access to the RGB Offset/Printer Points color balance and master controls.
— Bars mode gives access to the same YRGB Lift/Gamma/Gain and Offset controls as the Primaries Wheels mode, but the Bars interface lets you make vertical slider-driven adjustments to individual YRGB lift, YRGB gamma, and YRGB gain channels, as well as providing a slider and button-driven interface for the RGB Offset/Printer Points controls.
— Log mode is the home of the RGB Offset/Printer Points color balance and master controls that adjust the overall signal in a linear, film-oriented way. Log mode provides Shadow/Midtone/ Highlight/Offset controls that offer more restrictive yet customizable regions of adjustment intended for making adjustments to log-encoded image data.
Which mode you use depends entirely on how you like to work, and what kinds of adjustments you need to make.