< Previous | Contents | Next >
Additionally, the sidebar at the left provides controls for adding and removing zones, so users can customize this palette to work exactly the way they want. Any customized preset can be saved for easy recall. This way, users have the freedom to work in whatever way suits them.
The Option menu provides fast access to additional ways of customizing this palette’s operation, including the selection and management of presets, a choice of methods for numerically editing Color Balance adjustments, and a setting that determines whether or not the Global controls are always exposed, or should be banked to like the other zone controls.
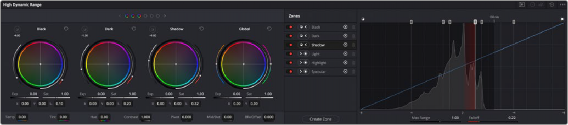
The HDR Palette Interface
The HDR palette is divided into two panels. The first, containing Color Balance controls and custom sliders, is for making color and contrast adjustments. The second, containing the Zones sidebar and Zones graph, is for customizing the range and falloff of each of the zones that corresponds to each set of controls found on the controls panel. It’s these zones that are used for making detailed image adjustments to tonally-specific areas of the picture.
By default, both panels appear within the same palette area, and you can switch between them using buttons at the top right of the palette. This is useful when you have limited screen real estate, or you’re making simple adjustments. Alternately, you can click a button to expose both panels side-by- side, occupying both the left and middle palette areas of the Color page.
![]()
From left to right, the Side-by-side view button, the Controls panel, the Zones panel, the Reset control, and the Option menu
![]()
This Side-by-side mode makes it easy to see and customize how each zone is mapped to the source image data, while making adjustments at the same time.
The HDR palette in Side-by-side mode; at left, the Color/Exposure/ Saturation controls; at right, the Zone Customization controls
An Option menu at the far right of the title bar (shown as three dots) reveals the preset manager for this palette, as well as different GUI options for customizing how you want to use this palette.
Navigating Multiple Zones in the Controls Panel
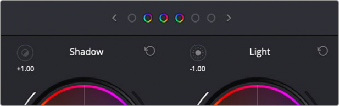
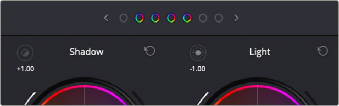
A row of buttons just under the HDR palette’s title bar show you, of all available zones, which ones are currently adjustable using the visible controls below. While the default HDR palette preset has six zone-specific Zone controls, plus the Global controls, most users will only have room in the GUI for four sets of controls to be visible at any time. Meanwhile, grading control panel users will be constrained by how many trackballs their particular control panel has.
The Zone bank controls
Since you’ll almost always have more zones available than you have room to adjust them, this interface lets you see which zones you’re currently using, which zones are mapped to a control panel, and which other zones are available for you to switch to. By default, there are three active zones shown at the top, corresponding to the three sets of Zone controls to the left of the Global controls. Zones that are available, but hidden, are shown in gray to the left and/or right of the currently visible zones, which appear in color. This way, you can bank back and forth among three zones at a time, while always having the Global controls available for adjustment.
There’s also a setting in the HDR palette’s Option menu, “Bank Global With Color Wheels,” that lets you use all four GUI control clusters in this palette to show Zones controls, making it faster to jump among tonally-specific adjustments. In this mode, there are four active zones shown at the
top, corresponding to the four sets of Zone controls being shown. However, in this mode you must page all the way to the right to expose the Global controls, which are banked along with all the other zones.
![]()
The Zone bank controls set to show four zones when the Global controls are banked with all the other zones
Using these controls, you can switch your visible control among all available zones similarly to how audio mixers switch among banks of tracks with a fader panel.
— Click any gray zone button to the left of the currently visible zones to move all zones so that the leftmost visible zone appears at that one.
— Click any gray zone button to the right of the currently visible zones to move all zones so that the rightmost visible zone appears at that one.
— Click the Left or Right Arrow buttons to either size of the zones indicators to move all zones one to the left or one to the right.