< Previous | Contents | Next >
Previewing Which Colors Are Warped By Each Control Point
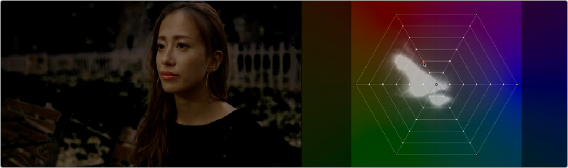
If you press and hold the Option key while you click on a control point in the warp grid, you get a preview in the Viewer of which colors that control point will affect. Affected pixels appear in color against black, which represents all pixels that will remain unaffected by that control point.
Holding the Option key down while clicking a Color Warper control point shows a preview of affected pixels against black.
Sampling to Warp Colors
While it’s important to learn how control points in the grid are manipulated, the most intuitive way of working with this control is to use the pointer to click within the Viewer to sample a color you want to adjust, hold the pointer button down, and then drag to adjust the color.
![]()
When moving the pointer in the Viewer, you’ll see a crosshairs moving around the warping grid that shows you the exact color on the vectorscope graph, while a yellow box indicates the control point that’s closest to the color you’re sampling that will be selected if you click. In the following example, positioning the eyedropper over the sky shows that clicking will select a control point close to the center of the grid.
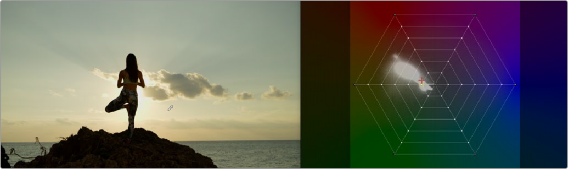
Moving the pointer in the Viewer shows a preview in the warping grid of which control point you’ll select were you to click.
Clicking and dragging selects and then moves the control point corresponding to that color in the Viewer. As you drag the pointer, you’ll see the selected control point move in the same direction as the mouse while the colors of the image update in real time to show the adjustment you’re making.
Meanwhile, an arrow in the grid shows you the delta of the current adjustment. Moving a selected control point to another hue in the grid warps the original color to the new color.
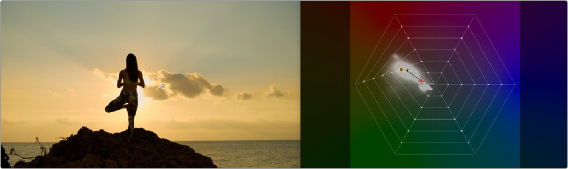
Clicking and dragging moves the control point corresponding to that color in the grid to adjust the color and locks it into place.
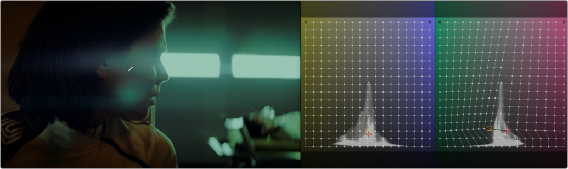
You can also lock control points by sampling the image. Hold the Command and Shift keys down, and then click on the color or colors you want to lock in the warp grid to prevent them from being changed. This makes it easy to work directly in the Viewer to lock colors you don’t want to change, before adjusting other colors that you do want to change.
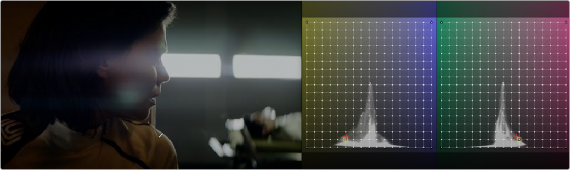
In the following example, Command-Shift-clicking on the woman’s shoulder locks the yellowish highlights falling on her uniform in place. Then, clicking and dragging a highlight on her face lets us push the highlights towards teal without losing the warmer highlights on her shoulder, all by sampling directly in the Viewer.
![]()
(Top) Command-Shift-clicking to lock the closest control point to a color on the warping grid you don’t want to change, (Bottom) Warping a neighboring color while the control point you just locked keeps that part of the image from changing