< Previous | Contents | Next >
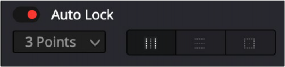
Alternately, this is where the Auto Lock controls really shine. When you turn these on, you can choose the type of region you want to affect (vertical column, horizontal row, or a square region), then choose how large a region of color you want to manipulate (one or two points away from the point that’s selected). Keep in mind that the current resolution of the warping grid also has an effect on how large the resulting region of color will be. Lower resolution grids will let you manipulate larger regions of color, while higher resolution grids will let you adjust a more narrow range of color.
The Auto Lock controls let you make highly targeted adjustments to specific sections of the warping grid.
Once these controls are enabled, simply clicking once on the image or warping grid selects a control point and automatically locks off the region of the grid you want to focus your adjustment on. In the following example, a medium-resolution grid is used in conjunction with the Auto Lock controls set to lock a 2-point rectangular region. So, clicking on the skin of the woman’s face and dragging adjusts a section of available reds within the locked-off region of the grid.
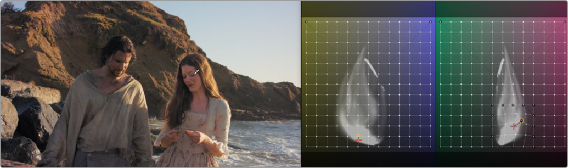
Making a targeted color adjustment to a locked-off region of the Chroma Luma grid
The following sections describe how the different tools available in this mode work to let you manipulate these radial control points in different ways.
![]()
Axis Angle
When you’re in Chroma-Luma mode, an additional control appears underneath the warping grids, a slider named Axis Angle. Dragging this slider to the left or right changes the range of hues in each of the two warping grids that’s presented, letting you manipulate different ranges of color.
Tools
Each of the available tools let you manipulate control points on the warping grid in different ways when you click on them.
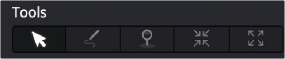
The Tools buttons