
< Previous | Contents | Next >
There is a set of HSL Qualifier presets, or Six Vector presets, that you can use to isolate automatically a predefined wedge of color (green, blue, red, magenta, yellow, or cyan) or chroma intensity (chroma light, chroma dark, or both). These presets are available either from the Color > Presets menu, or using the DaVinci Resolve Advanced control panel.
Selecting one of these presets automatically sets the HSL Qualifier to the corresponding range or color or lightness. Afterwards you
can continue modifying the HSL Qualifier to suit your purpose. The Color > Presets menu
Using Highlight to See What You’re Isolating
The Highlight control at the top of the Viewer (revealed by turning on Viewer Options in the Viewer’s Option menu) lets you overlay a representation of the key you’re creating over the current image in the Viewer. Overlays are also mirrored to your video output, so they’ll show up on an external display as well, in the event that you’re hiding the onscreen Viewer.
There are two types of highlights with which you can evaluate a qualification you’re creating. Each is useful for different tasks.
![]()
— Flat-Gray: The default highlight that DaVinci Resolve uses shows the selected portion of the image with the original colors, and the unselected portion of the image with a flat gray. It is useful for seeing the subject you’re isolating even while you’re adjusting the Qualifier controls, which lets you also see the color or contrast adjustments you’re applying at the same time.
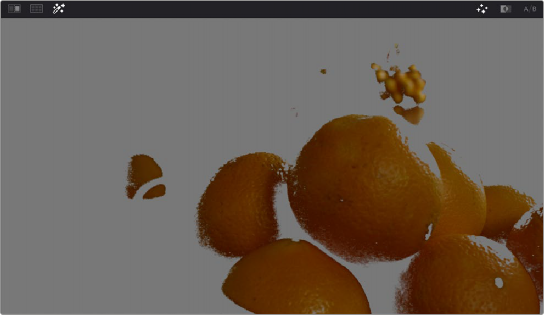
Oranges qualified and highlighted
— High-Contrast: Pressing Option-Shift-H, you can show what’s called a “high-contrast” highlight, which should be familiar to you if you’ve used other color correction applications and plugins; it’s a more typical display wherein the selected portion of the image is white, and the unselected
portion of the image is black. The high-contrast highlight is useful in situations where you need to eliminate holes in a key, or evaluate how “chattery” a key is since irregularities are easier to spot when divorced from the original image.
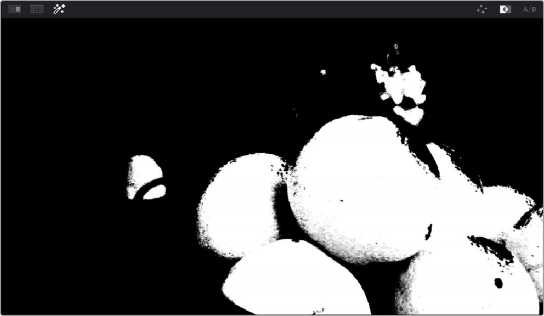
High-Contrast B&W highlighting
— In the Viewer Options toolbar at the top of the Viewer, click the Highlight control, and choose the type of highlight you want from the buttons that appear at the right.
— Choose an option from the Highlight submenu in the Viewer’s option menu; a regular Highlight is Shift-H.
— Choose Highlight > Highlight BW (Option-Shift-H) from the Viewer’s option menu.
![]()
1 Open the Preferences > User > Color window.
2 Check “Mattes display high contrast black and white.”
3 Click Save.
The next time you click the Highlight control in the Qualifier palette, the high-contrast highlight will display.