< Previous | Contents | Next >
Magic Mask (Studio Version Only)
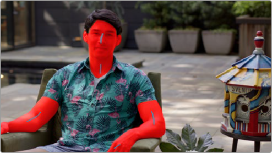
The Magic Mask palette uses the DaVinci Neural Engine to automagically create a mask to isolate one or more people or object in the frame, guided by user-applied paint strokes to identify the subject for isolation. Masks can be generated for either an entire object, person, or for specific features of that person (their face, hair, arms, shoes, etc.). The following images show these two kinds of masks with Highlight enabled in the Viewer. A red onionskin overlay lets you see what Magic Mask is isolating.
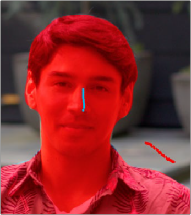
(Left) Using Magic Mask to isolate an entire person, (Right) Using Magic Mask to isolate someone’s face
Once the Magic Mask palette has generated a mask, Matte Finesse controls let you adjust the mask’s size and feathering. This lets you deal with difficult edges that might tip your hand depending on the kind of adjustment you’re trying to make.
While the masks generated by Magic Mask can often be good enough to use directly for making high quality isolated adjustments, it won’t always give perfect results. Keep in mind that Magic Mask is as much for the fast creation of detailed garbage masks as it is for doing direct isolation.
![]()
In these cases, the Matte Finesse controls let you make the resulting mask softer and looser as necessary to clear the edge of a difficult subject you’re isolating with the help of another mask generation technique, such as a Qualifier key or window. When you use the Magic Mask palette within the same node in which you’re also creating a key in the Secondary palette, or a window in the Window palette, the key or window and Magic Mask are combined to output a boolean intersection. This means the isolation is limited to areas where both kinds of masks overlap one another.
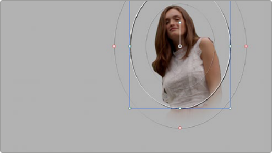
(Left) Using Magic Mask to create a mask, (Right) Combining the Magic Mask with a circular window, the resulting mask is an intersection of the two
Objects can also be isolated by Magic Mask, allowing you to create complicated masks of complex shapes that may be difficult to isolate with other tools. For example, using the Magic Mask in Object mode to modify only the wood grain section of this guitar.
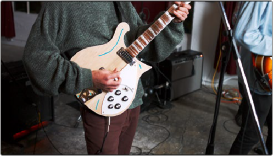
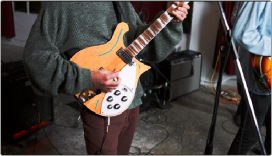
(Left) Multiple strokes in Object mode isolating the wood grain of the guitar, while ignoring the musician’s arm, (Right) The finished shot, with a warmer wood grain
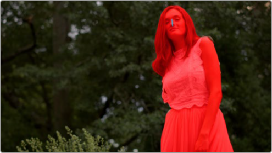
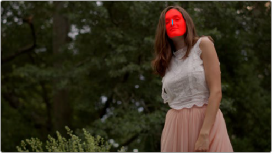
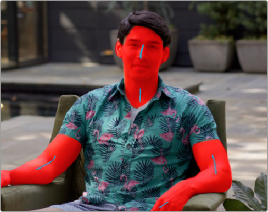
If you’re isolating specific features of a person, you can also mix and match what you’re isolating to create exactly the type of mask you require. For example, you might isolate the face, along with exposed skin on the torso, arms, and legs, to create a mask for creating an overall skin tone adjustment that doesn’t include the subject’s hair or clothes.
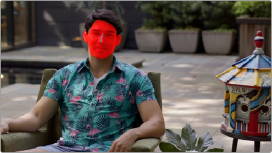
(Left) Using Magic Mask to isolate a face, (Right) Using Magic Mask to isolate all exposed skin
![]()
As described earlier, this whole process is guided by strokes you draw to identify the subject. In a typical workflow, you’ll draw short positive strokes (colored blue) over the person or feature you want to isolate. Then, if necessary, you can also paint short subtractive strokes (colored red) over parts of the image that are not the person or feature you’re isolating, to correct any problems you see in the generated mask.
Blue strokes identify a person or feature to isolate, while red strokes identify things that shouldn’t be included in the mask.
Ideally, both positive and subtractive guidance strokes should be relatively short, and centered on the part of the person or object you’re trying to add to the mask. Stroke position is usually more important than stroke length, and in fact if you don’t like the result you’re getting in the mask with a particular stroke you’ve drawn, you can drag it to another position without redrawing it; strokes are live and can be selected using the pointer to move or delete them.
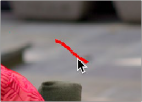
Selecting a stroke with the pointer; selected strokes become highlighted.
Very long paint strokes aren’t usually that useful, and can be counterproductive later on when you’re trying to track strokes to follow motion in the clip. This is particularly true if a stroke needs to follow something that’s changing shape as it moves, like an arm. Furthermore, while you can make as many strokes as you like, fewer strokes work better than many strokes, and as a general rule you shouldn’t use more than five strokes to isolate a particular person or feature (nor should you need to).
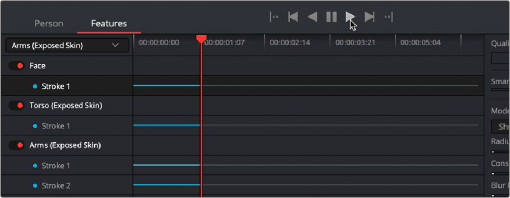
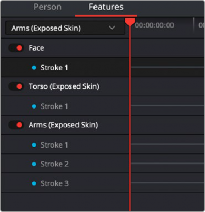
As you work, each stroke shows up in the Stroke list, which lets you select, enable/disable, delete, and otherwise manage the different strokes you create to guide automatic mask generation.
![]()
(Left) Multiple strokes in Features mode isolating exposed skin, (Right) The Stroke list keeps track of all strokes you’ve made.
But what about camera and/or subject motion, you ask? After you’ve painted one or more strokes to guide the analysis, you can motion track these strokes to follow the subject throughout that shot using the stroke tracking controls within this palette. If you’ve made multiple strokes, they’re all
tracked at once, and each stroke automatically follows along with whatever image details immediately surround that stroke, so there’s no setup necessary. You simply draw one or more strokes, then click the track forward or backward button. When you track a stroke, the tracking bar for that stroke in the Stroke list shows you which frames have been tracked (tracked frames are blue).