< Previous | Contents | Next >
Using Magic Mask as a Garbage Matte
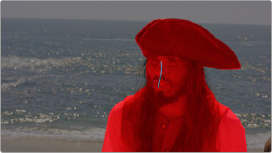
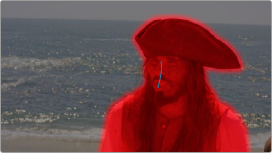
In situations where the outer edge of a person is not being detected closely enough for Magic Mask to give a useful result for a more extreme color adjustment, you’re probably better off expanding the result into a closely-fitting garbage matte to use for isolating the person or features using other techniques, such as a keyer in the Qualifier palette. Even for this purpose, you’ll find using Magic Mask is typically faster than rotoscoping a relatively close garbage matte over a moving figure using windows.
(Left) The initial mask isn’t quite close enough to the edges to make an extreme adjustment, (Right) Using the Mode/Shape/Radius/Iterations/Blur Radius controls to expand the matte to be a garbage matte for use with other keys
Dealing With Hair
Wispy or frizzy hair, individual strands of hair being thrown back, and tips of dreadlocks or heavily moussed hair that comes to points will often require special handling with this tool. Keep in mind that the Magic Mask tool does not specialize in soft translucent mask edges like a keyer does. When it comes to hair styles that are loose and free, in many situations you may be able to finesse an acceptable result using the Matte Finesse controls to expand a softened version of the matte to encompass the entire hairstyle.
![]()
If this interferes too much with the edges of other features of the subject you’re isolating, you can create a dedicated hair mask in Features mode by drawing Hair strokes. You can then use the Matte Finesse controls at the right of the palette to create softened edges that work well with the outer boundary of the hair style you’re isolating.
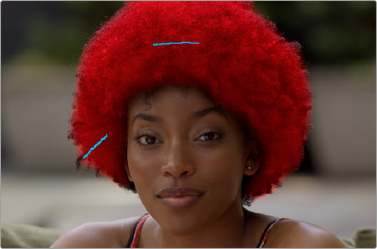
Creating a soft-edged hair mask