< Previous | Contents | Next >
Using Composite Modes With the Layer Mixer
You have the option of combining the adjustments made by all nodes connected to a Layer Mixer node using the same Composite modes that are available when compositing clips in the Timeline. This lets you combine different overlapping image adjustments using compositing math to achieve creative effects or utilitarian fixes.
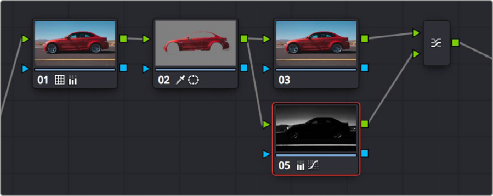
The following simple example shows two overlapping Corrector nodes connected to a Layer Mixer node that’s set to the Add composite mode. Node 3 has no adjustment, but Node 5 has an extremely high-contrast curve adjustment applied, along with a blur, that effectively isolates the highlights of the image and feathers them out.


Combining two nodes using the Layer Mixer set to Add to create a glowing effect
By adding both treatments together, a hot glow has been created, blowing out the highlights
![]()
of the image. Many, many other effects are possible using the different composite modes that are available. For more information on composite modes, see Chapter 50, “Compositing and Transforms in the Timeline.”