< Previous | Contents | Next >
The Ext Matte Node’s Freeform Isolation Track
If your node tree has an External Matte, the EXT MATTE node exposes a Freeform Isolation track in the Keyframe Editor. This is useful for time offsets or Sizing repositioning of the Ext Matte image.
Automatic Keyframing
Every track in the Keyframe Editor has an Auto-Keyframing button that can be turned on or off. When auto-keyframing is enabled for a particular track, every change made to a parameter or control associated with that keyframe track automatically generates a keyframe. There are two ways you
can use this:
— Used with a keyframing track, auto-keyframing makes it simple to set up animated changes to specific adjustments within a node. This is a lot easier than manually placing keyframes one by one.
— On the other hand, turning on auto-keyframing for the Corrector track correspondingly enables auto-keyframing for every keyframing track belonging to that node. In this case, keyframes
will automatically be placed on whatever keyframing track corresponds to the parameters or controls you adjust.
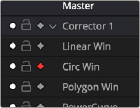
Auto-keyframing selected for Circular window on Node 1
When auto-keyframing is disabled, changes you make alter existing keyframes. How this alteration works depends on the location of the playhead, and the type of keyframes in the Keyframe Editor. For more information, see the next section.
![]()
Modifying Keyframes
Once you’ve started adding keyframes to animate changes to a grade, there are a variety of methods available to navigate and edit these keyframes to further customize these effects. This section covers the different ways you can navigate among, alter, and remove keyframes.
Navigating Among Keyframes
For many operations, it’s necessary to move the playhead directly on top of the keyframe you want to modify. While you can always use the transport controls or pointer to move the playhead, there are also commands for jumping to a specific keyframe.