< Previous | Contents | Next >
The Mist mode lets you combine blur and sharpen operations in such a way as to create effects similar to those achieved via “Vaseline on the lens” or Pro-Mist optical filters.
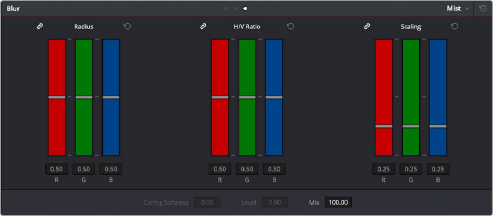
Mist including Mist Mix control
Unlike the Blur or Sharpen modes, where the Radius sliders provide immediate access to the desired effect, the Mist mode requires you to lower the Radius and Mix sliders together to get a desirable result. By varying the amounts of Radius and Mix, you can create many variations on the mist effect.
— Radius: When creating a Mist effect, you first need to lower Radius to sharpen the image. This operation then combines with a lowering of the Mix parameter to provide the combination of detail and blurring that results in a mist effect.
— H/V Ratio: Lets you add directionality to the current operation. At the default value of 0.50, the image is affected in both the horizontal and vertical directions equally. Raising H/V Ratio makes the effect increasingly directional along the horizontal axis, while lowering makes the effect increasingly directional along the vertical axis.
— Scaling: Multiplies the amount of scaling being applied by the Radius control, and lets you intensify a mist effect beyond the Radius slider’s ordinary range. The scaling parameter has no effect if Radius is set to 0.50 or above for blur effects.
— Mix: After you sharpen the image using the Radius slider, decreasing the Mix parameter adds a superimposed blur that mixes with the high-detail areas of the picture to create the mist effect.
![]()
1 Press the VECTORS button on the T-bar panel, or the VECTORS soft key on the Center panel’s main page.
2 On the Center panel, press the IMAGE MODE soft key repeatedly to cycle to the RESOLVE MIST EFFECT controls.
3 Use the RADIUS, H/V RATIO, SCALING, and MIX knobs to create the desired mist effect.
4 When you’re finished, press the PRIMARIES soft key to return to the Center panel’s main page.