< Previous | Contents | Next >
These controls let you customize the UI of this effect.
— Clone Sticks to Mouse: When enabled, drawing or placing a Rect, Ellipse, or Patch in Clone or Blend Clone mode immediately switches to positioning the sample region, making it faster to use.
— New Patches Stay Selected: When enabled, patches stay selected after you draw them, in preparation for further customization.
— UI Line Thickness: Lets you choose how thick the on-screen outlines should be.
— Patches Stick to: This parameter lets you deal with fixing dead pixels or blemishes on clips that have been stabilized.
— Source: Patches you place stay put, unless you apply motion stabilization to the shot, in which case the patches are transformed along with the image so they remain “stuck” to the feature in the source clip they’re fixing.
— Scene: If you’re eliminating a blemish on a moving subject, you can use the FX Tracker to track the thing you’re fixing, so the patch follows along with it.
— Output Mode: This lets you see different representations of the patched effect you’re creating. There are four options.
— Patched Result: The final result, with each patch repairing the blemish it’s covering.
— Patch Locations: Shows a key where each placed patch is white against black.
— Differences: Shows the difference of each patch against the original image.
— Difference Magnitude: Shows a more pronounced Differences representation.
Deband (Studio Version Only)
![]()
Low bit-depth media that has areas with shallow gradients of color, such as a sky or a wall, often exhibit color banding, seen as visible stripes, because there aren’t enough color values to smoothly represent the gradiation from light blue to darker blue in the sky.
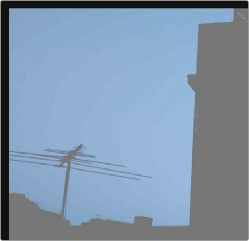
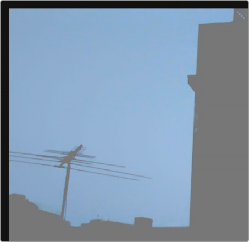
An example of banding in the sky of an image Minimizing banding using the Deband filter