< Previous | Contents | Next >
Patch Replacer (Studio Version Only)
The Patch Replacer is a quick fix when you need to “paint out” an unwanted feature from the image. For those of you who’ve been using windows and Node Sizing to do small digital paint jobs, this plugin offers more options and a streamlined workflow.
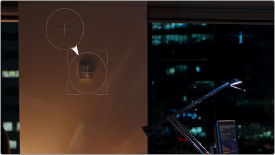
On adding the plugin, an onscreen control consisting of two patches appears, with an arrow connecting them indicating which patch is being copied into the other. The patch behind the arrow is the “source” patch, used to sample part of the image, and the patch in front of the arrow is the “target” patch, used to cover up the unwanted feature using pixels from the source patch.
To use the Patch Replacer, simply drag the target patch over the feature you want to obscure, resize it to fit using the corner controls (the source patch is automatically resized to match), and then drag the source patch to an area of the image that can convincingly be used to fill the target patch.
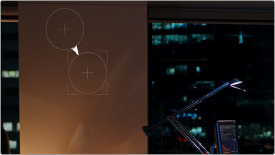
(Left) Original image, (Right) Removing the thermostat with the Patch Replacer
The source and target patches can be motion tracked using the FX tracker, so this tool is effective even if the subject or camera is moving.
Main Controls
The Fill-in Method pop-up menu is arguably the most important, as it defines what method to use to fill the destination patch with whatever is in the source patch. The rest of the primary controls work differently depending on which Fill-in method you choose.
![]()
— Clone: Simply copies the source patch into the target patch. When Clone is selected, the Replacement Detail slider (which defaults to 1) lets you fade out the source patch, while Region Shape lets you choose a different kind of shape to use, and Blur Shape Edges lets you feather the edge of this operation, to more convincingly blend the source with the target area.
— Blend Clone: A much more sophisticated method of obscuring the target area using pixels from the source patch, and in many cases will yield better results more quickly than cloning. The source patch is copied into the target patch in such a way as to combine the source detail with the lighting found inside of the target area, creating in most instances a fast, seamless match. The Keep Original Detail checkbox, when turned on, merges detail from the source and target patches to create a composite, rather than a fill. The Variability slider lets you adjust how solid the center of the patch is. The Blur Shape Edges slider works a bit differently with Blend Clone selected, but the idea is the same, feathering the effect from the outside in to obscure instances where there’s a noticeable border around the target area.